SAML Authentication Settings with OneLogin
This document outlines the process to register DeployGate as a SAML app in OneLogin.
This operation requires “Administrator” privileges
OneLogin, Inc.’s OneLogin supports SAML authentication, and you can manage DeployGate accounts using your existing OneLogin account.
Please see the following table for the corresponding values between OneLogin and DeployGate.
| OneLogin | DeployGate |
|---|---|
| Issuer URL | ldp entity id |
| SAML 2.0 Endpoint (HTTP) | Idp sso target url |
STEP 1: Add App
First, log in to OneLogin and go to the Add Apps page. Search for “deploygate” and click on the DeployGate app result that appears.

Then, click on the “SAVE” button at the top right of the page to add the app.
STEP 2: Obtain Configuration Information
After adding the app, obtain the configuration information to be added to DeployGate’s SAML Settings. The information is available in the SSO tab of the DeployGate app that you added in Step 1.
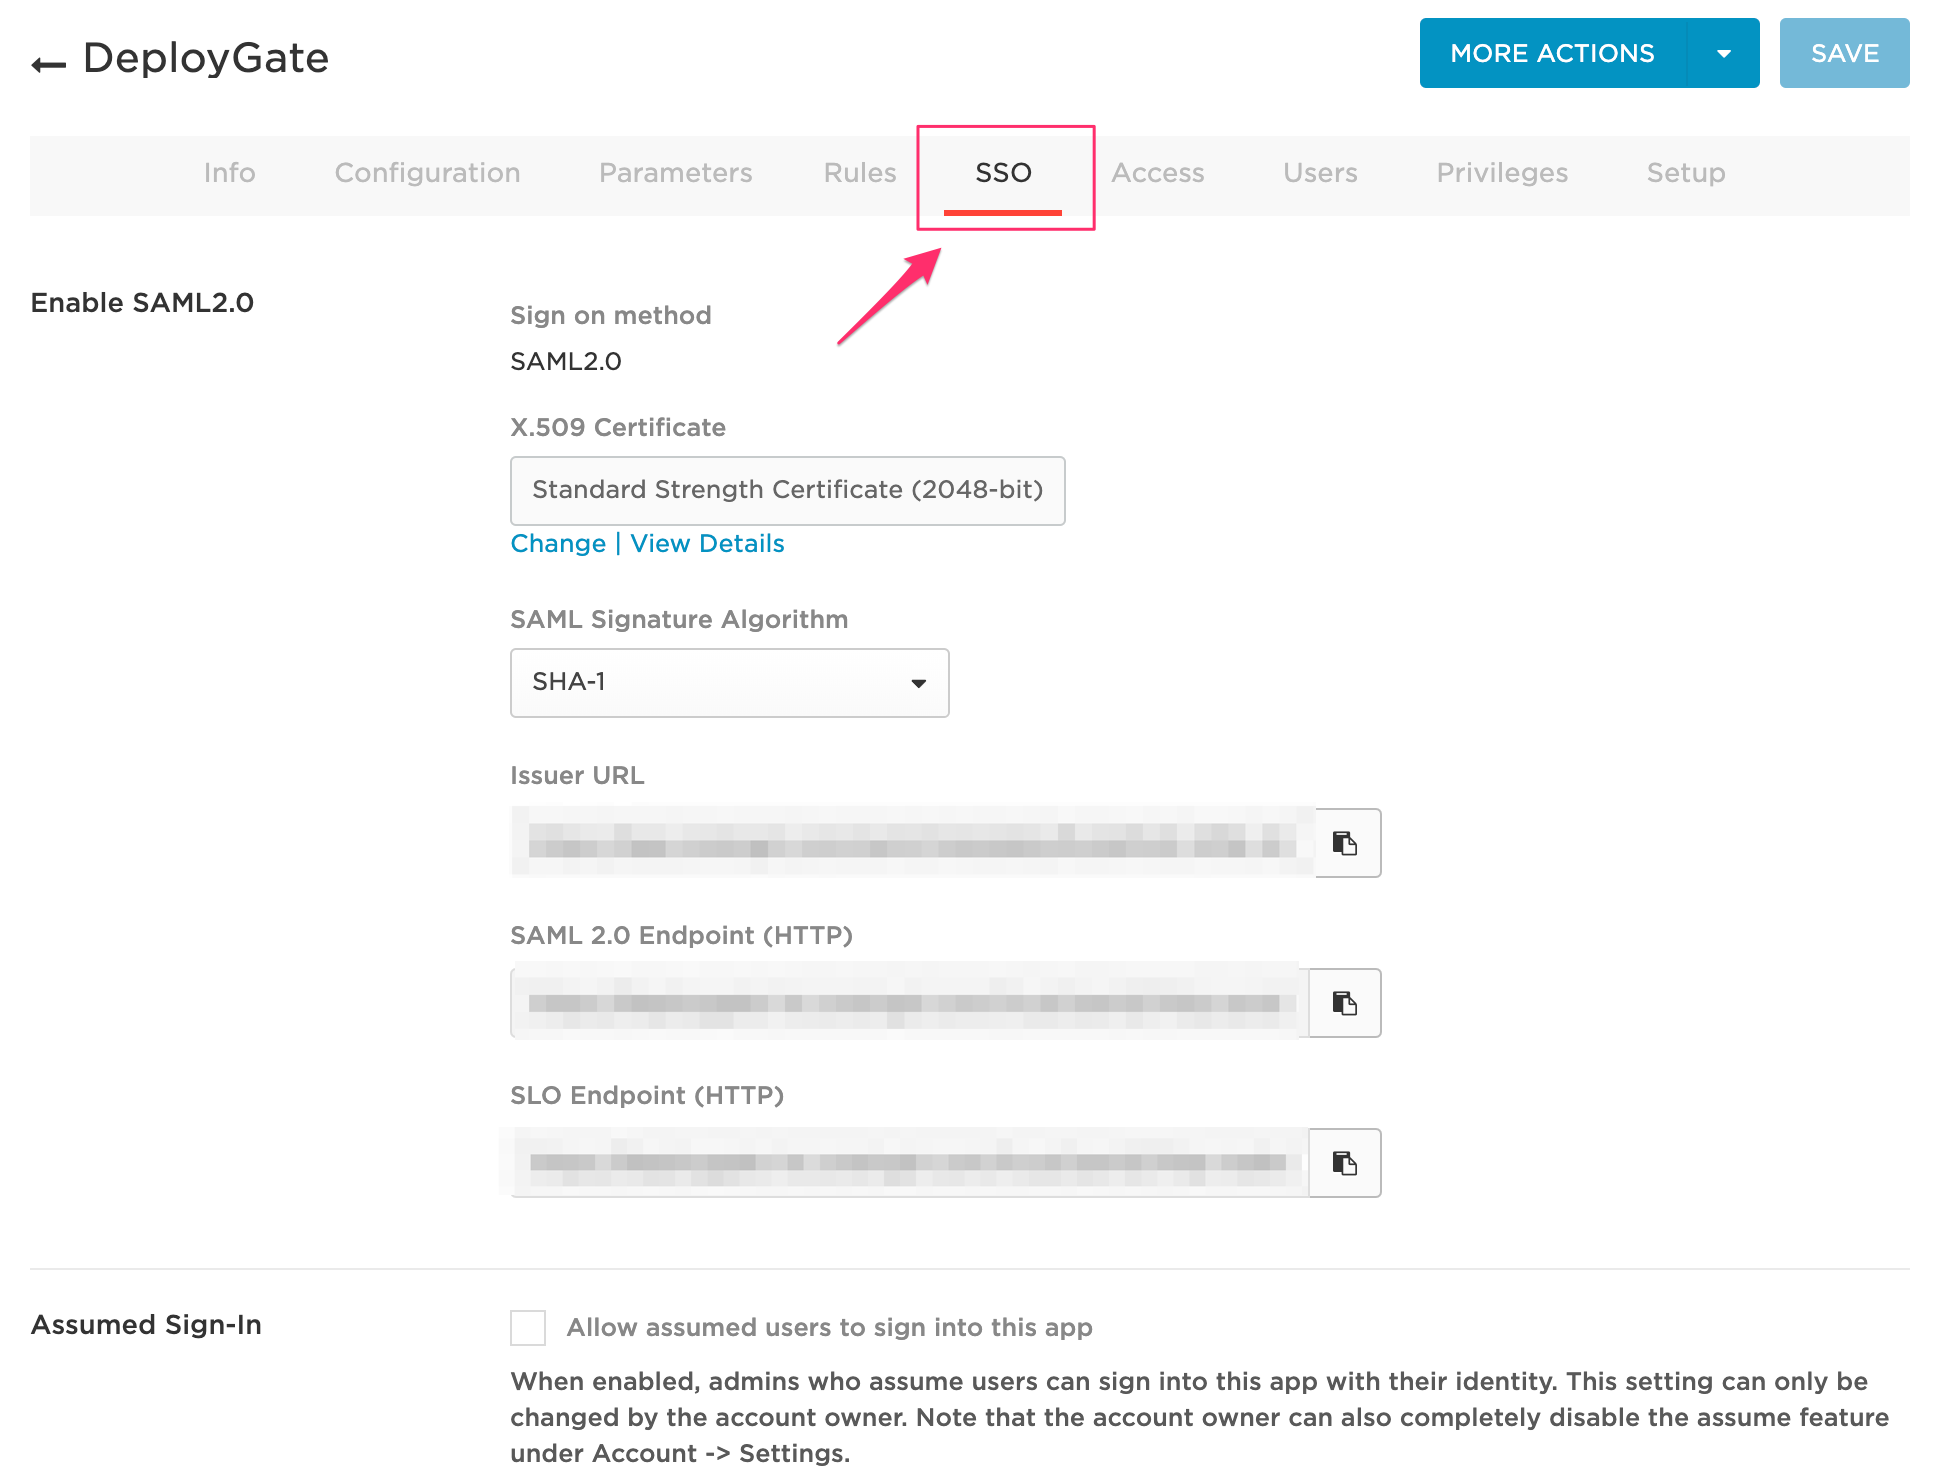
Enter the "Issuer URL" and "SAML 2.0 Endpoint (HTTP)" values in the "IdP Entity ID” and “IdP SSO Target URL” fields of DeployGate’s SAML Settings, respectively.
To obtain the IdP Certificate, go to the SSO tab’s “X.509 Certificate” and click on View Details.

STEP 3: Configuring RelayState
If you enter the SSO configuration information into DeployGate’s SAML Settings, the RelayState will be displayed.
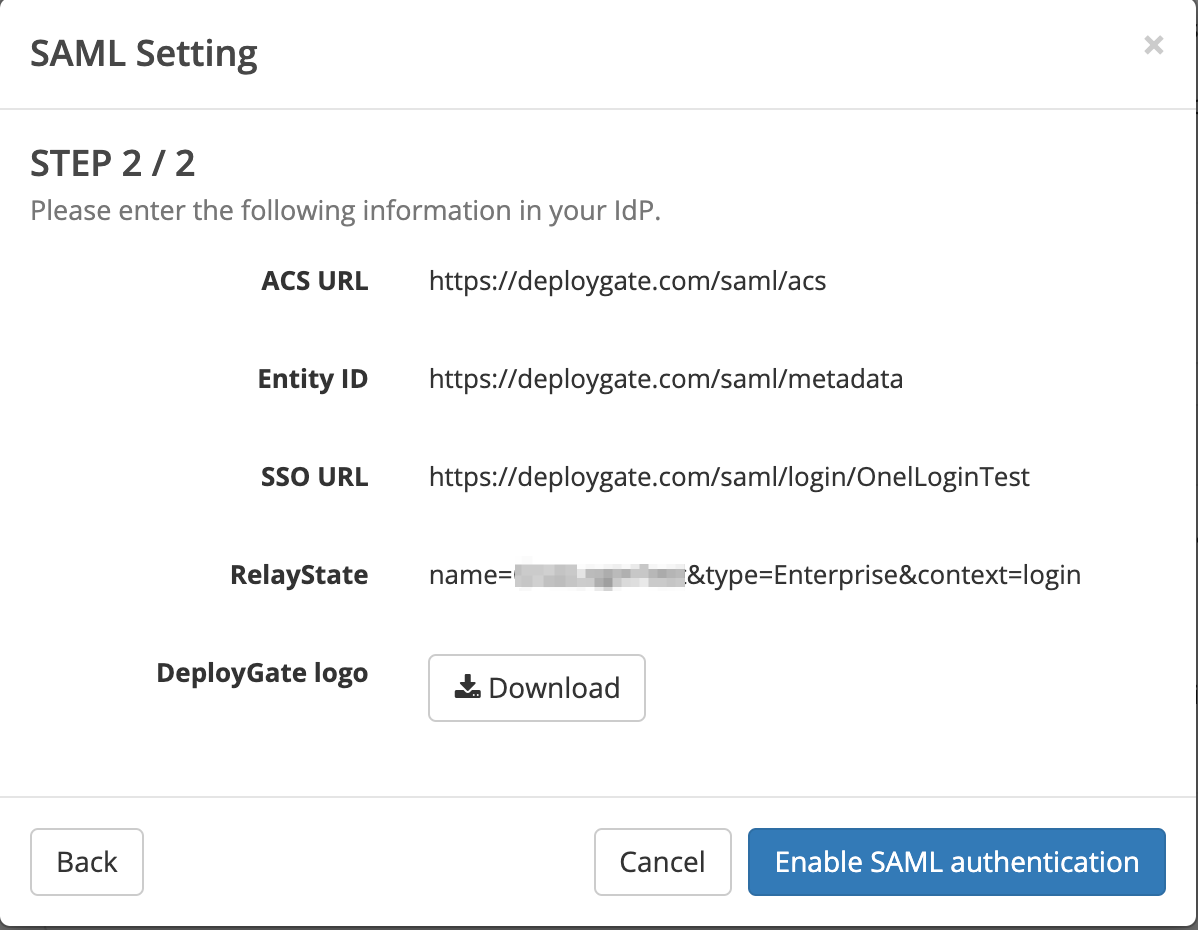
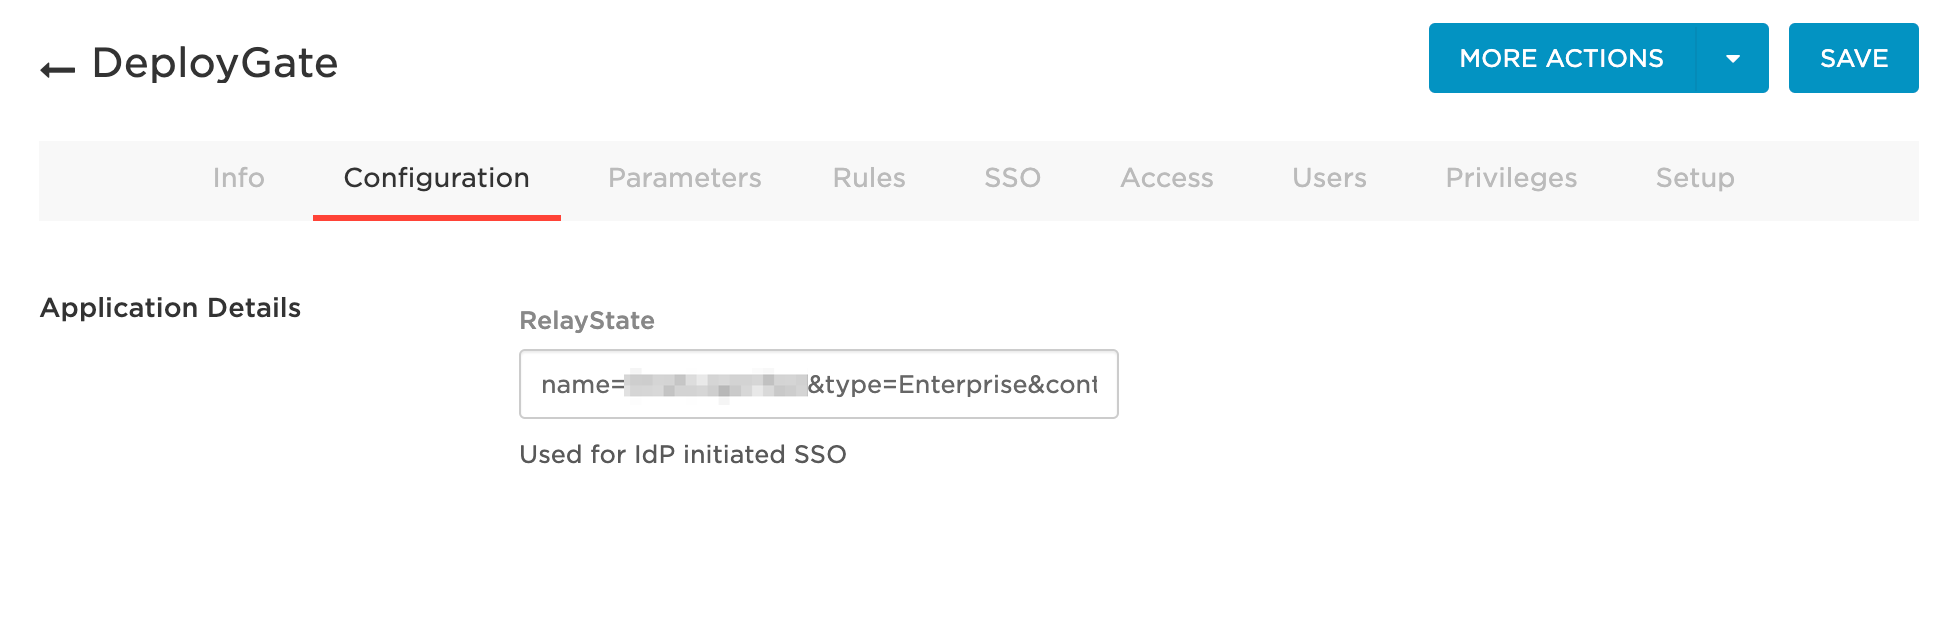
Return to OneLogin’s DeployGate app. In the Configuration tab, add the RelayState information to the RelayState field.
Finally, click on the SAVE button to finish configuring OneLogin.
Return to DeployGate and enable SAML authentication.