SAML Authentication Settings with Okta
This operation requires “Administrator” privileges.
Specify urn:oasis:names:tc:SAML:2.0:nameid-format:persistent for the format and Persistent Identifier for the value. For attribute mapping, provide the user’s email address as “email”.
This document outlines the steps to set up SAML authentication with the Okta.
- Adding and Configuring an Application on Okta
- DeployGate Settings
Okta Settings
Log in to Okta and proceed to the Admin Dashboard.
Add Application
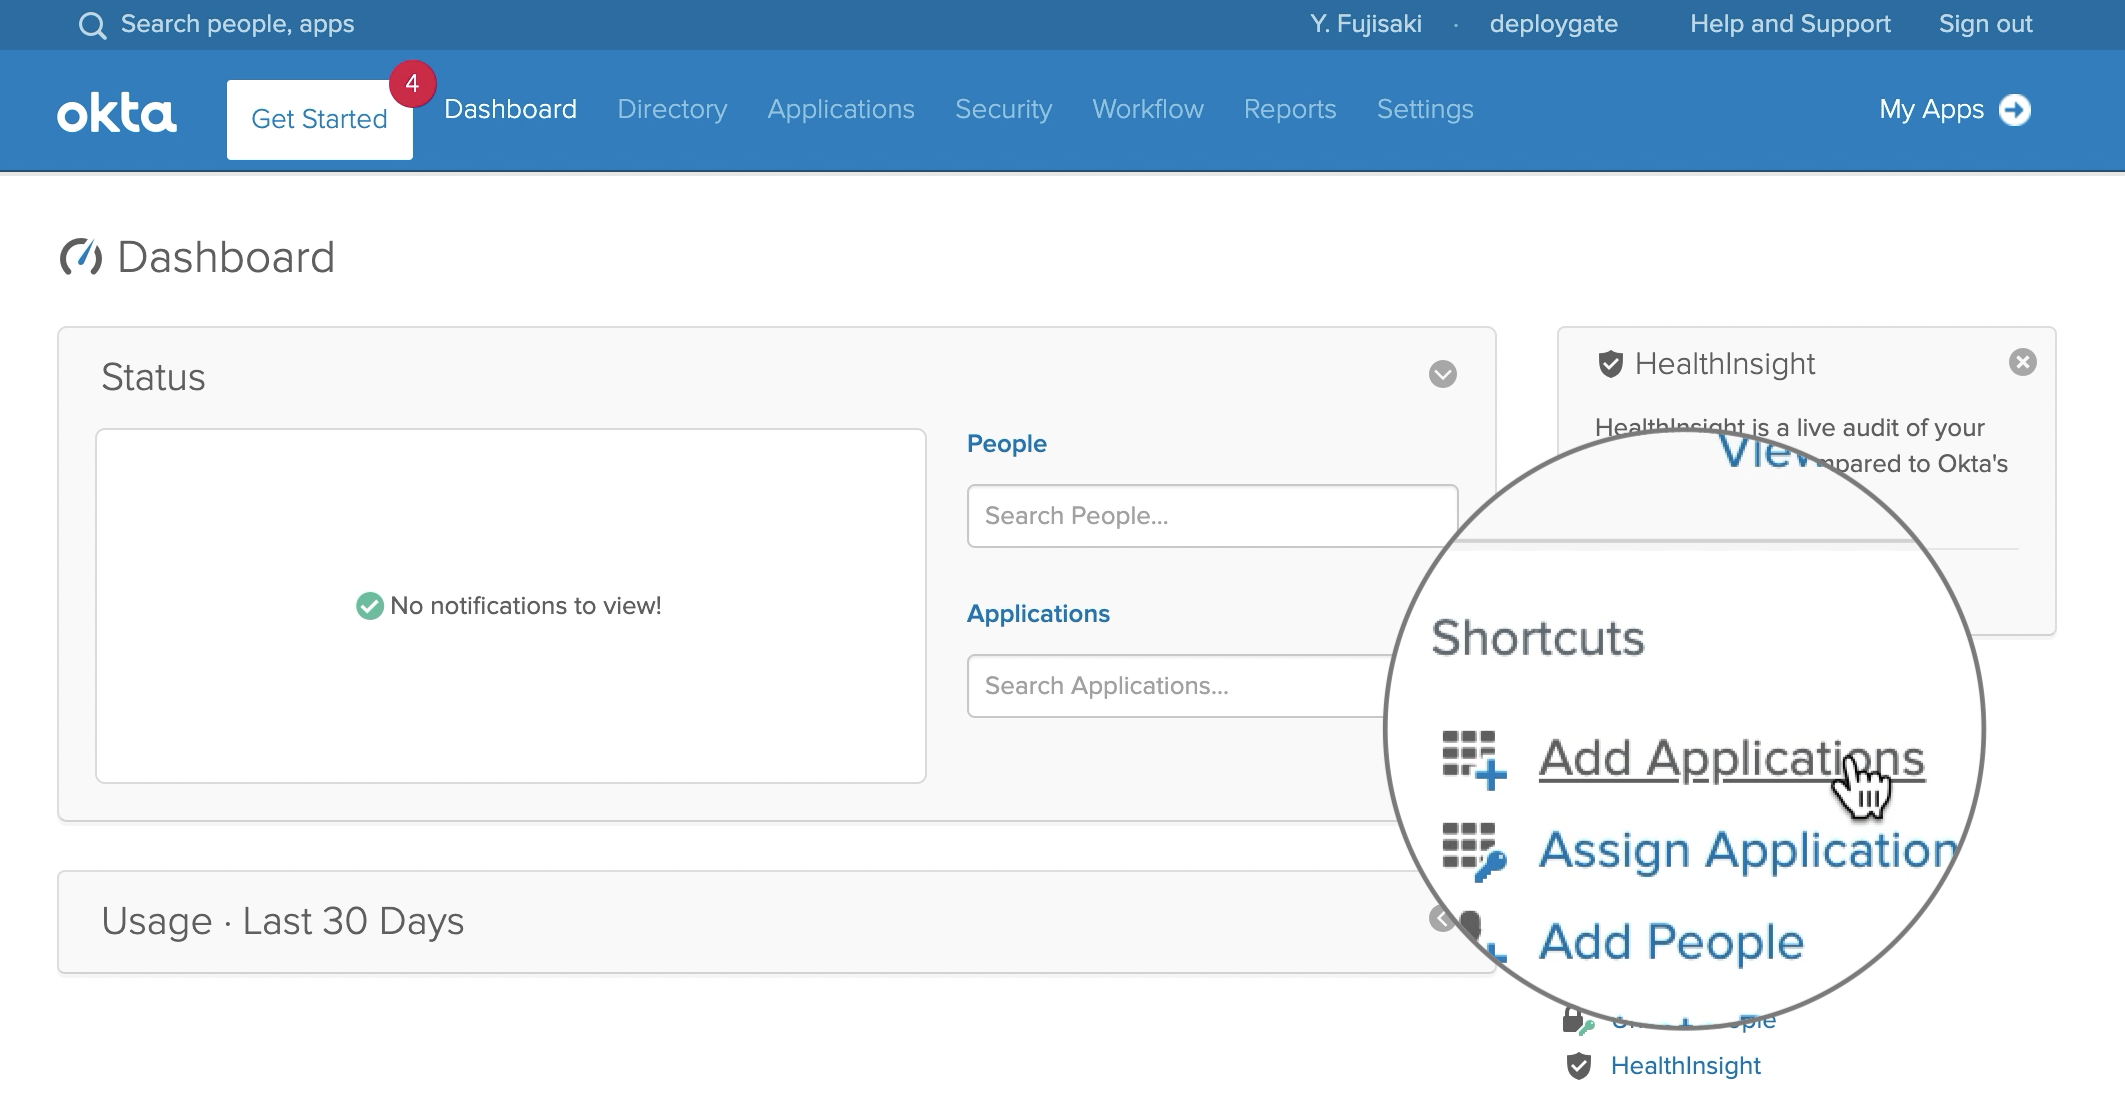
Select Add Applications from the Admin Dashboard.
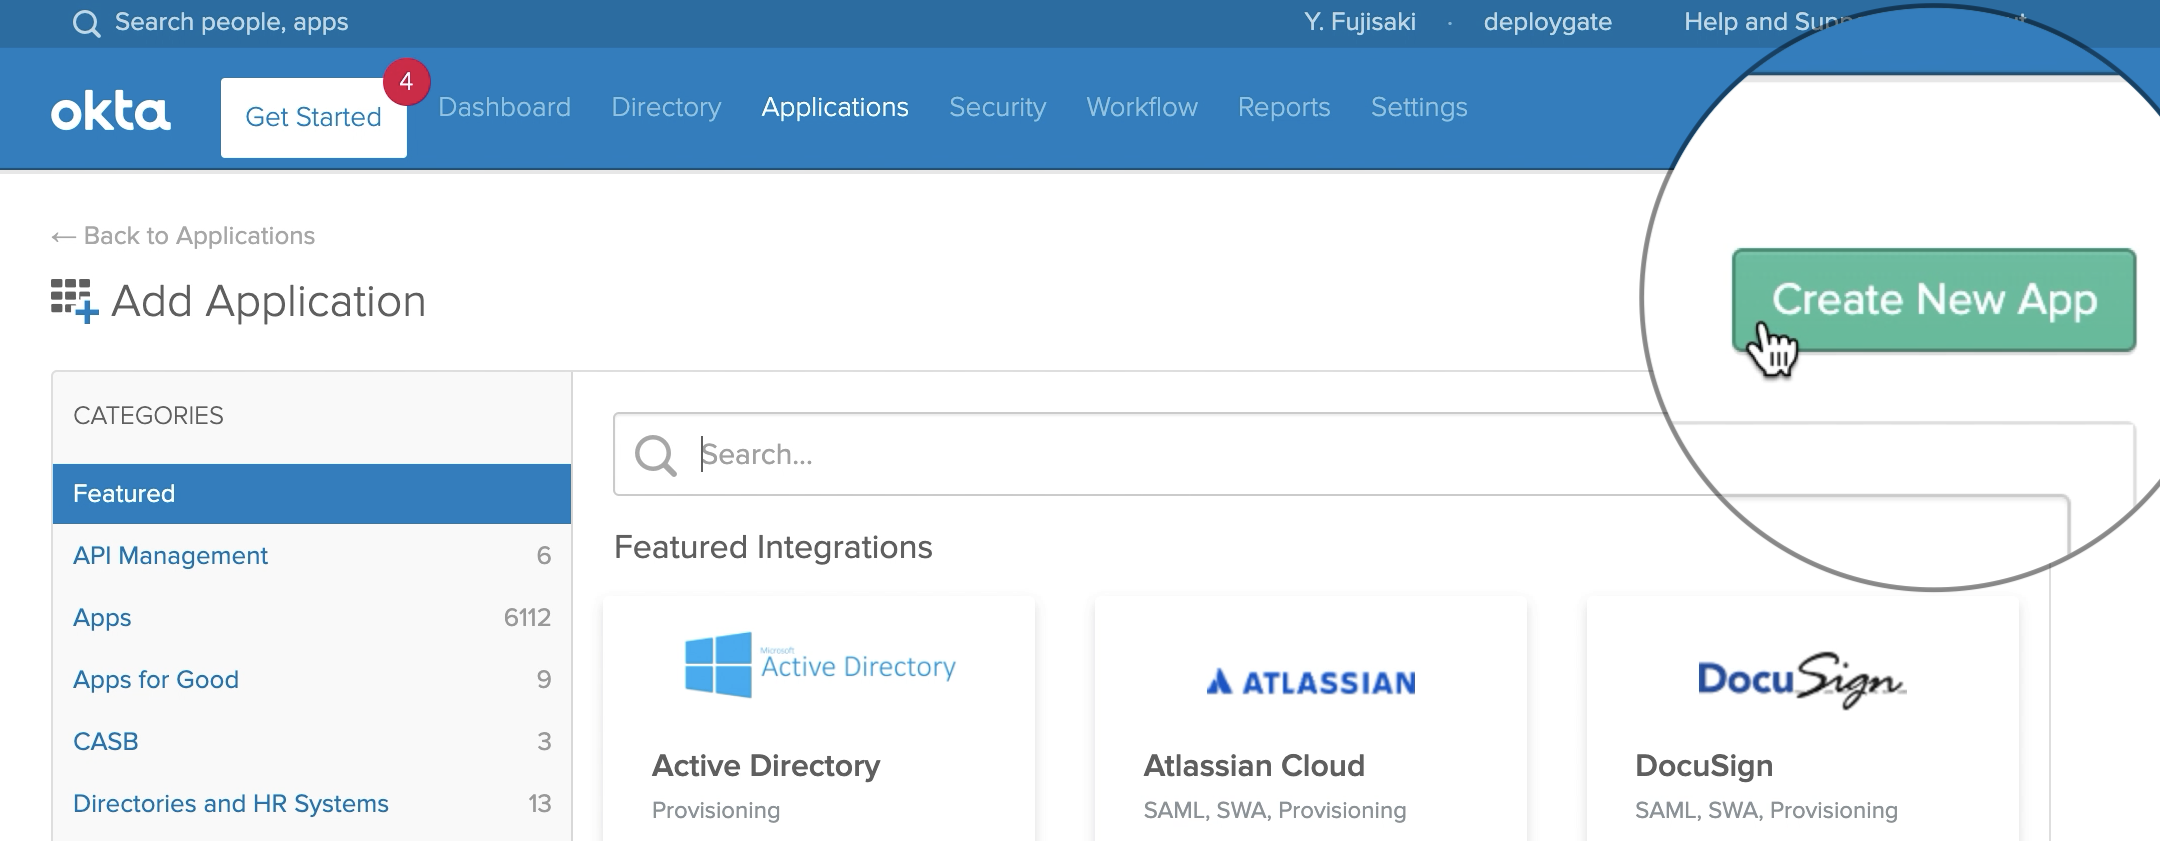
Click the Create New App button.
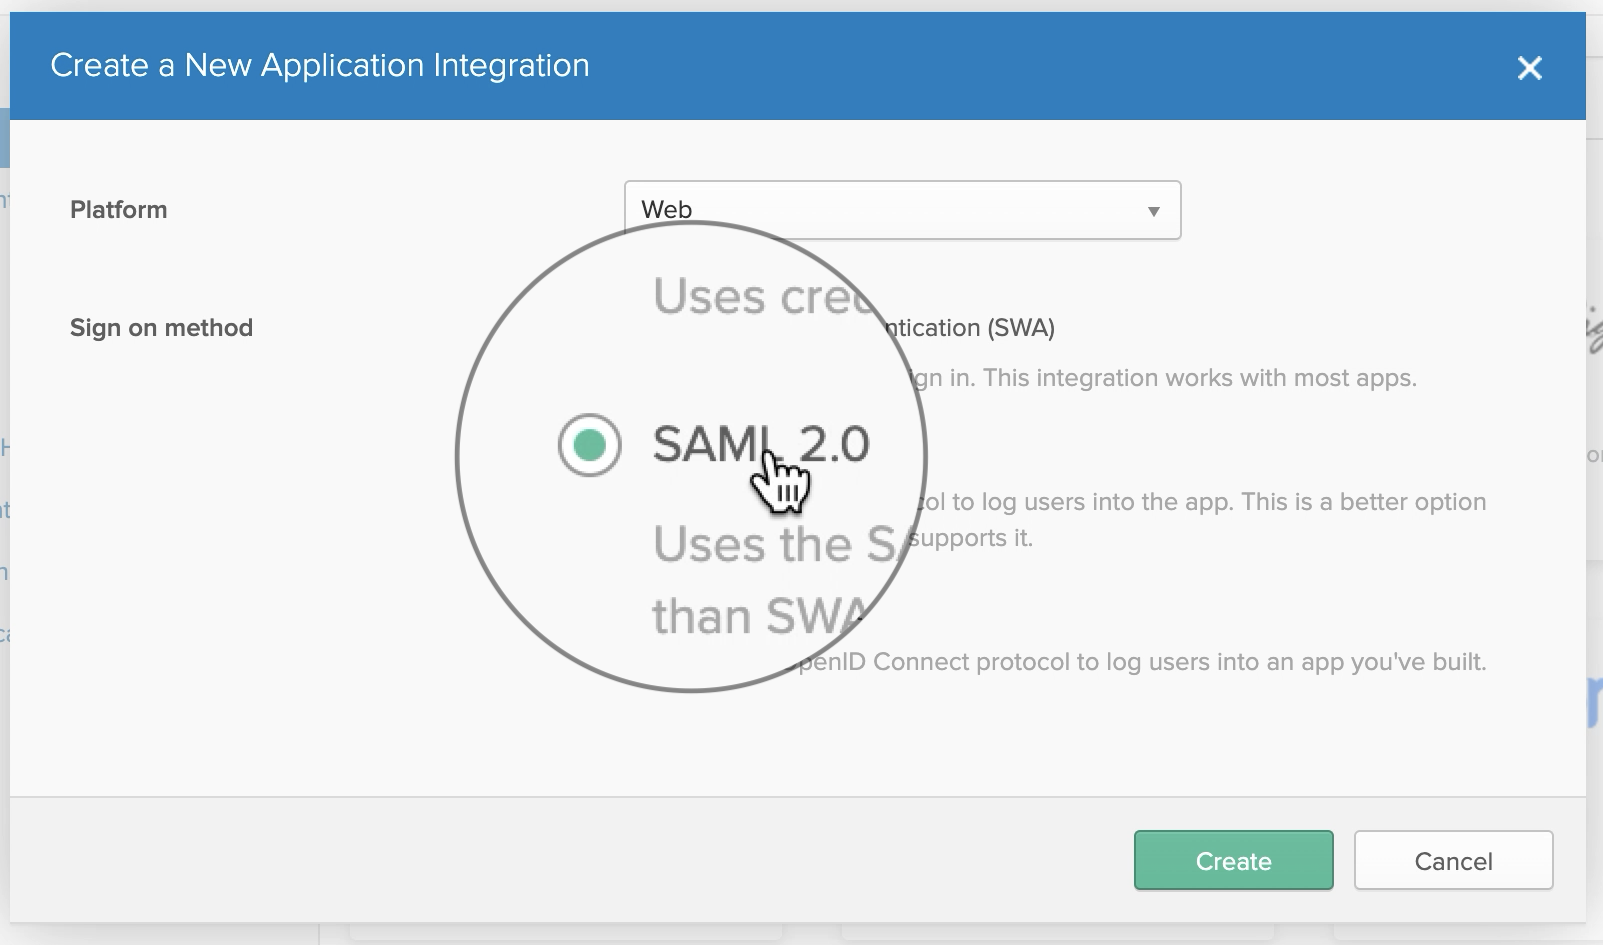
In the pop-up, select SAML 2.0 and click the Create button.
Create SAML Integration
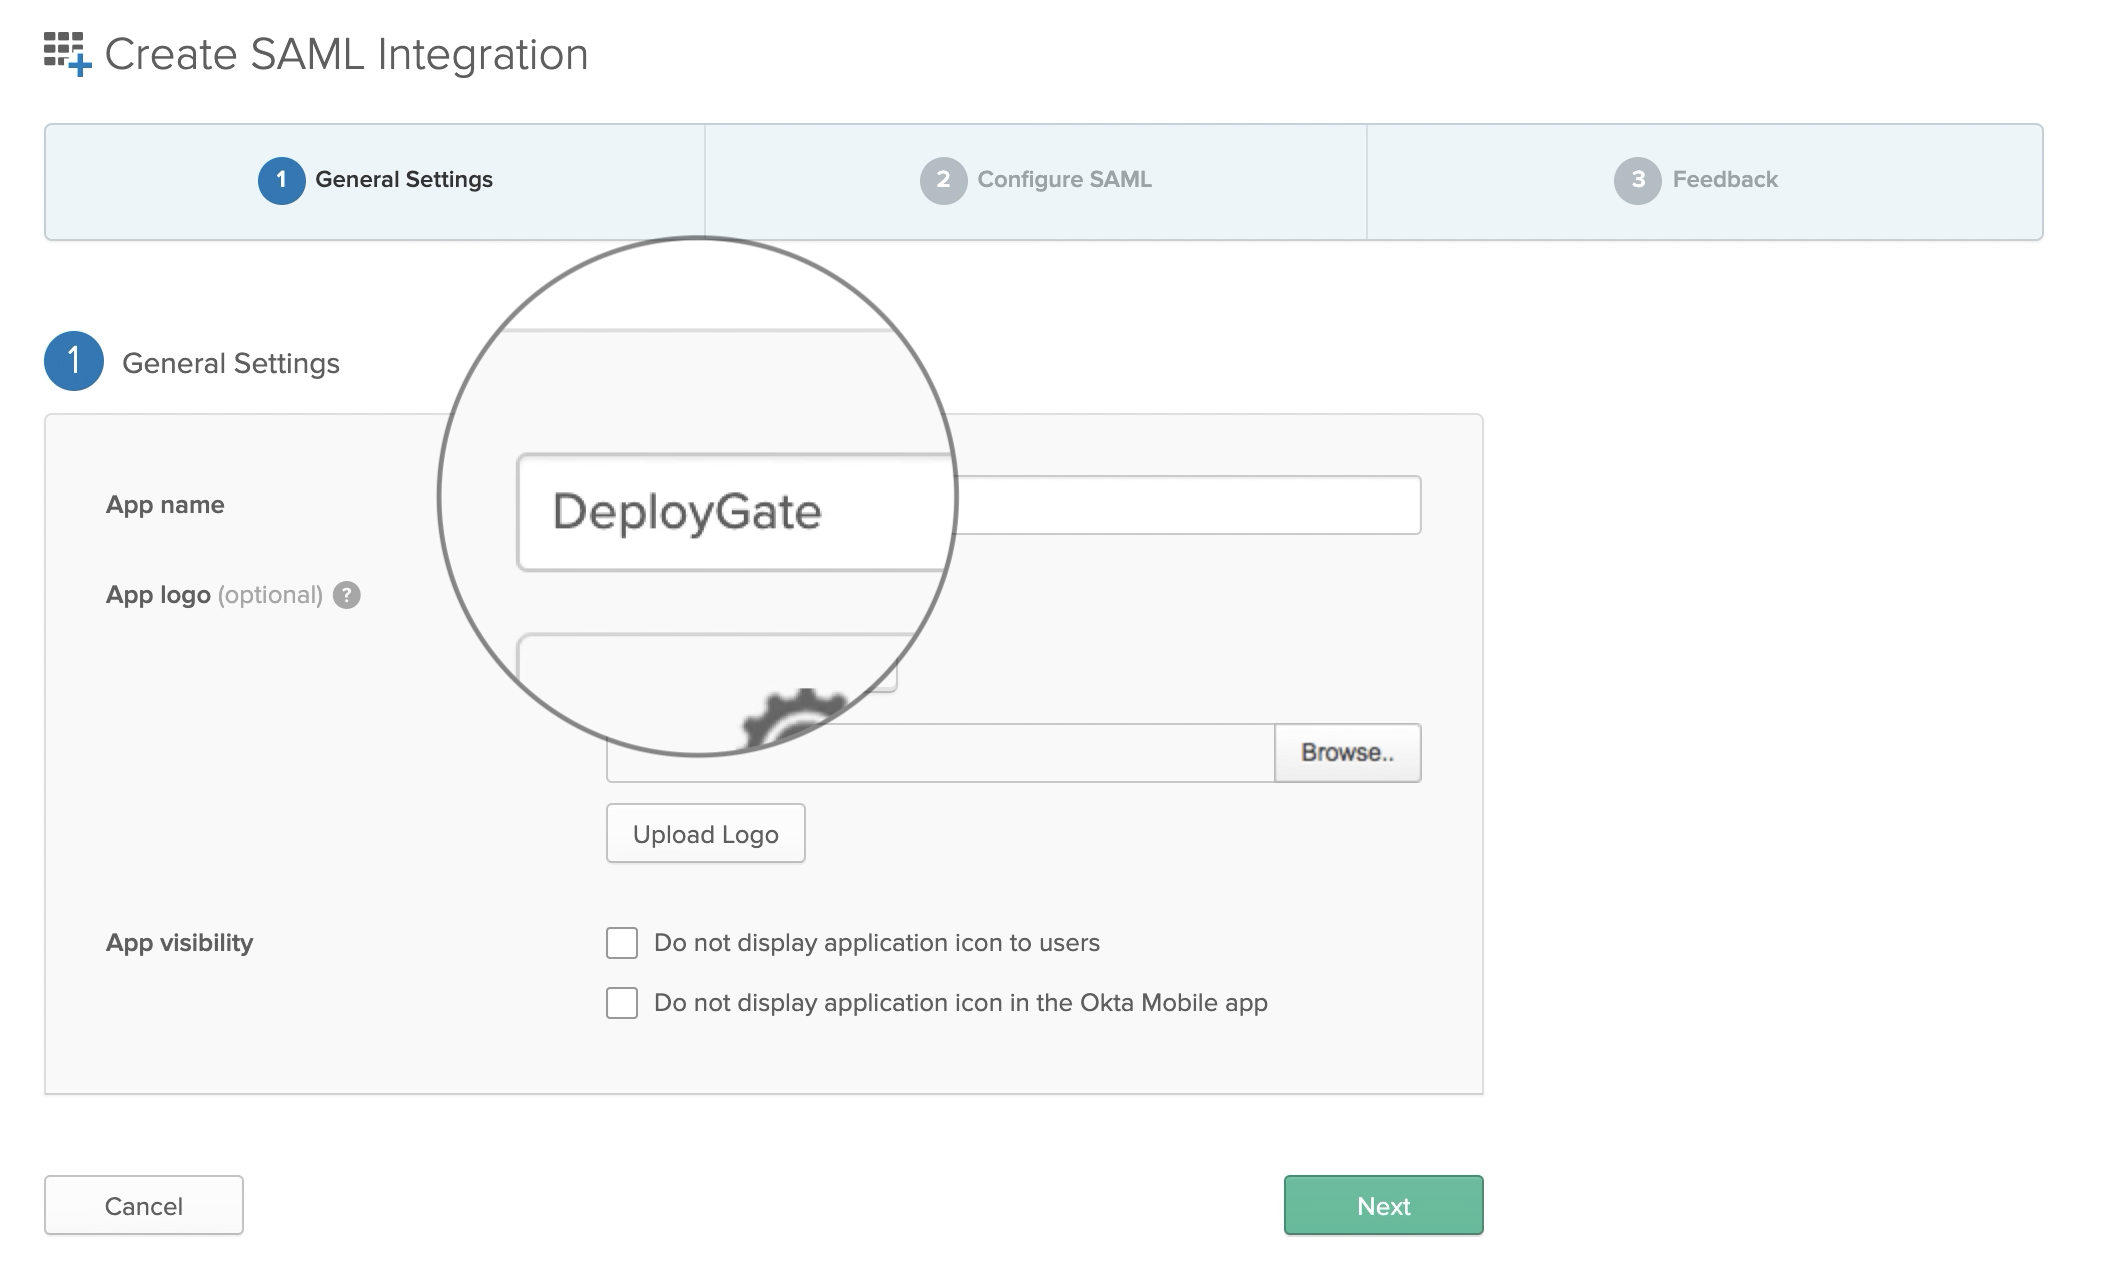
In General Settings, enter "DeployGate" in the App name field.
 Please download the following image and use it as the App Logo.

Input SAML Settings
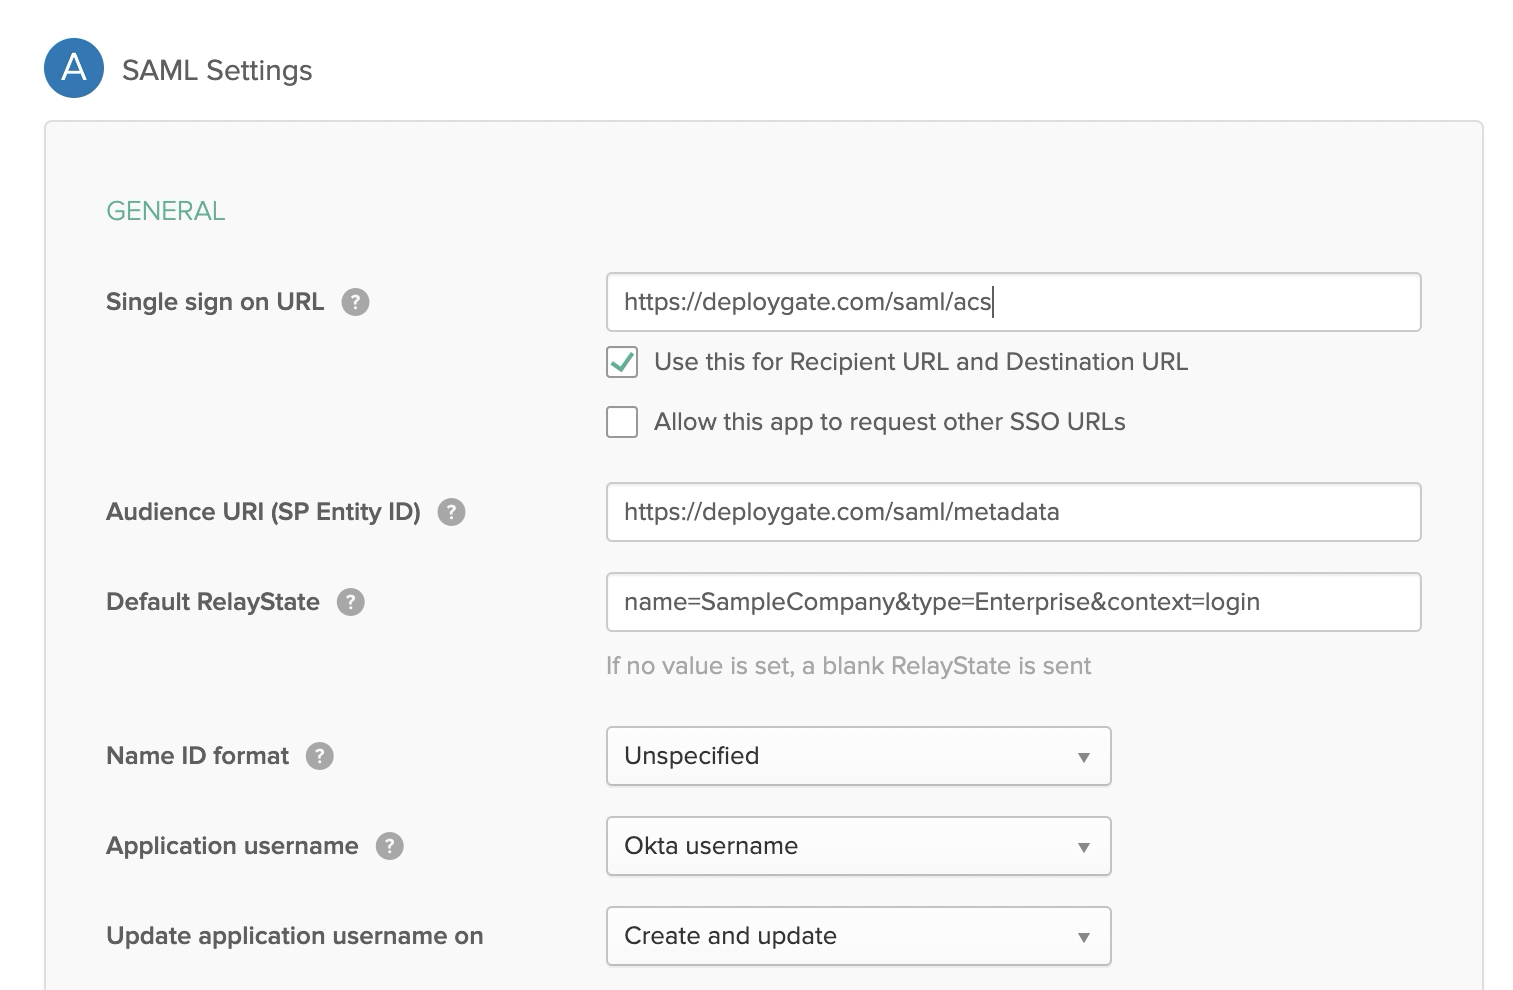
Enter the following information into the SAML Settings.
| Item | Value |
|---|---|
| Single sign on URL | https://deploygate.com/saml/acs |
| Audience URI (SP Entity ID) | Please obtain this information from DeployGate’s screen. |
| Default RelayState | Please obtain this information from DeployGate’s screen. As of July 2021, it will be displayed in the following format. (e.g. s;;) |
For all other fields, please use the default values. Click Next when you’re done.
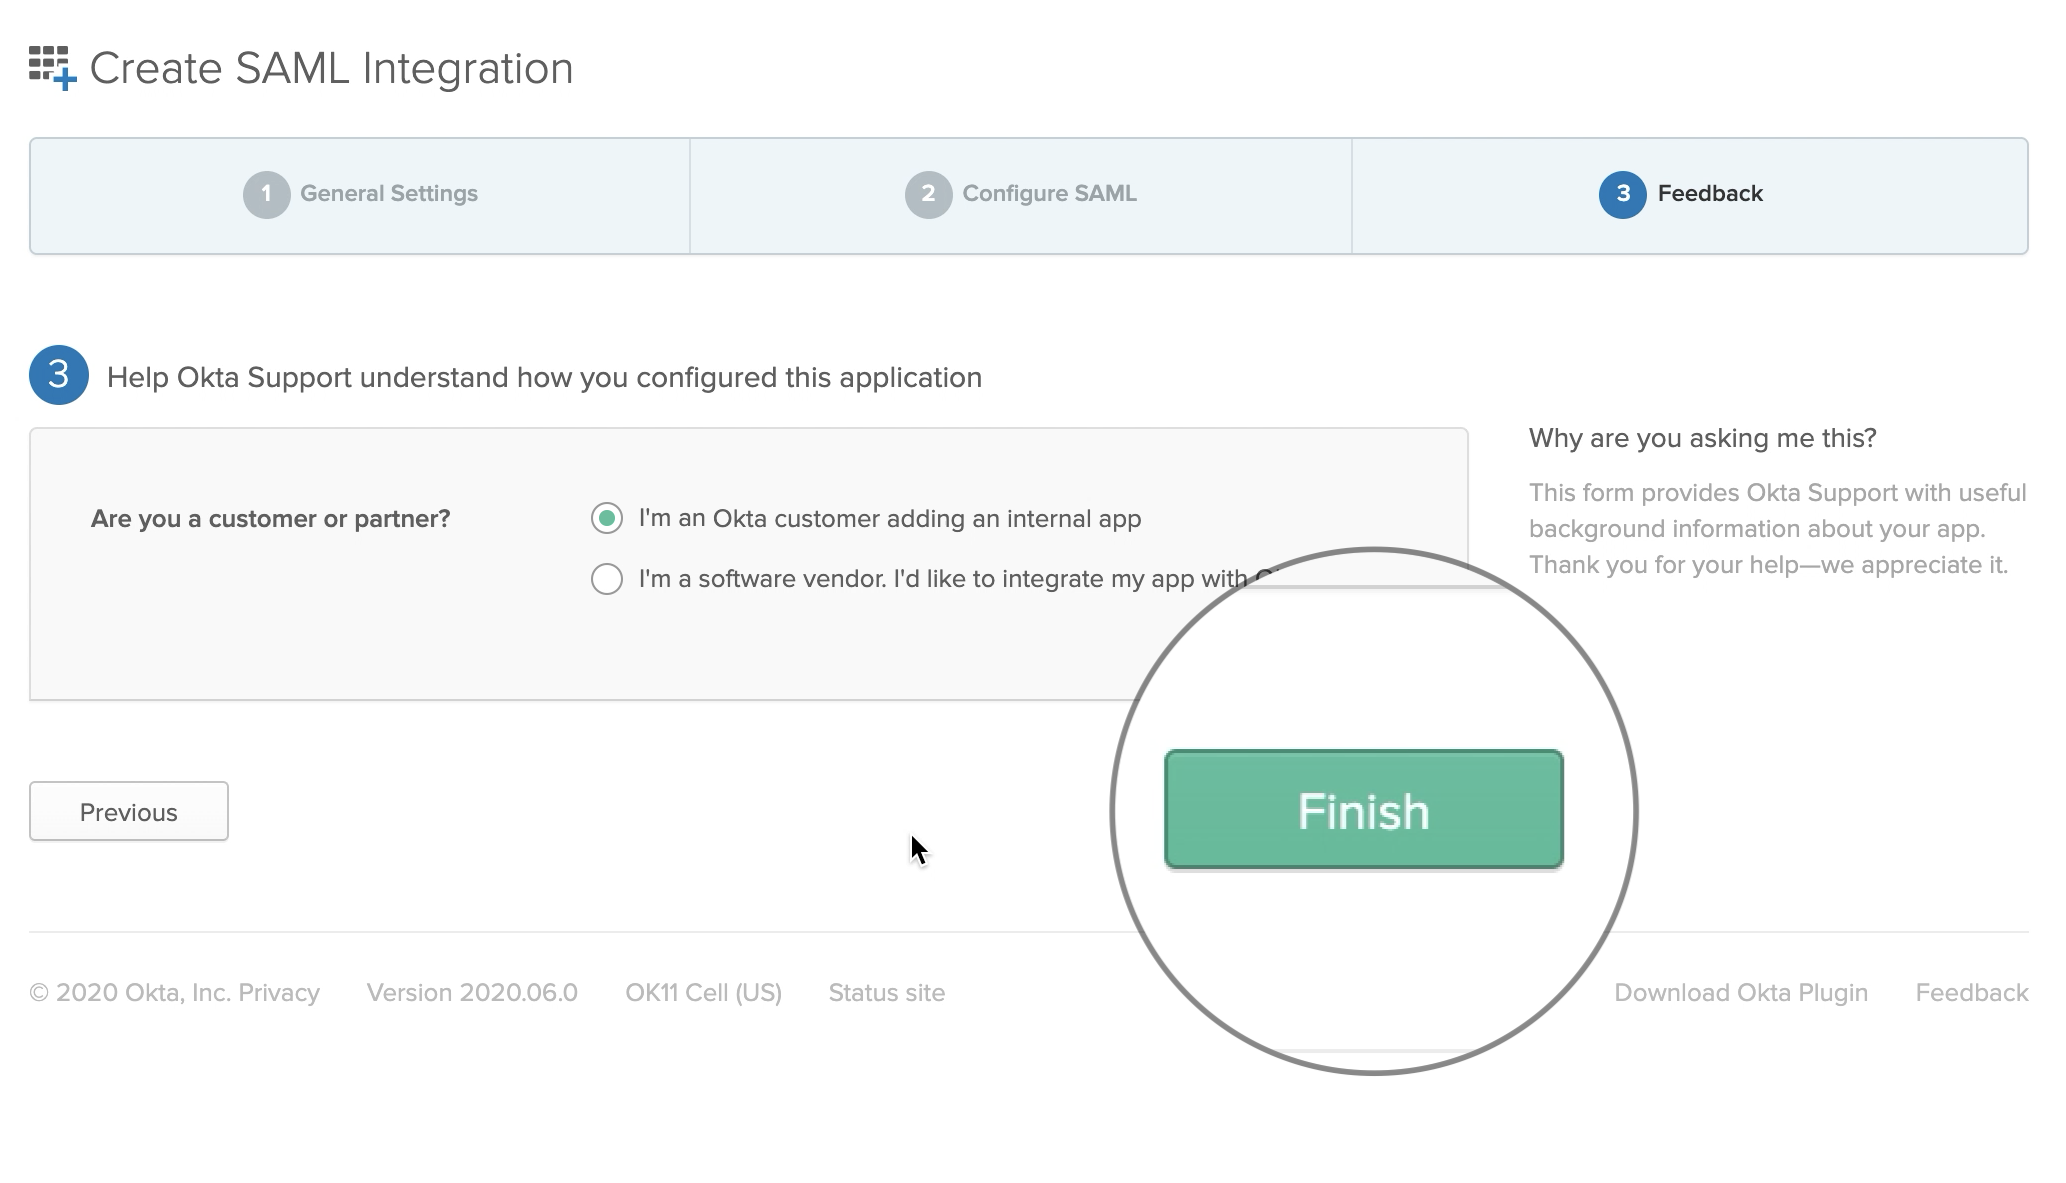
Feedback Settings
Select I'm an Okta customer adding an internal app and click Finish. Other fields can remain blank.
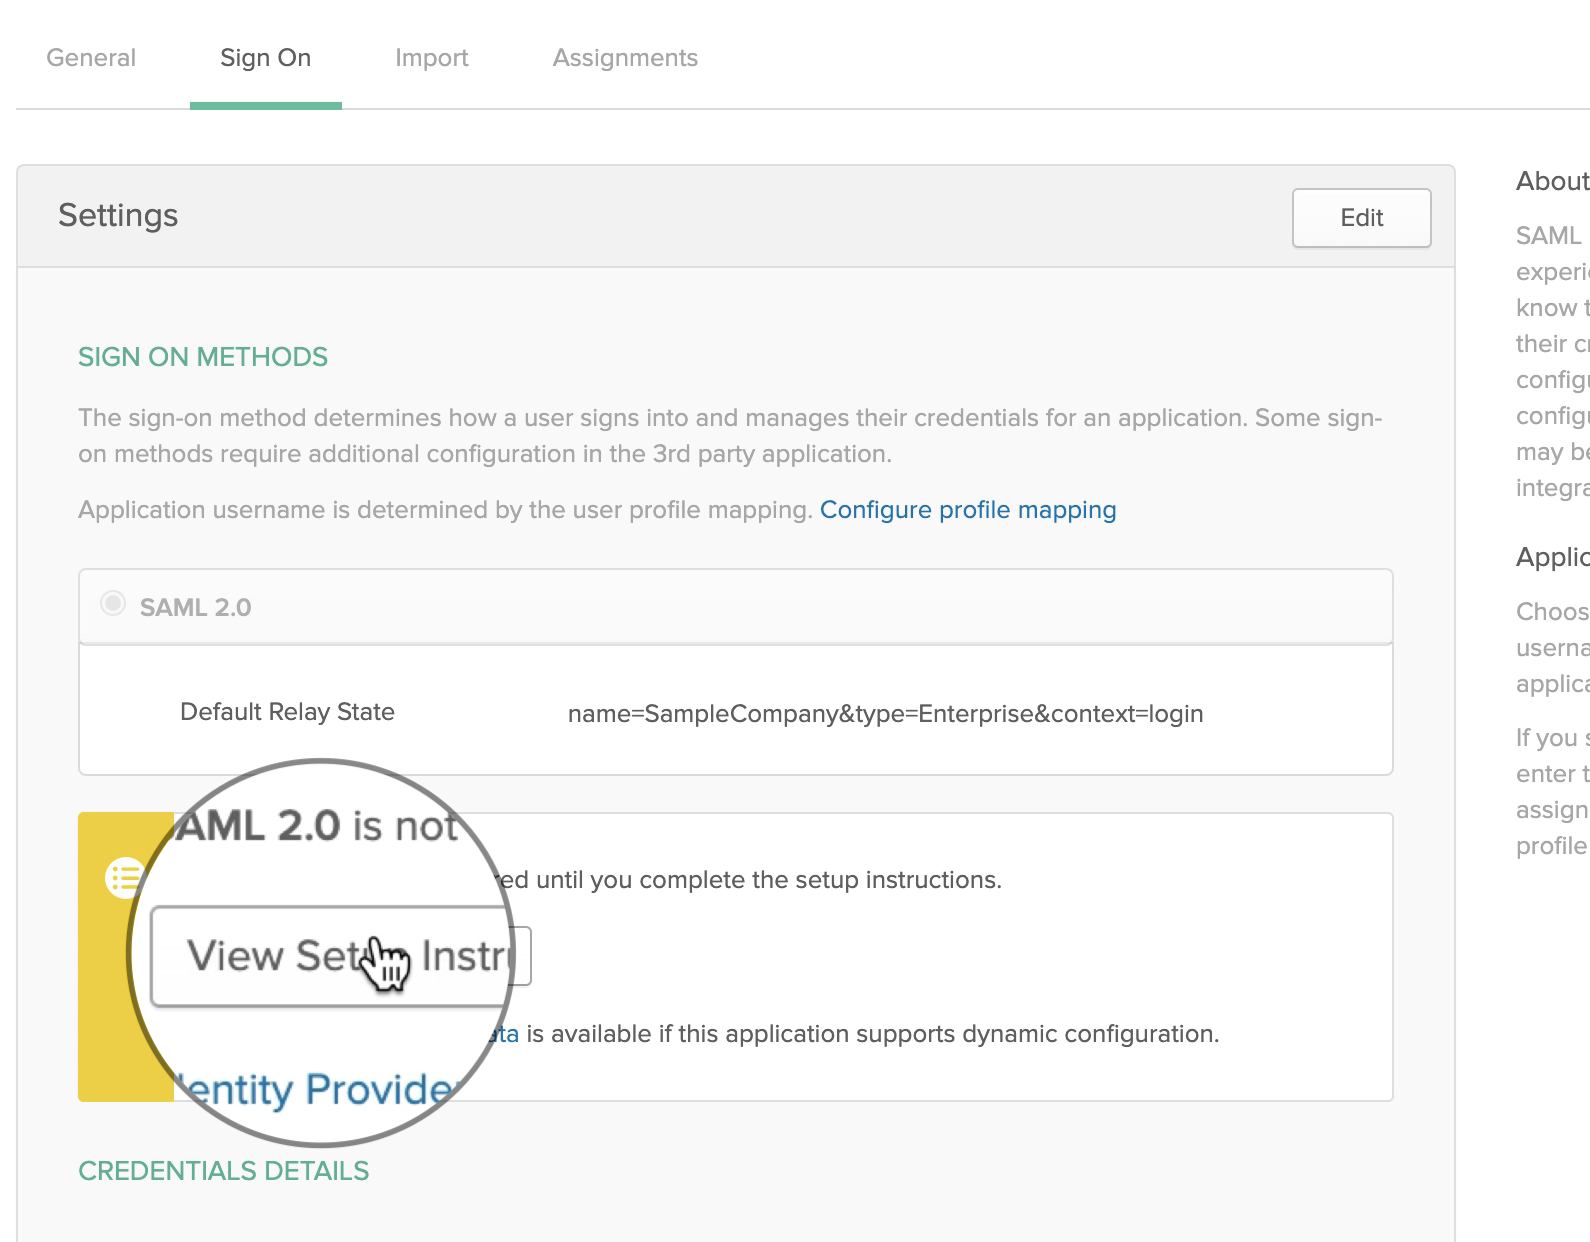
Obtaining Settings
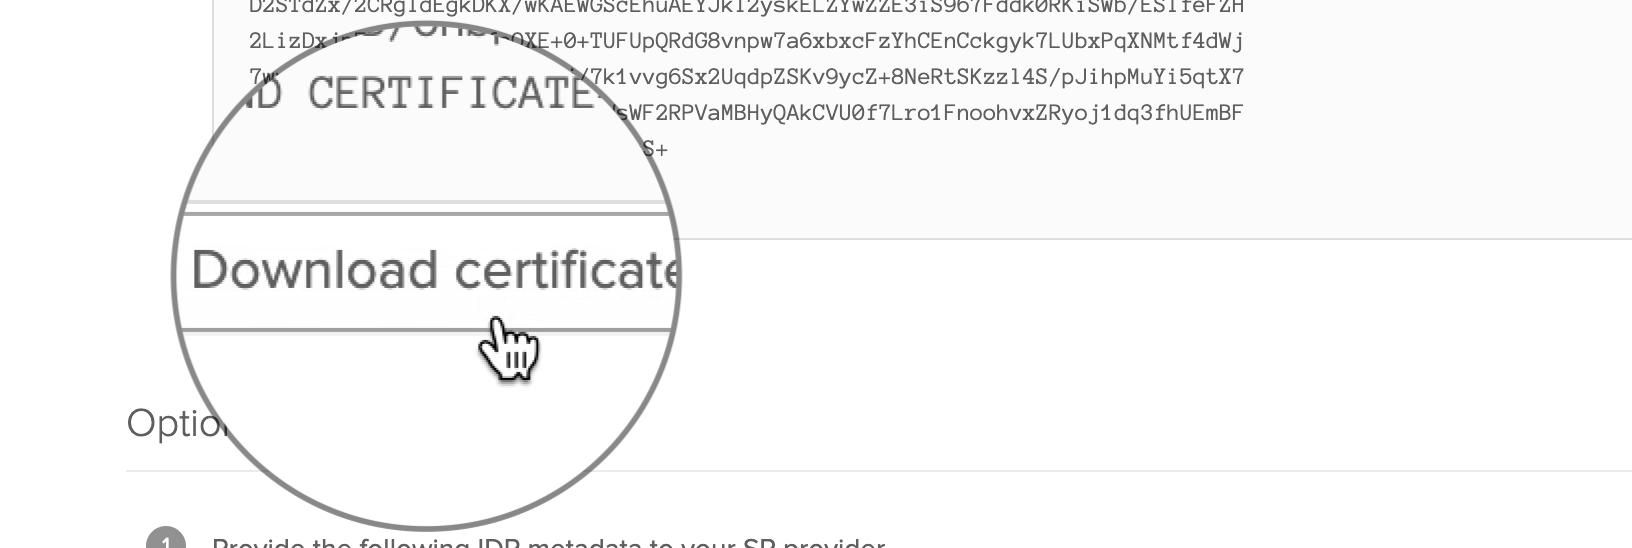
When finished, select View Setup Instructions to obtain the settings to be entered into DeployGate.
Identity Provider Single Sign-On URL and Identity Provider Issuer values should be copied or written down.
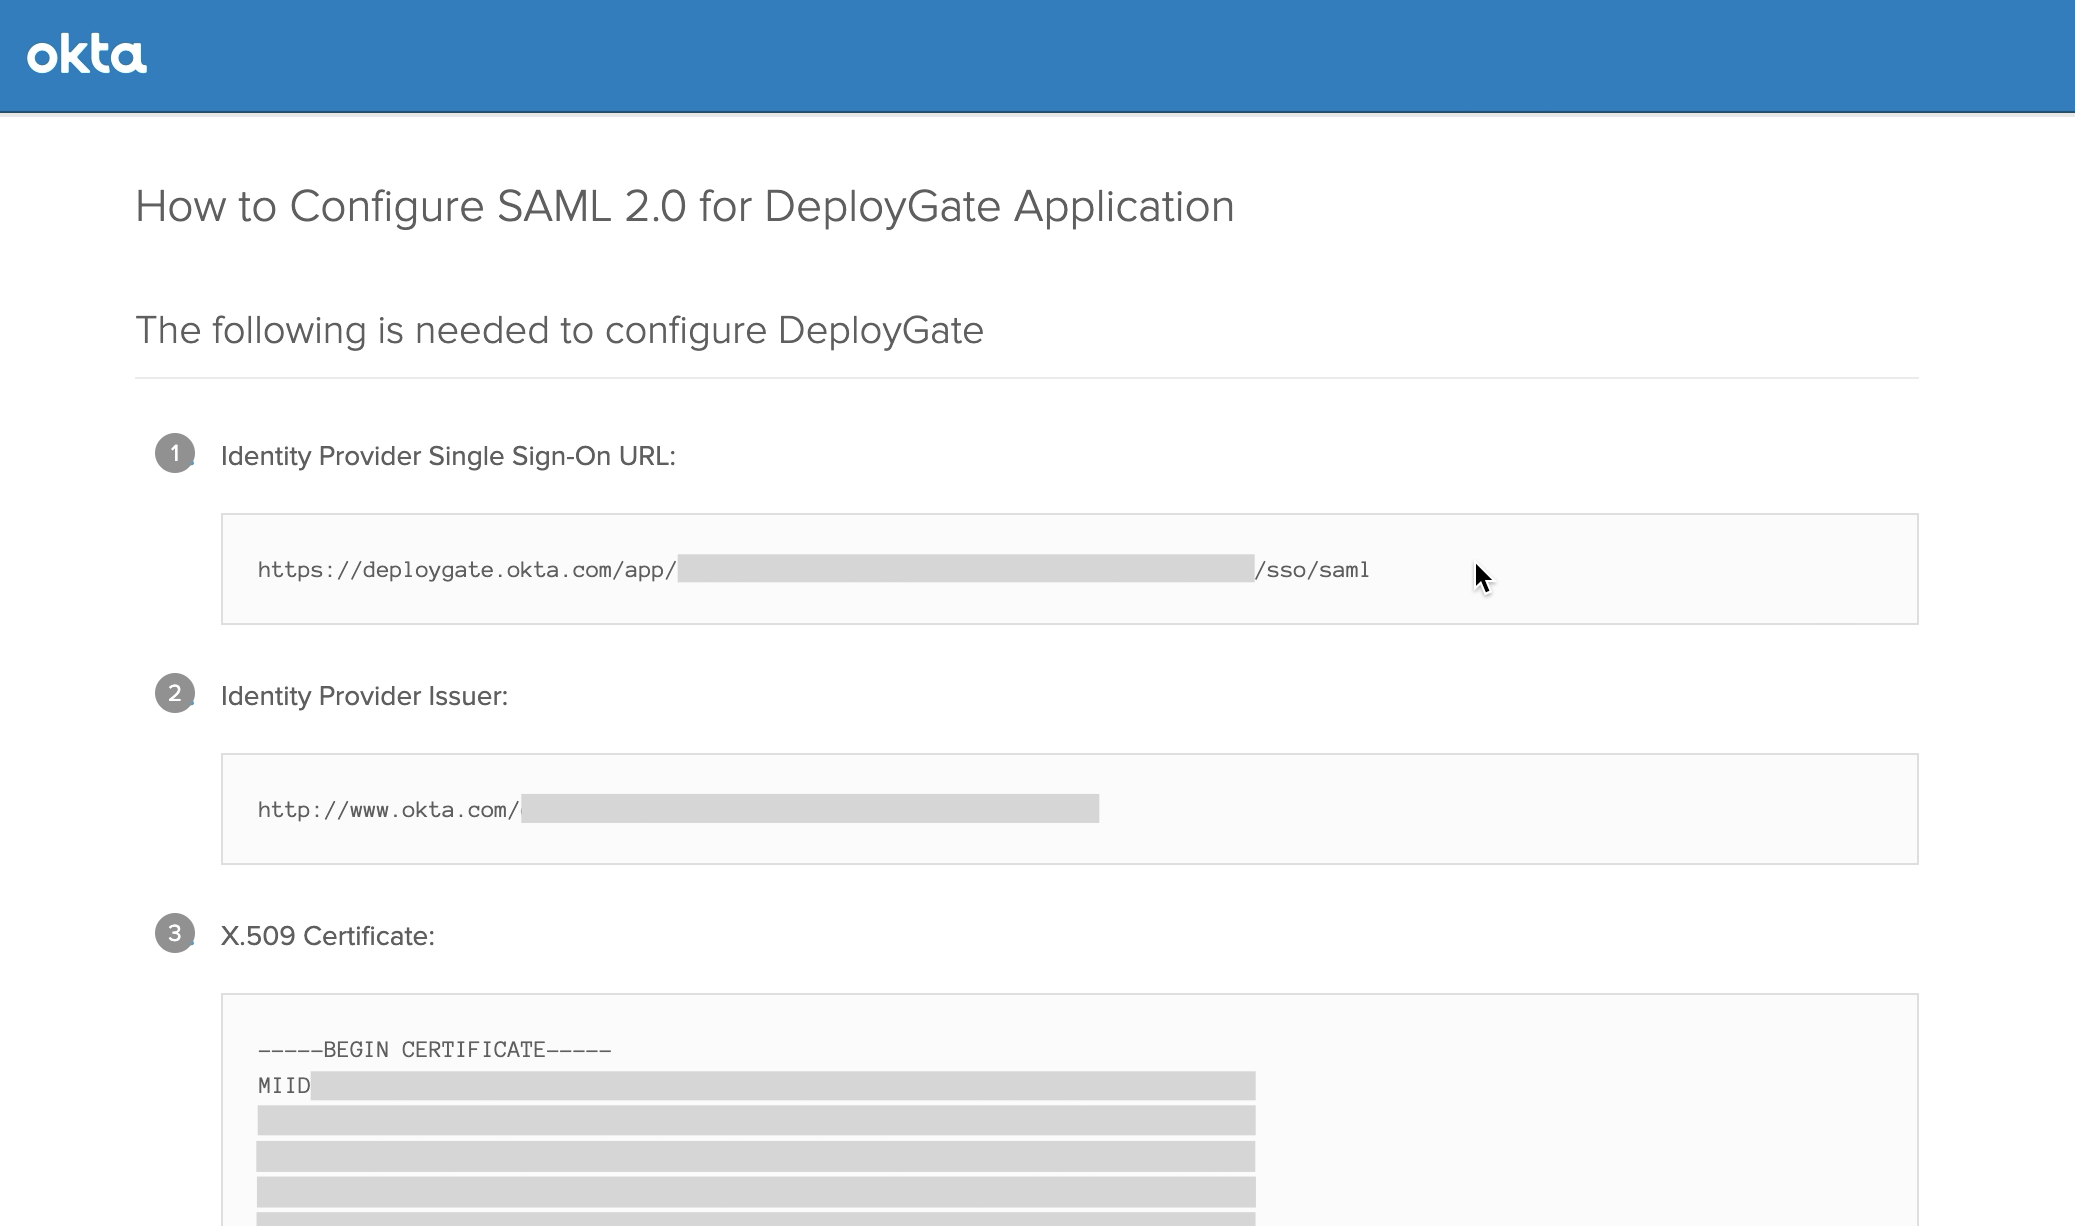
X.509 Certificate Is also required for the following steps.
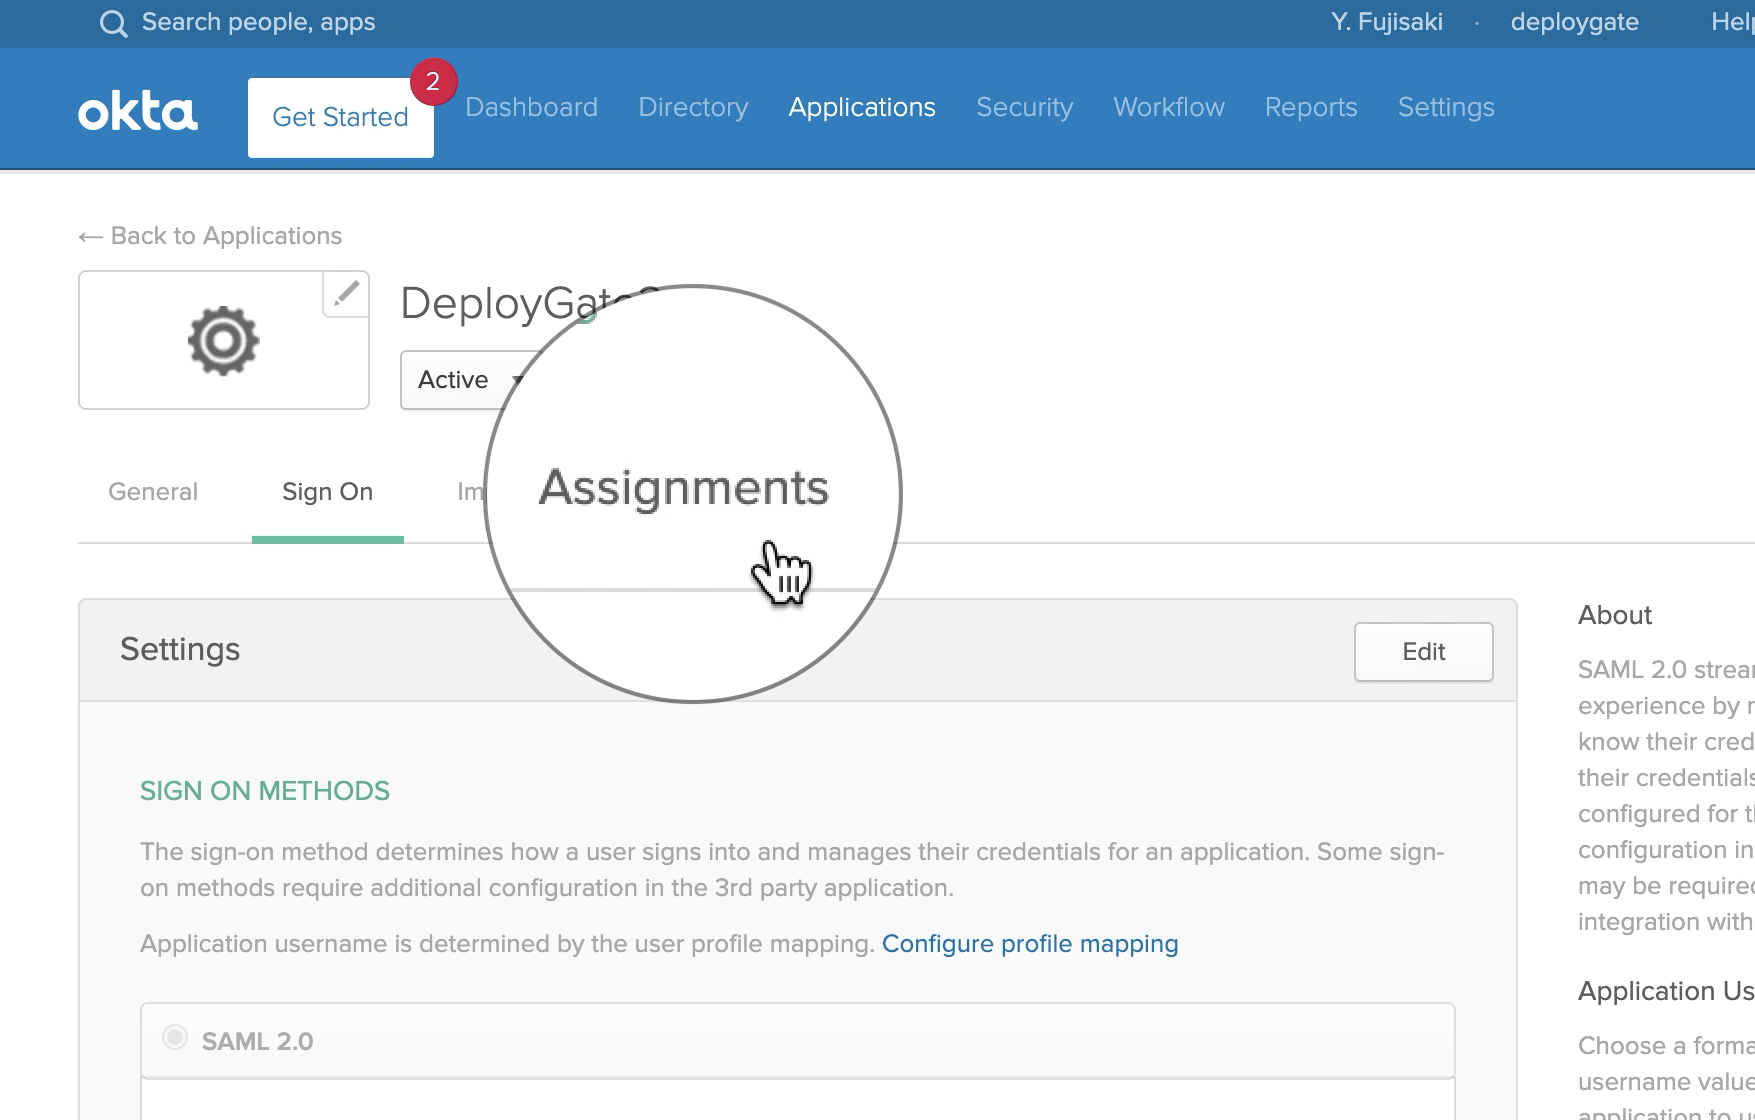
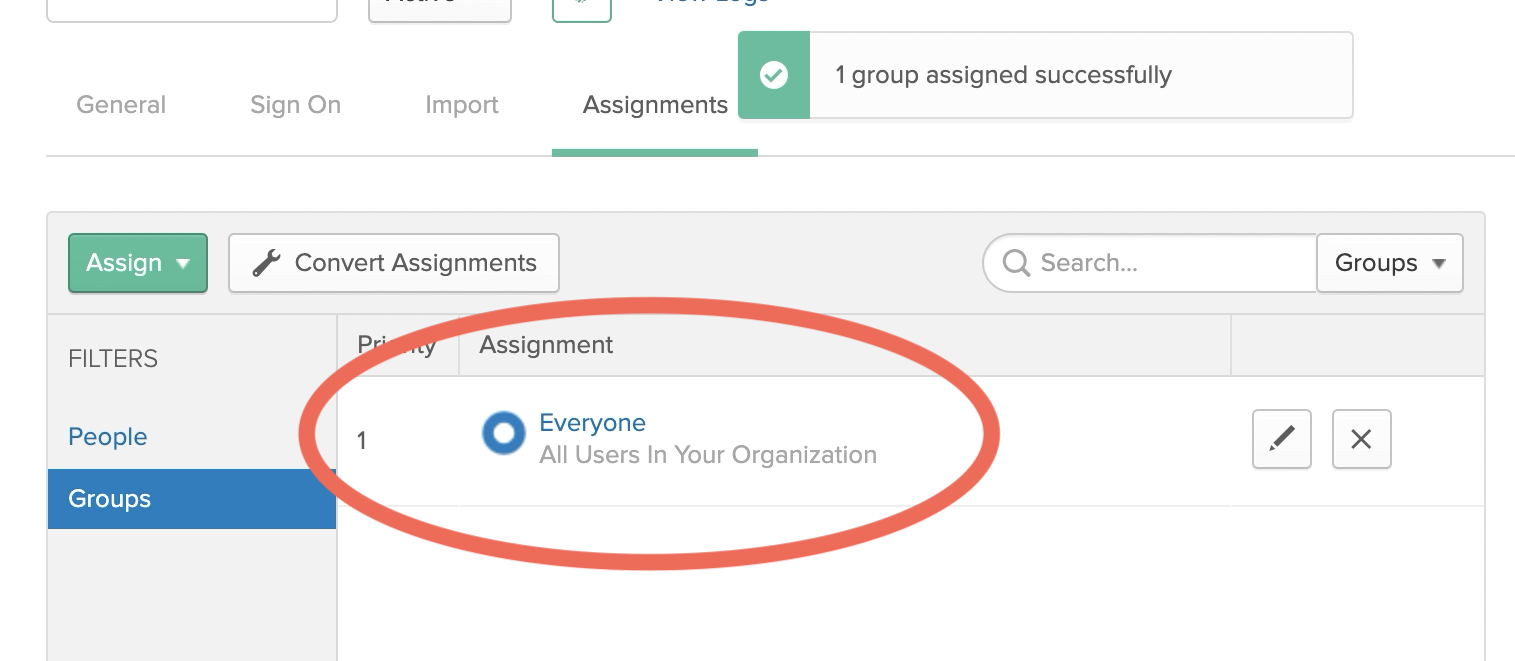
Set up accounts in Assignments
Next, go to Assignments to set up user assignments. At a minimum, the individual who is configuring all these settings must have their account assigned. Otherwise, they will not be able to complete the setup in DeployGate.
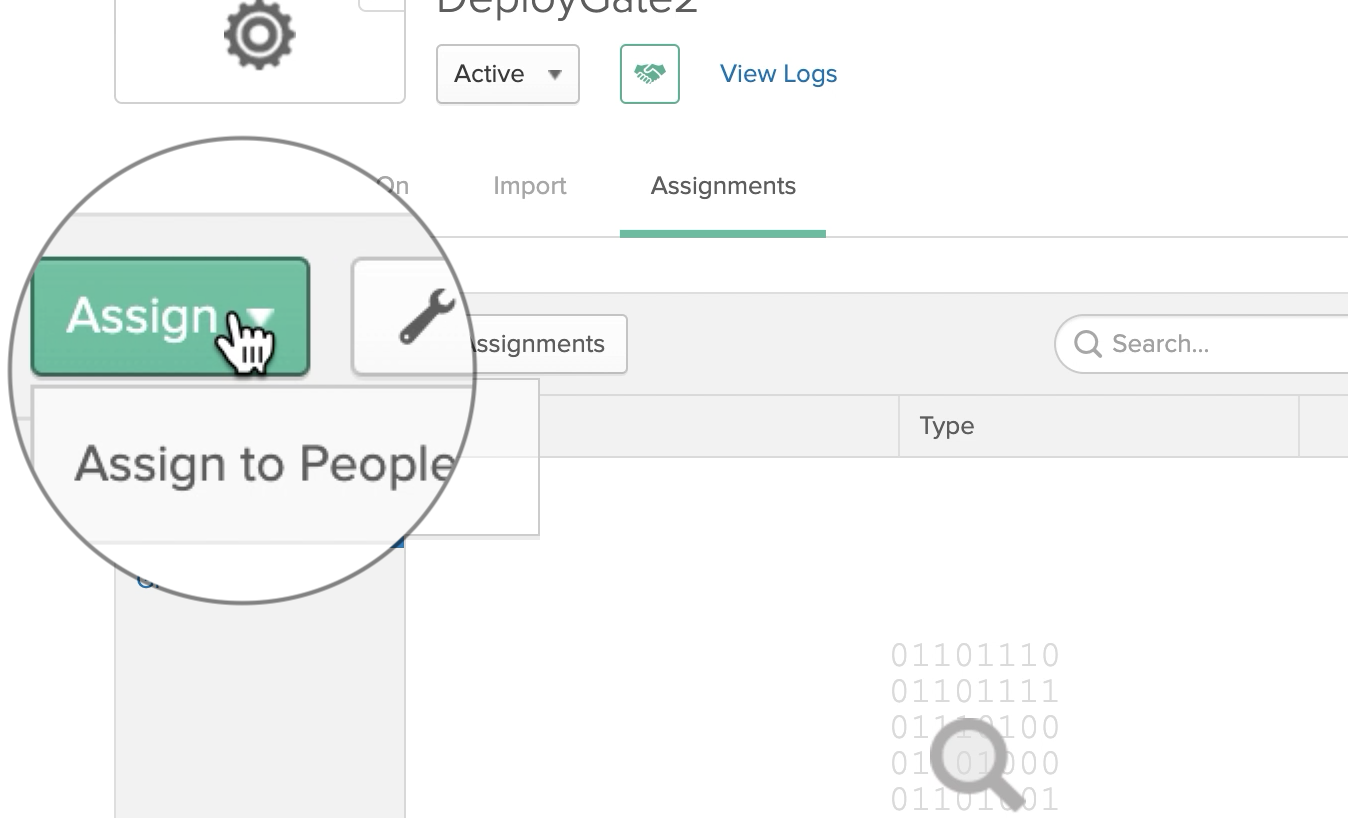
In Assign, select and add People or Group, depending on who you would like to be able to use DeployGate.
Assign Everyone to make it available to all users. (*optional)
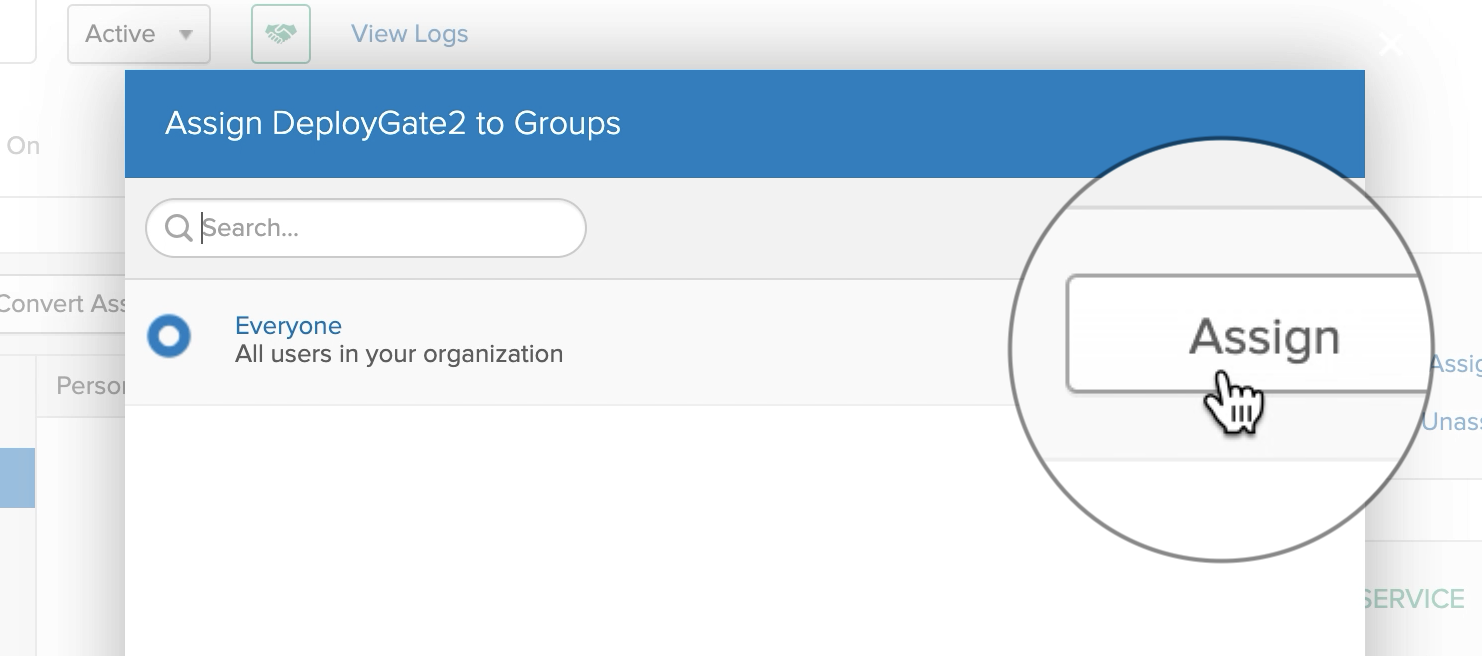
When you’ve confirmed that the assignments were successfully added, proceed to DeployGate’s Settings.
DeployGate Setting
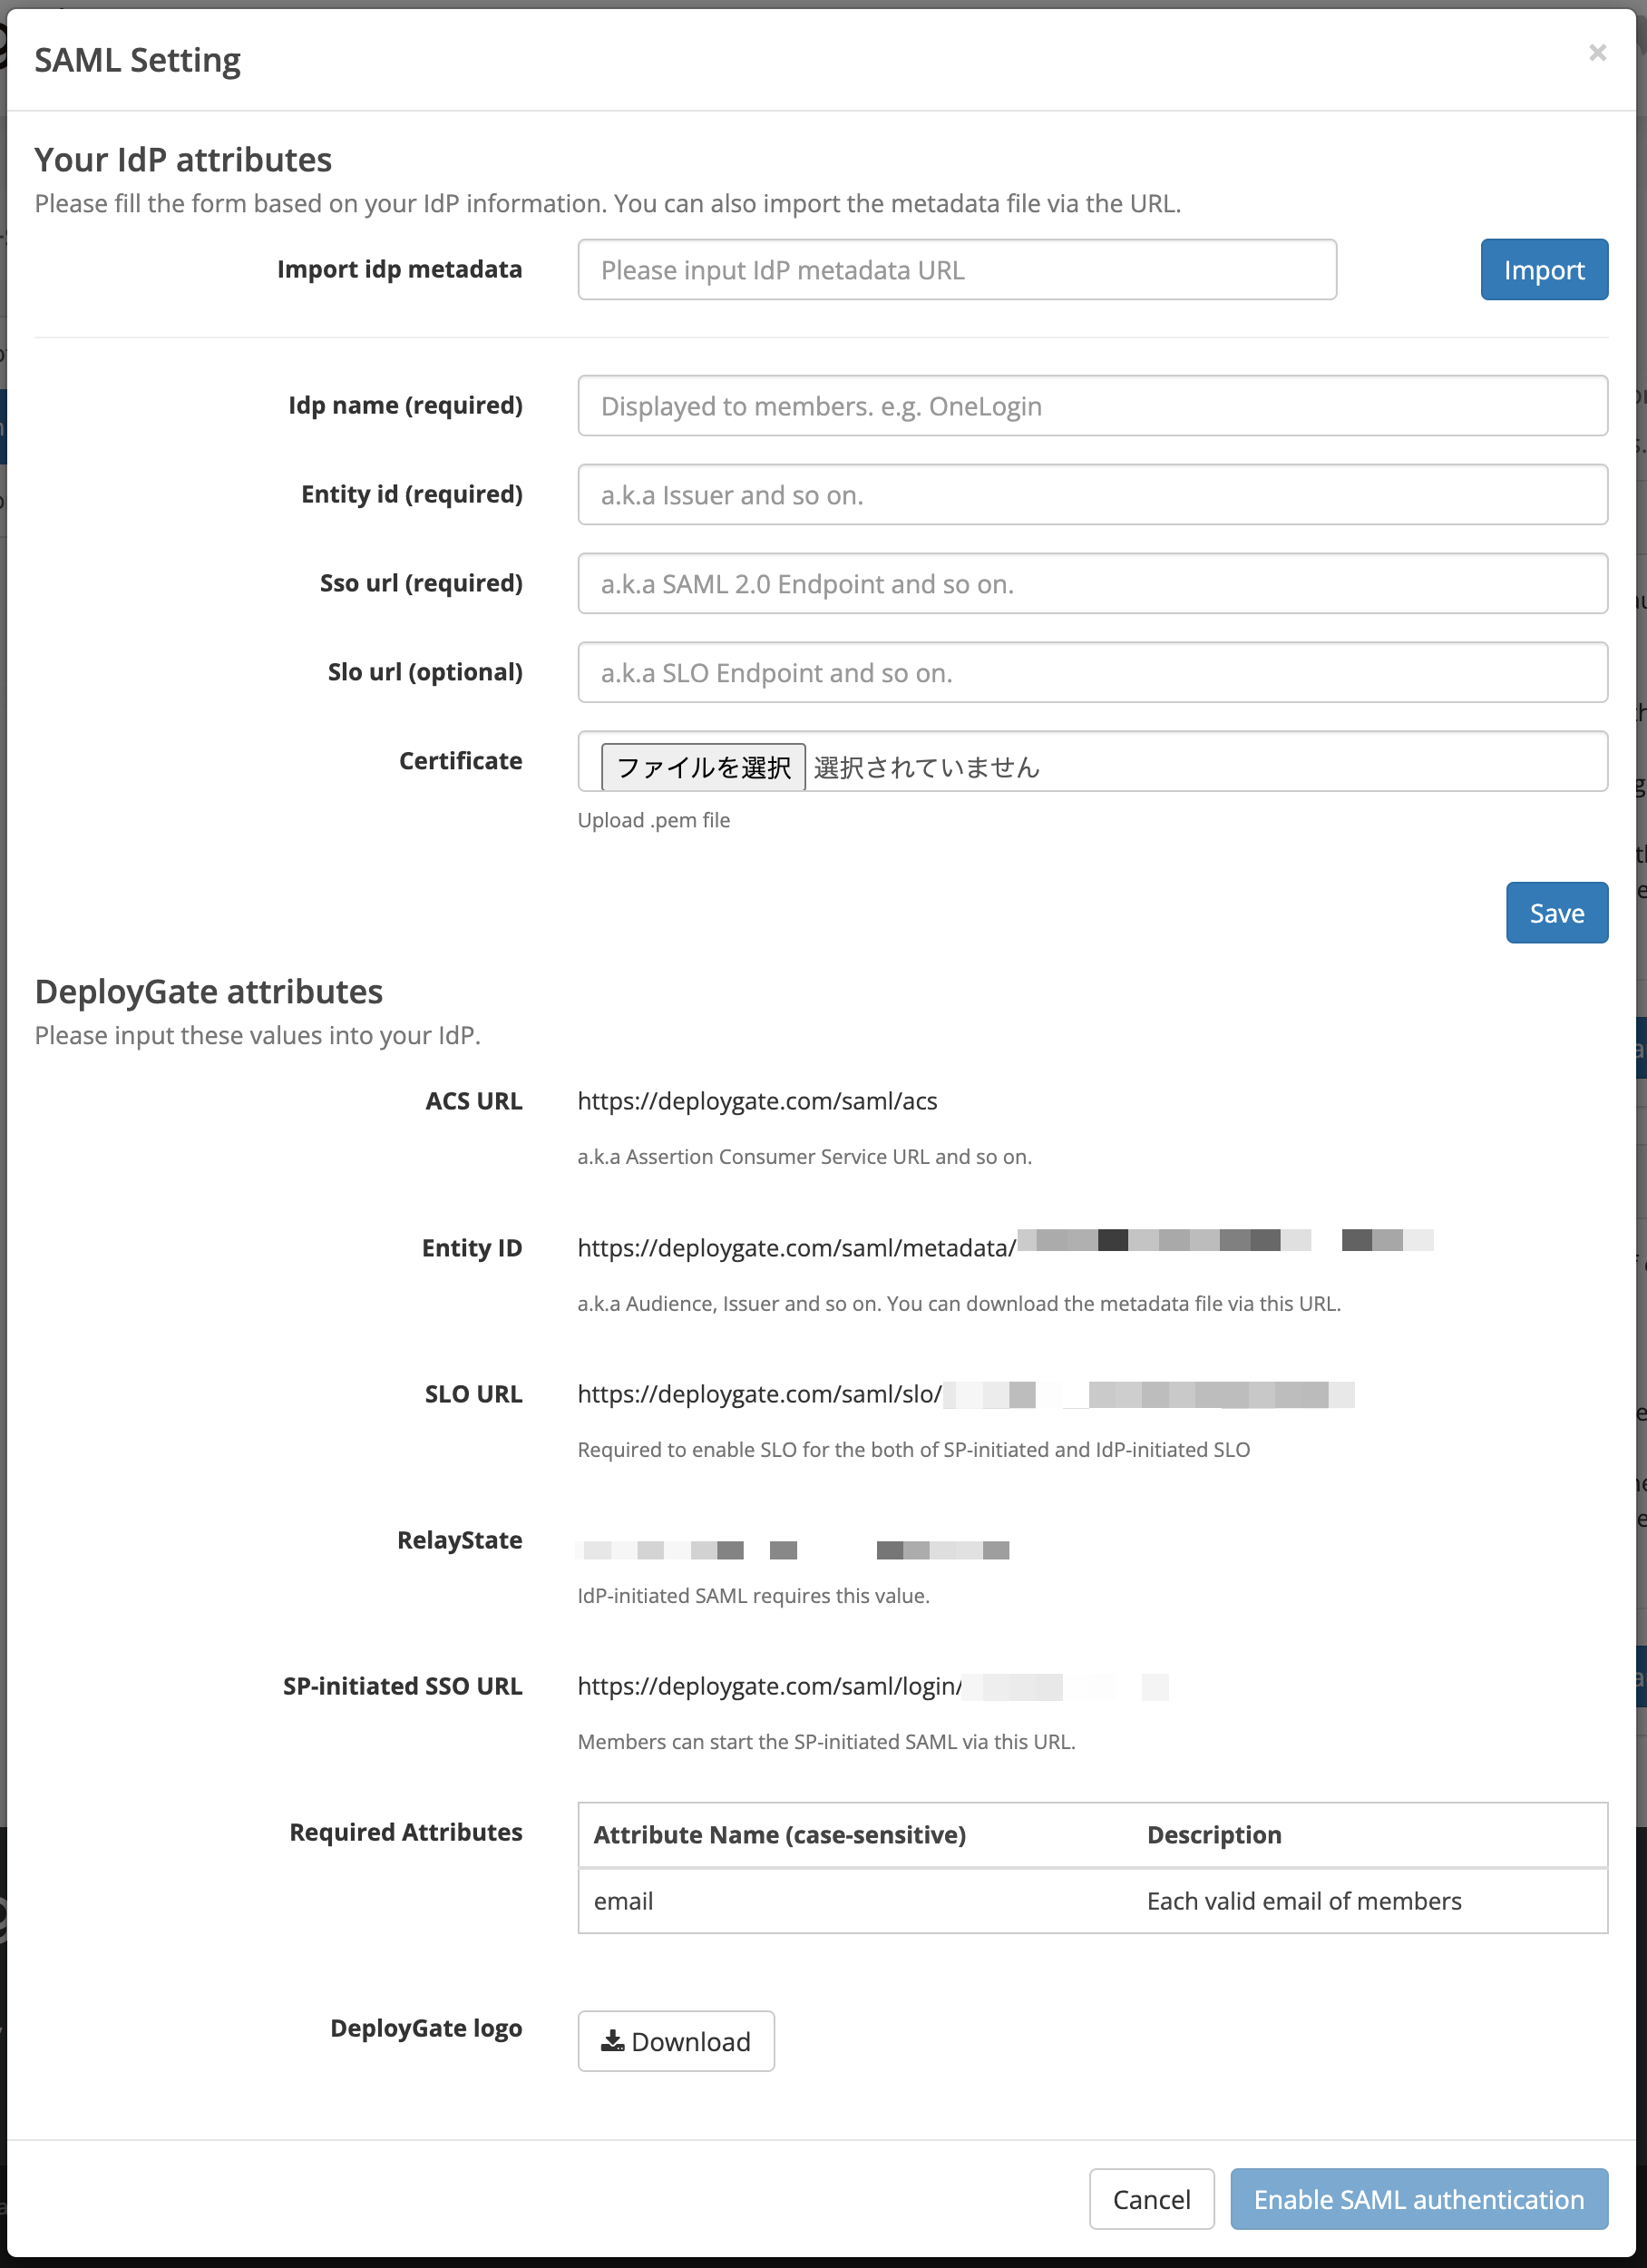
Open the DeployGate Workspace Admin Console and select Enable SAML authentication button.

Enter authentication settings
Enter the required information into the authentication settings wizard and click save and continue button.
| Item | Description |
|---|---|
| Idp name | Okta (or your choice of name) |
| Idp entity id | The Identity Provider Issuer obtained earlier |
| Idp sso target url | Identity Provider Single Sign-On URL obtained earlier |
| Idp certificate | The X.509 Certificate obtained earlier |
Verifying the settings information
Once saved, the information to be entered into Okta will be displayed. Please ensure that the displayed information (especially RelayState) is identical to the previously configured information. If you’re satisfied that the information is correct, click the Enable SAML authentication button.
- After clicking on the “Enable SAML authentication” button, you will be redirected to Okta for authentication. You will also be prompted to log in to DeployGate again for confirmation.
- If you log in with the email and password of the current account, you will be logged out and the configuration will be completed.
These steps complete the configuration process. Once finished, please use DeployGate’s Login with SAML authentication or Okta’s Applications selection to log in.
Troubleshooting
In the case of showing “Sorry, you can’t access…” error after enabling SAML authentication
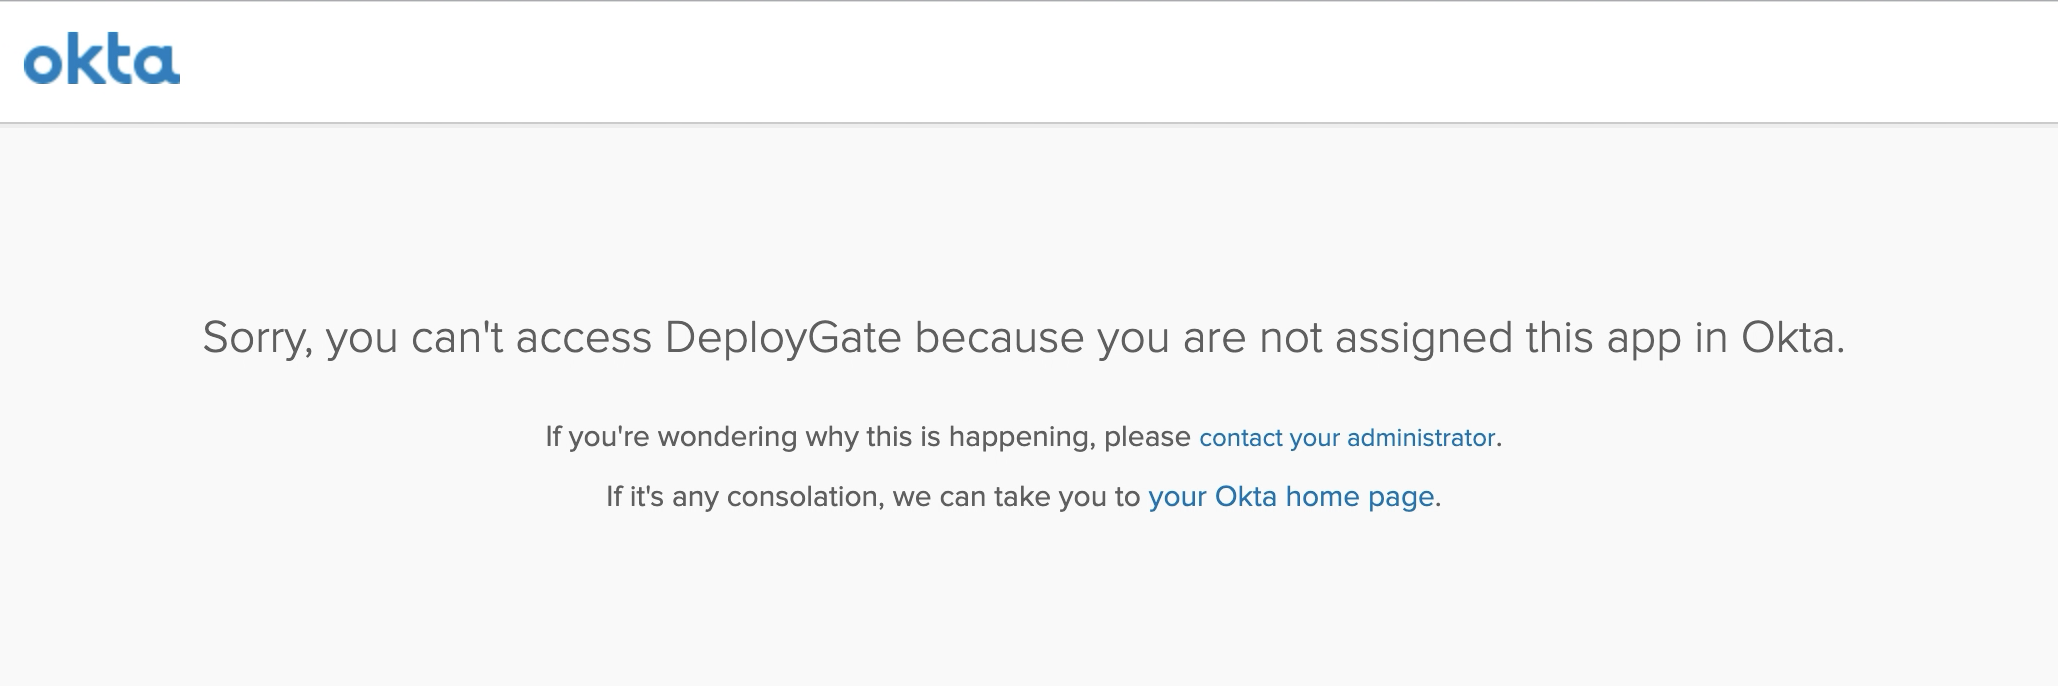
This error appears when People/Projects are not assigned in the Application section of Okta.
Please follow the steps outlined in the Set up accounts in the Assignments section above.