1. Getting Started with DeployGate - Learn How to Use its Features
1.1 Set Up Your Workspace
-
Log in to DeployGate with your Workspace Administrator account.
-
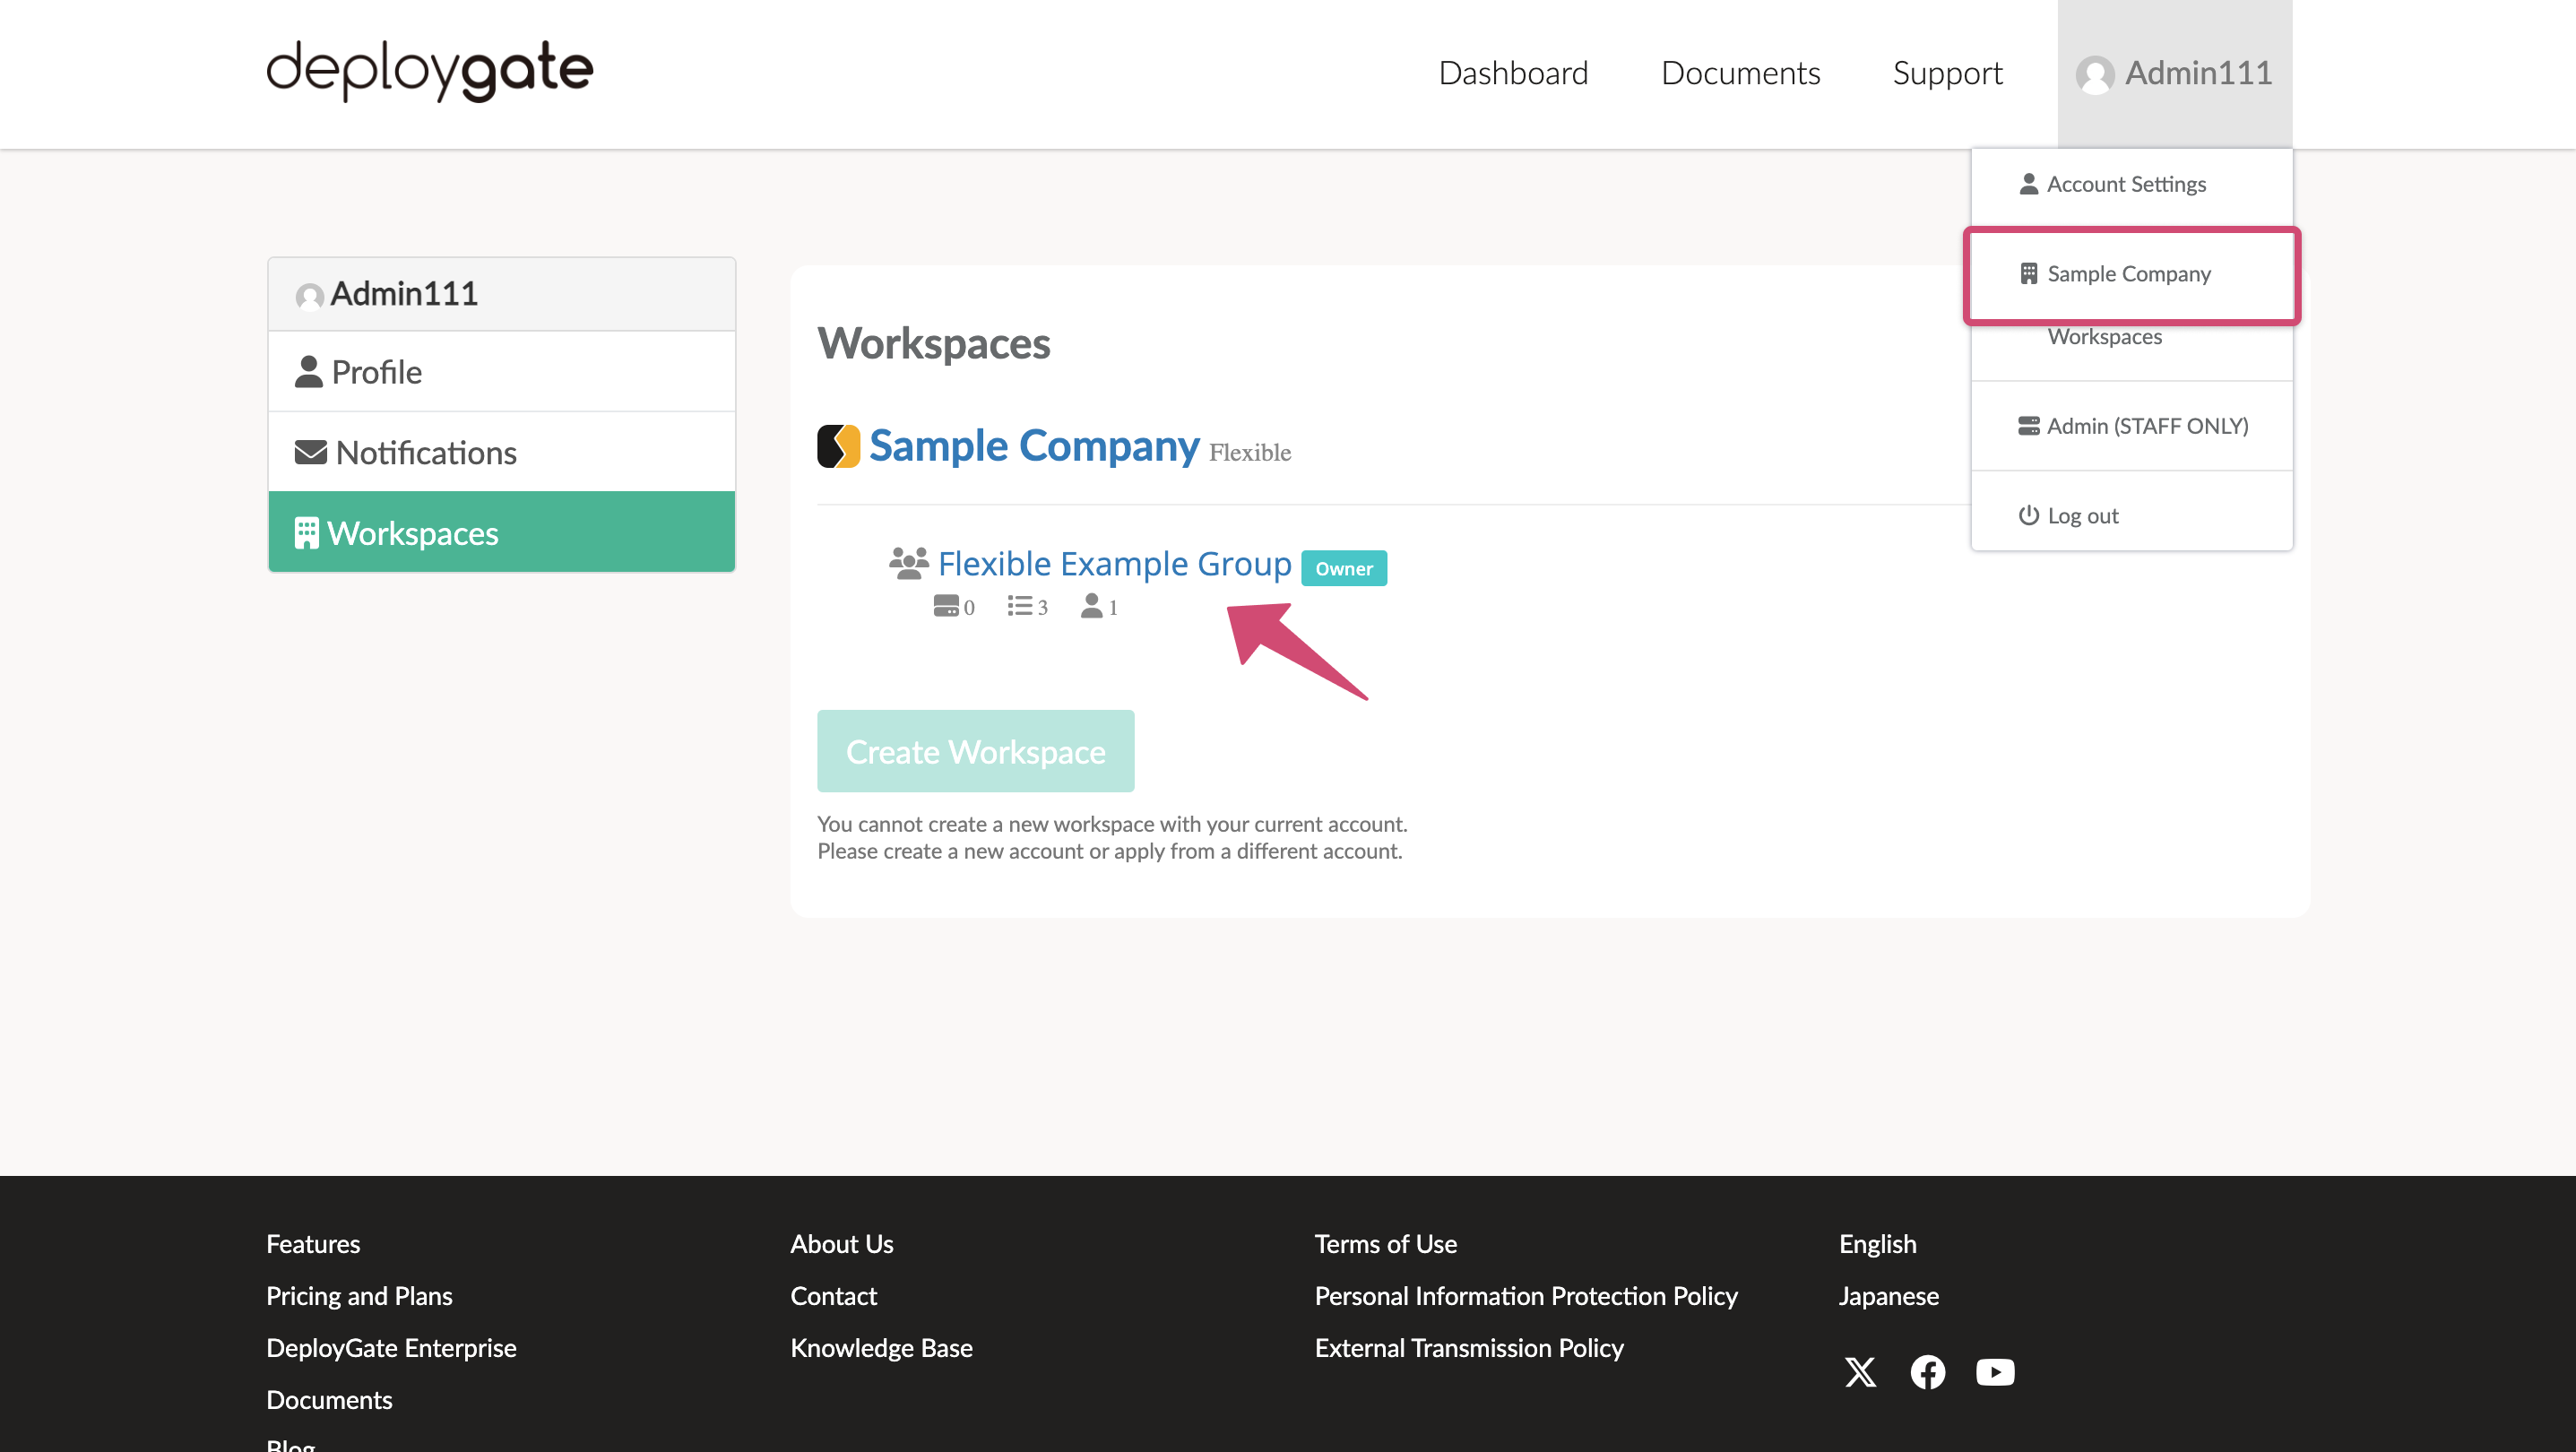
Hover over your user icon/account name at the top right of the page to view the menu and click on your Workspace name (*) to access the Workspace Admin Console. *This is the company name provided when you submitted your application.
-
Click on Settings in the upper right corner of the Workspace Admin Console to configure additional Workspace settings.
You can upload a profile image or change the Workspace display name as needed.
1.2 Create an Organization
-
Click on
Organizations Settings
from the Workspace Admin Console’s left menu.
-
Click on the
Create
button in the top right corner of the Manage Organizations screen to create a new Organization.
You can create multiple Organizations within a Workspace.
By creating an Organization for each project or internal department, you can manage access permissions more efficiently.
Each application will be uploaded to a specific Organization.
The following diagram illustrates the relationships between Workspaces, Organizations, Teams, and Applications.
- Enter the Organization name, display name (optional), and Organization description (optional), then click
Create
.
While you can change the display name at any time, you cannot modify the Organization name once selected.
- Click on
Organizations
from the left menu to return to the Manage Organizations screen. You should see the newly created Organization in the list.
1.3 Uploading an Application
-
Hover over your user icon/account name at the top right of the page to view the menu and click on
Workspaces
. -
On this screen, you will see a list of Organizations created within the Workspace. Click on the Organization you created earlier.
-
When the following screen appears, click the
Upload
button.
This will open a file selection dialog. Select an APK/AAB file or an IPA file to upload the app to the Organization.
Once the upload is complete, the app management screen will open.
-
After uploading the app, you will be redirected to the App Details screen, as shown below. A QR code for installing the app on your device will appear.
1.4 Installing the App on your Device
Please refer to the following documents for information on installing apps on your device: