Upload Apps to DeployGate
On this page, we will explain how to upload apps to a Project. There are two ways to upload an app - Web browser and API.
Upload via Web Browser
When using a web browser to upload apps, you can do so from the Project Dashboard or Individual Dashboard.
Upload from Project Dashboard
-
Access the Project Dashboard and click
Upload Appbutton.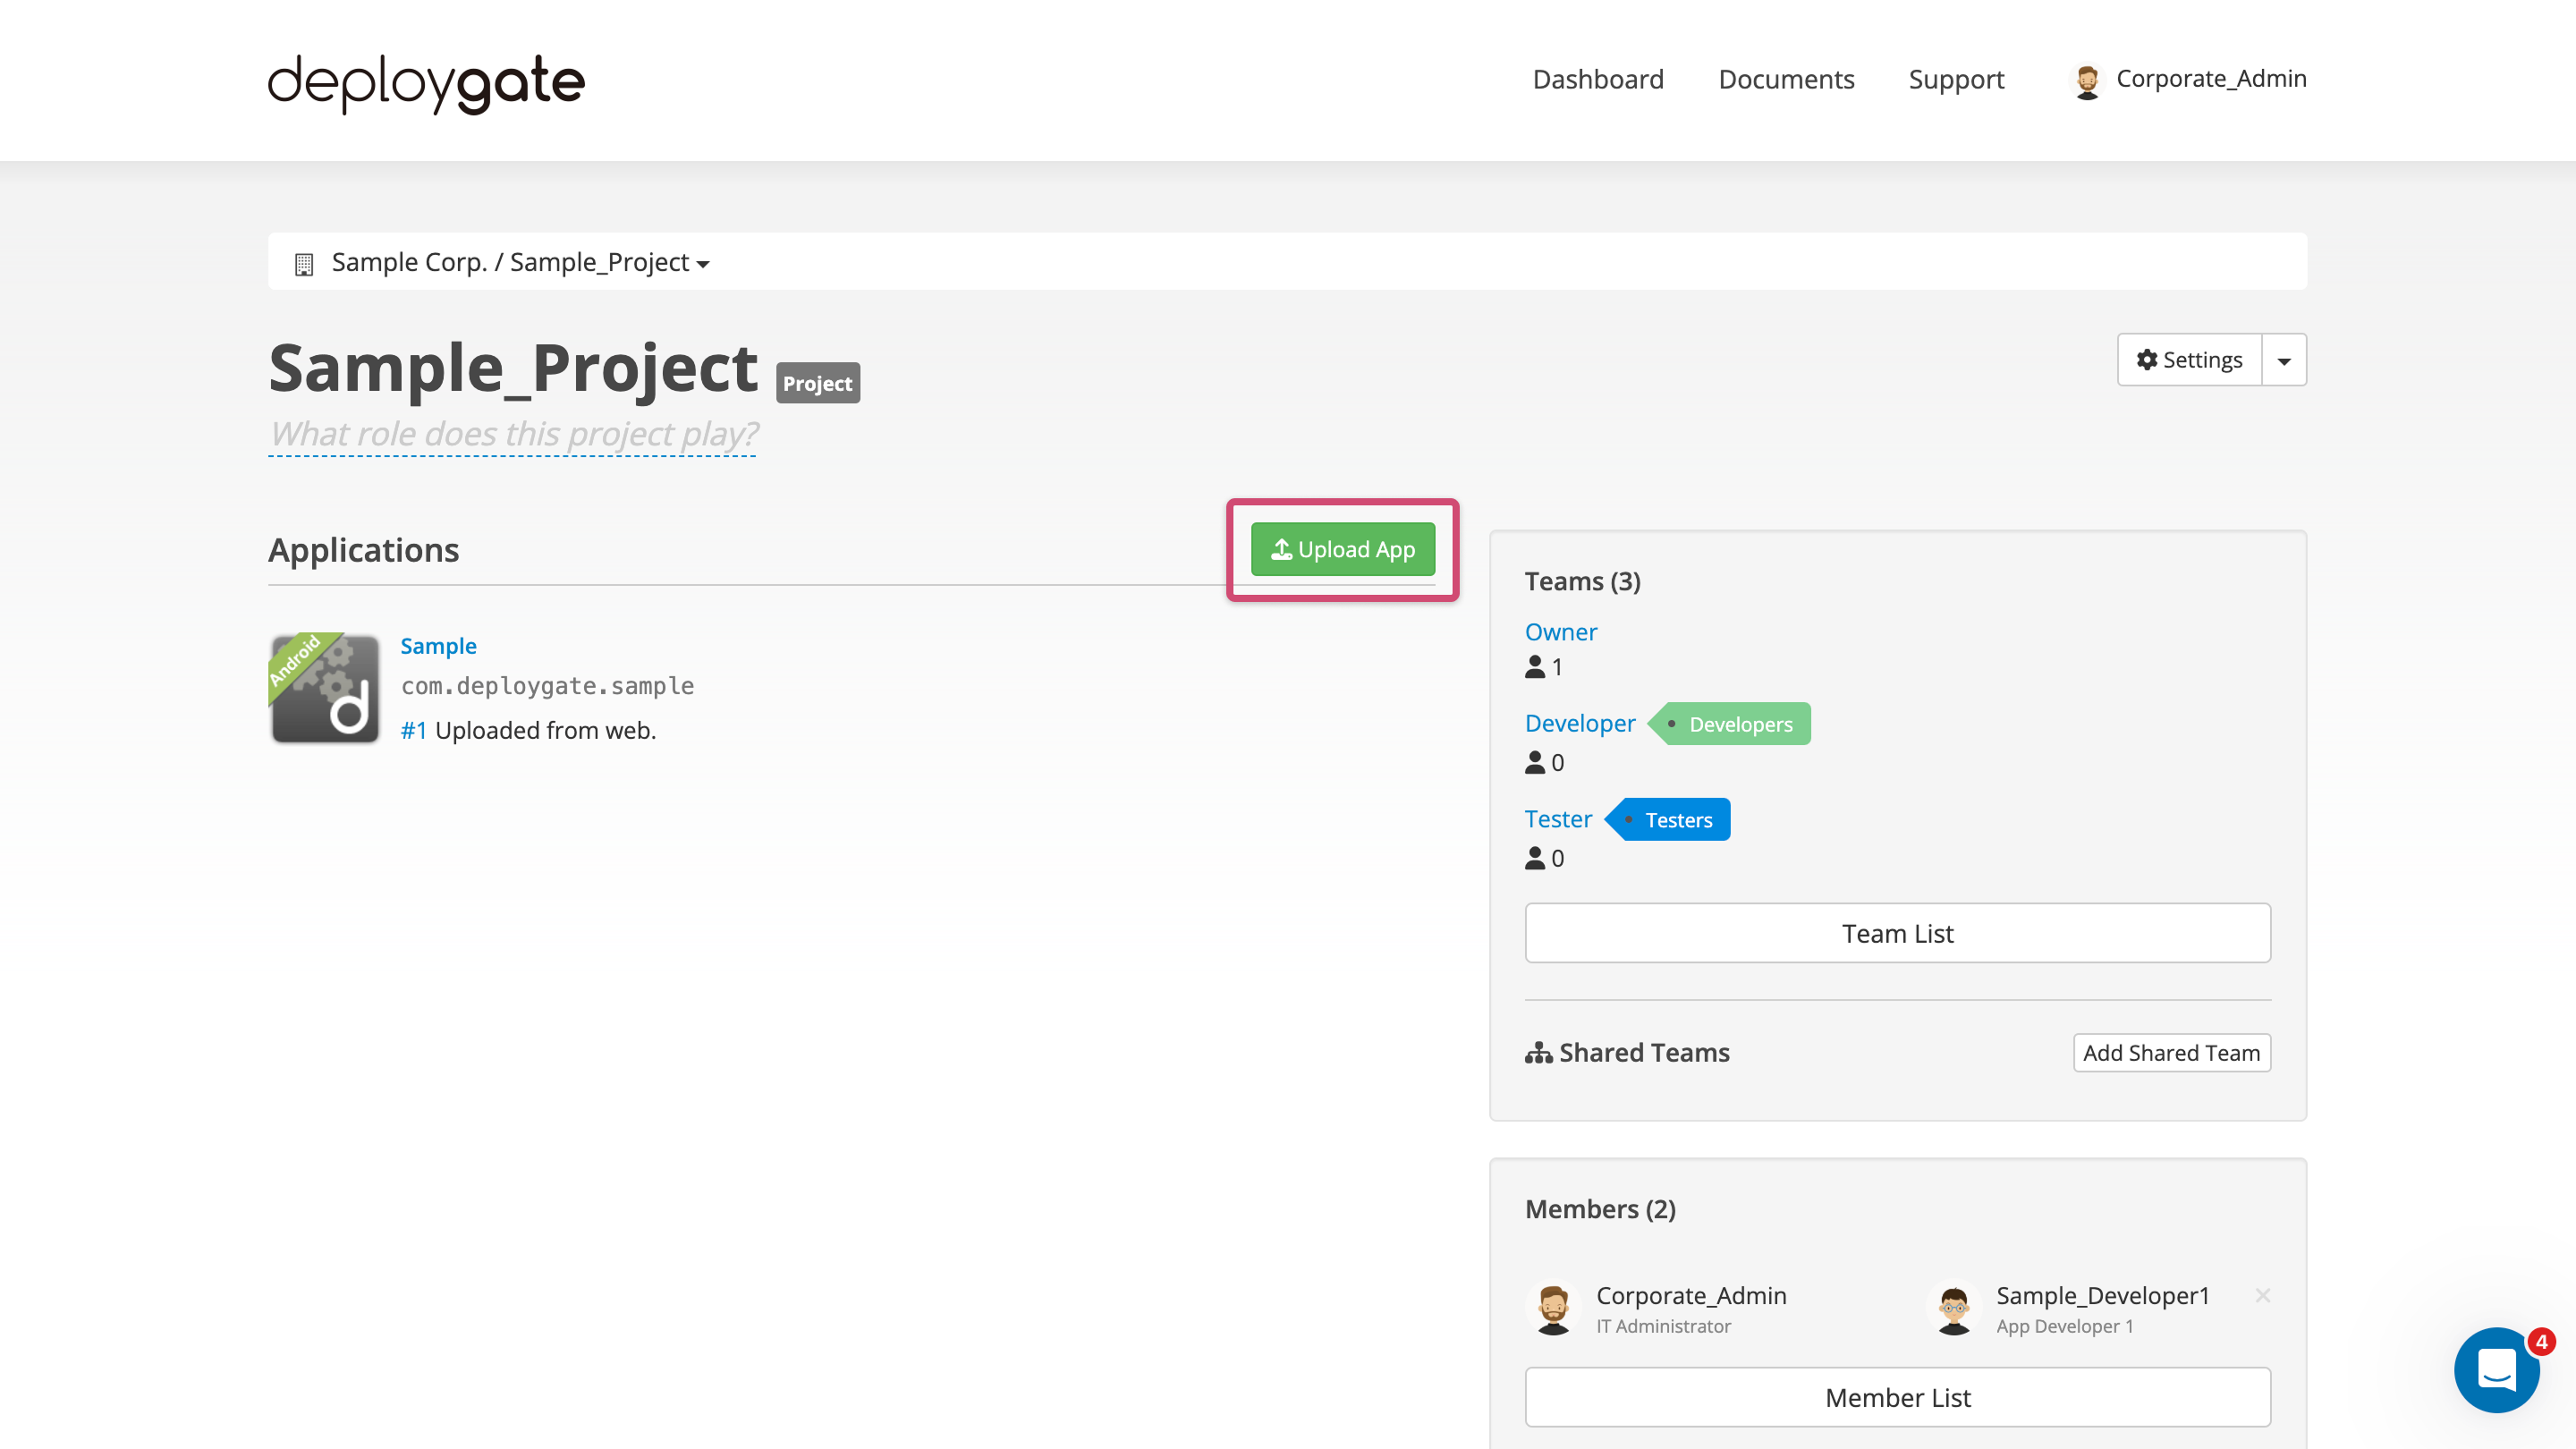
-
The file selector will appear. Select an APK file or IPA file to upload.
(Optional) When Using Instant Device Feature with iOS Apps:
When you select an iOS app (ipa file), a form to add a simulator build for Instant Device will appear. If you want to use the Instant Device feature, click "Choose File" and select a zip file containing the .app directory built for the simulator.
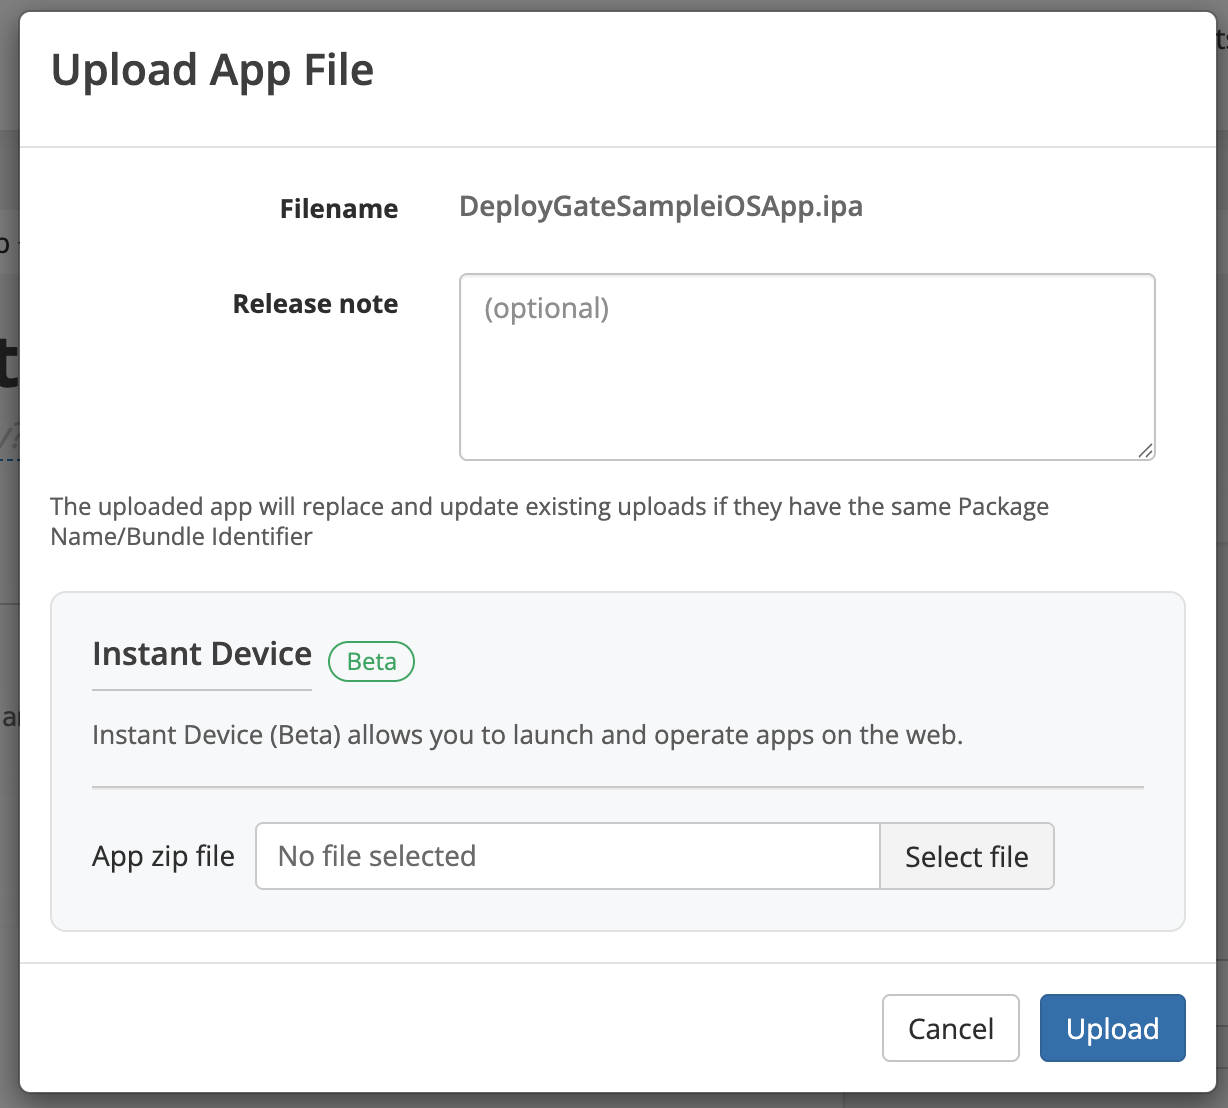
If you don't want to use the Instant Device feature, you can proceed without selecting a zip file. For more details, see Getting Started with Instant Device.
-
Confirm the uploaded file name on the dialog and enter Release Note if needed. By clicking on
Uploadbutton, the app will be uploaded to the Project.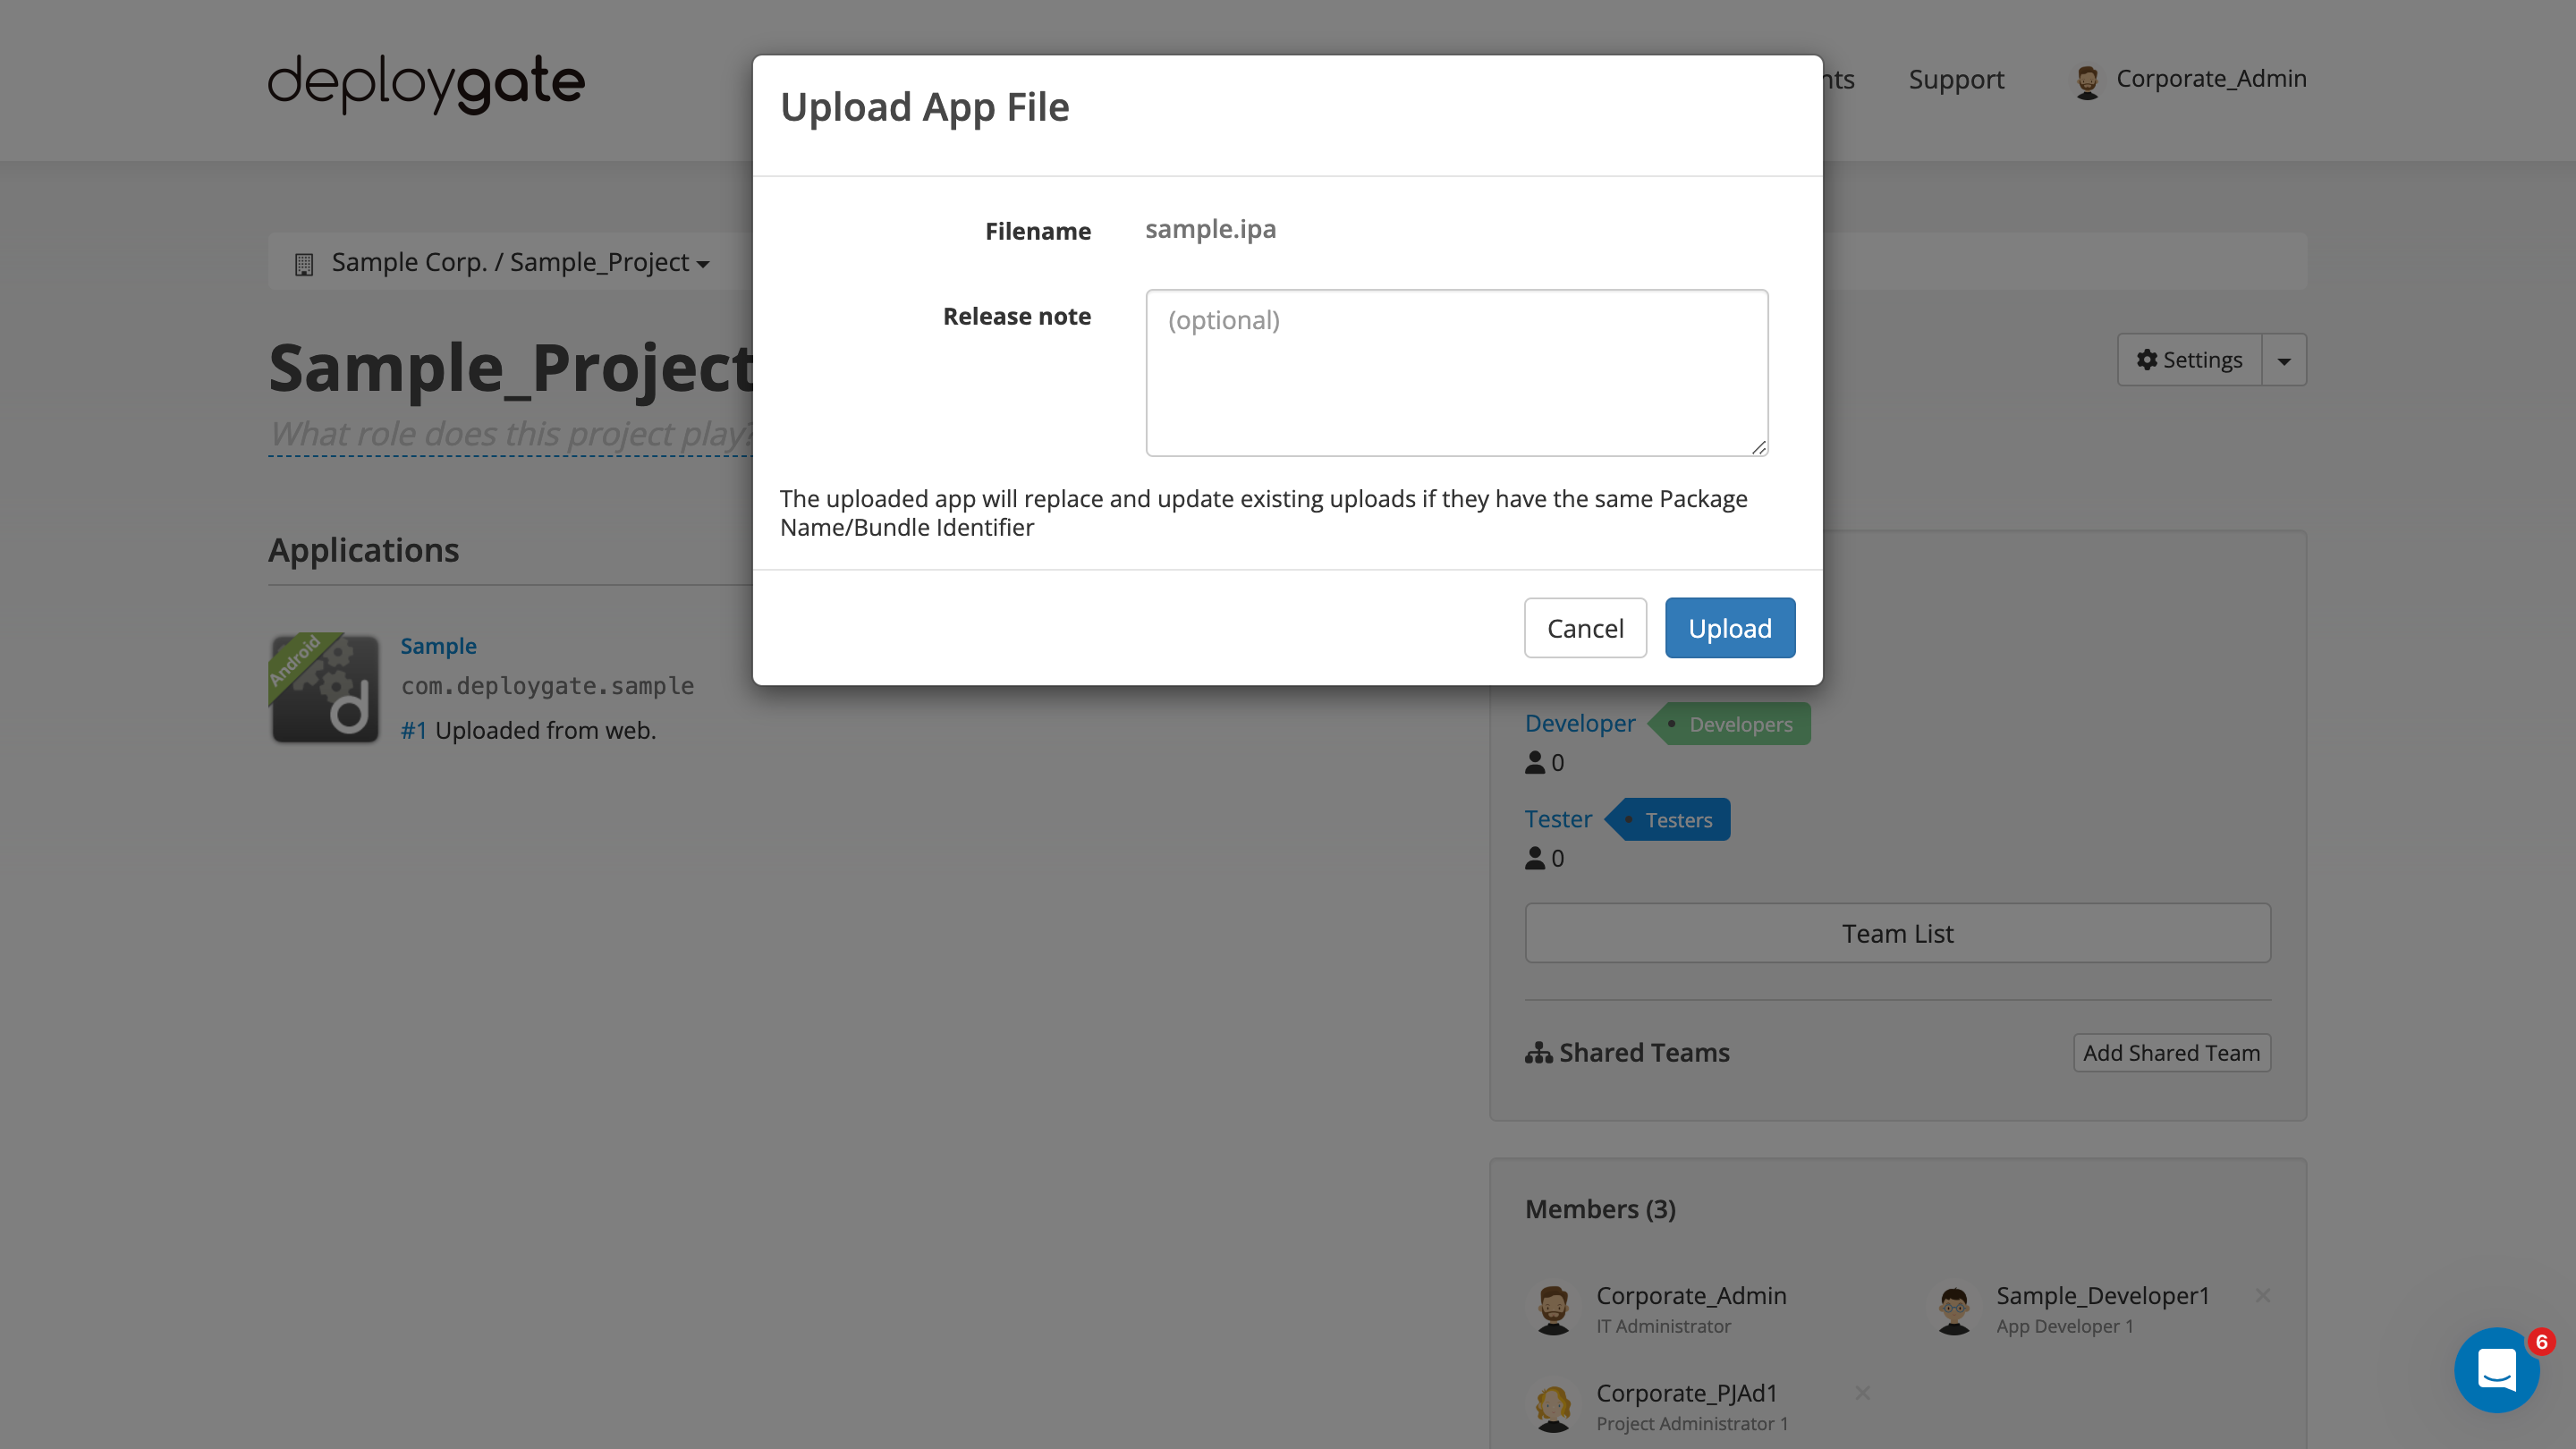
-
After uploading the app, the screen as the Screenshot below will be displayed. You can install the app via a QR code or links.
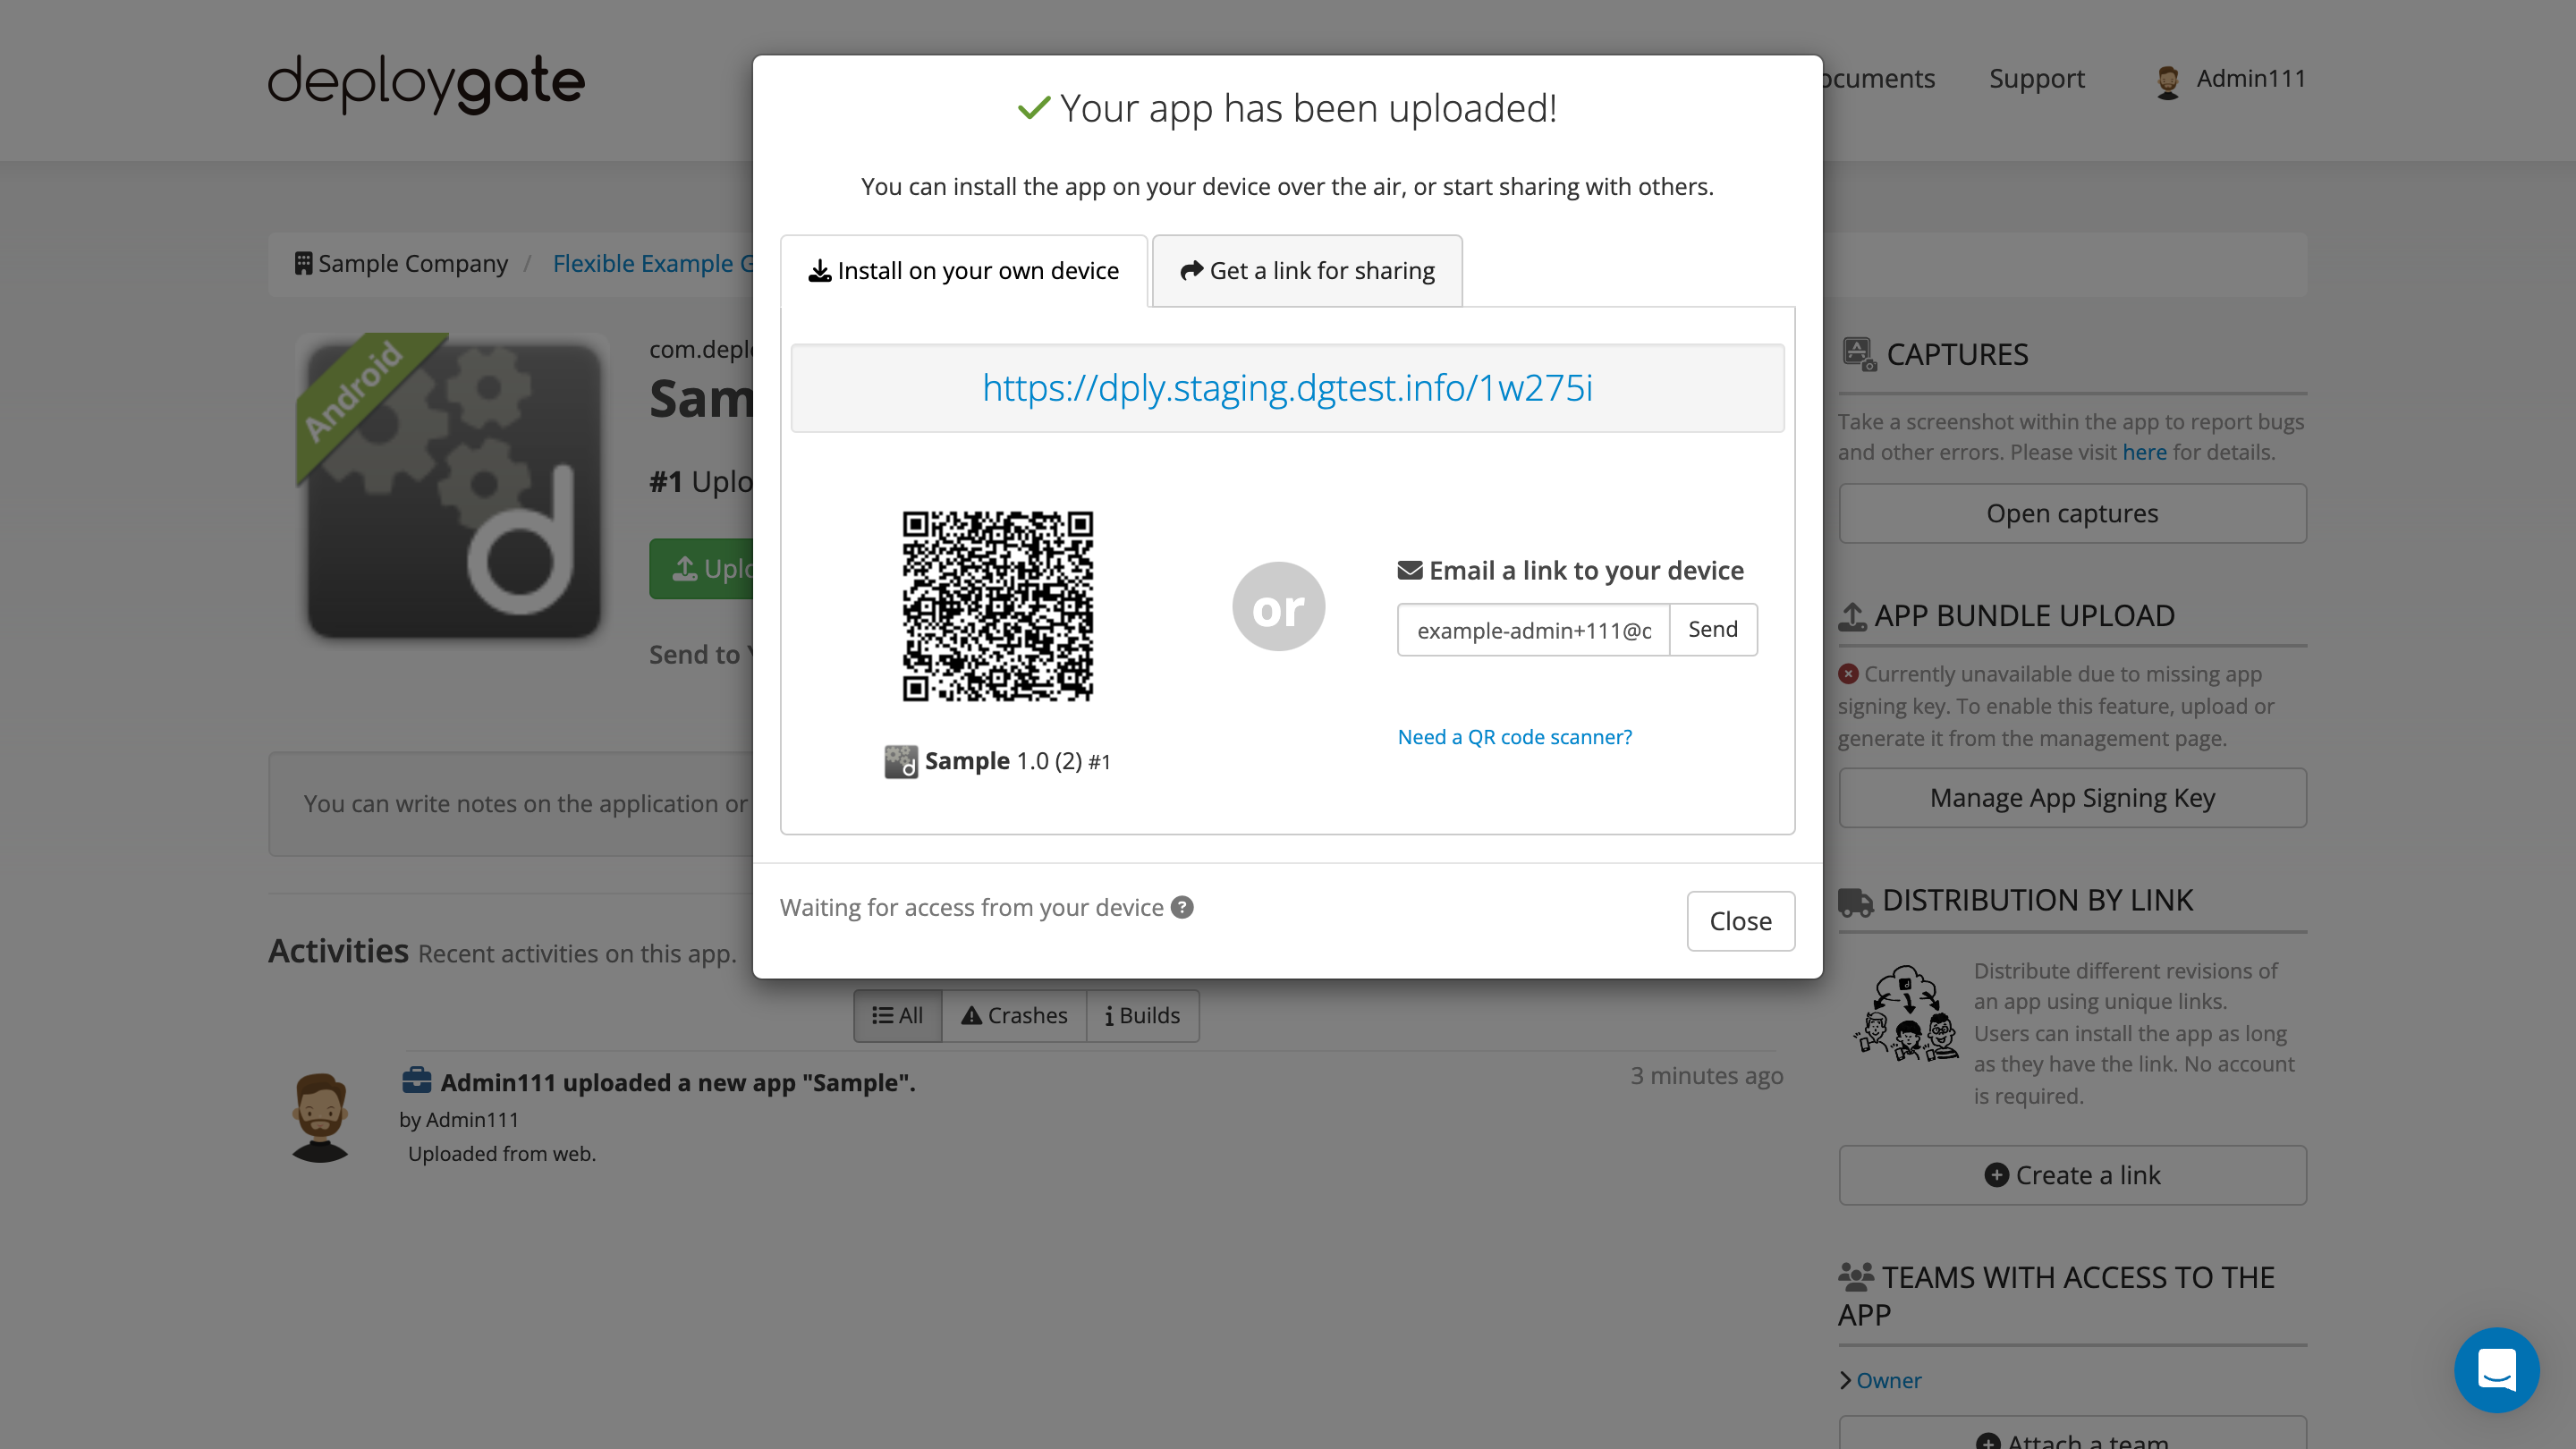
If necessary, modify the app’s access permissions.
The upload button will not be available if any of the following apply.
- You are not an owner or administrator
- You have reached your plan’s limits for the maximum number of apps
- Your Project’s trial period has ended
Upload from Individual Dashboard
You can also upload apps directly to a Project from your Individual Dashboard, which is the first page you see when logging in.
-
Access the Project Dashboard and click
Upload Appbutton or drag and drop the target app file directly.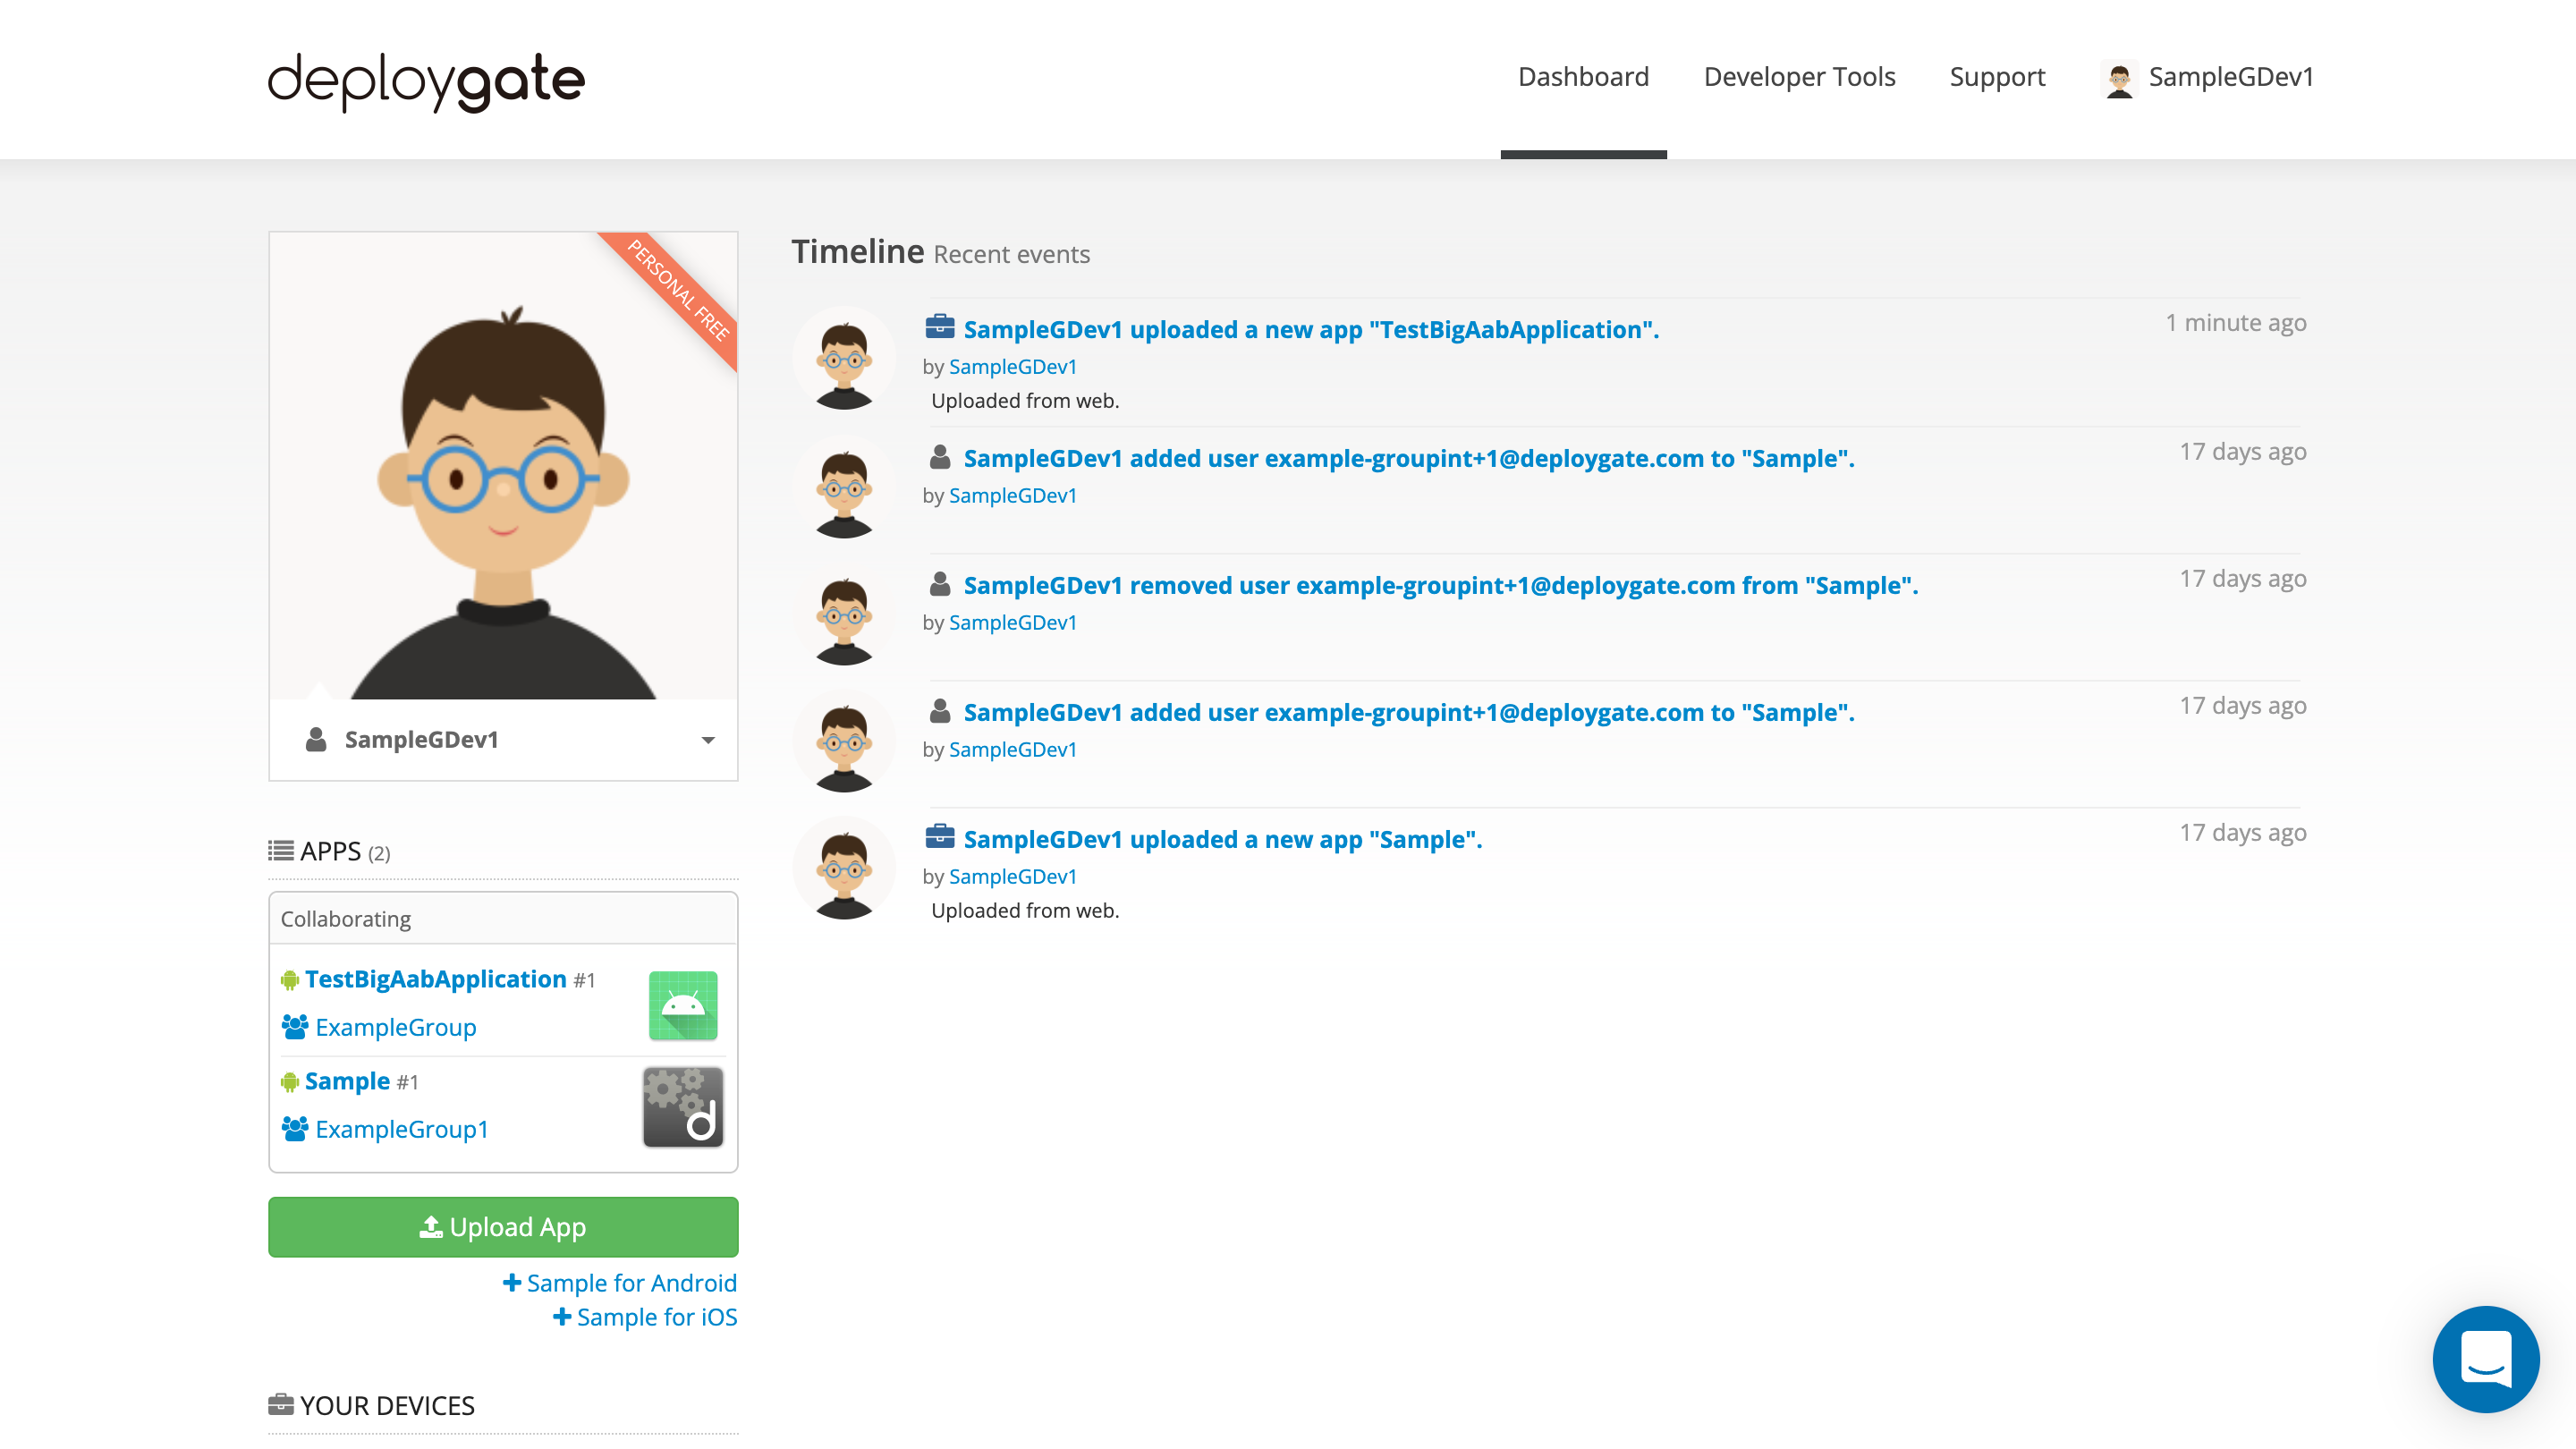
-
The file selector will appear. Select an APK file or IPA file to upload.
(Optional) When Using Instant Device Feature with iOS Apps:
When you select an iOS app (ipa file), a form to add a simulator build for Instant Device will appear. If you want to use the Instant Device feature, click "Choose File" and select a zip file containing the .app directory built for the simulator.
If you don't want to use the Instant Device feature, you can proceed without selecting a zip file. For more details, see Getting Started with Instant Device.
-
Confirm the uploaded file name on the dialog and enter Release Note if needed. The default location will be your personal account, but you can select a Project from the drop-down menu. By clicking on
Uploadbutton, the app will be uploaded to the Project.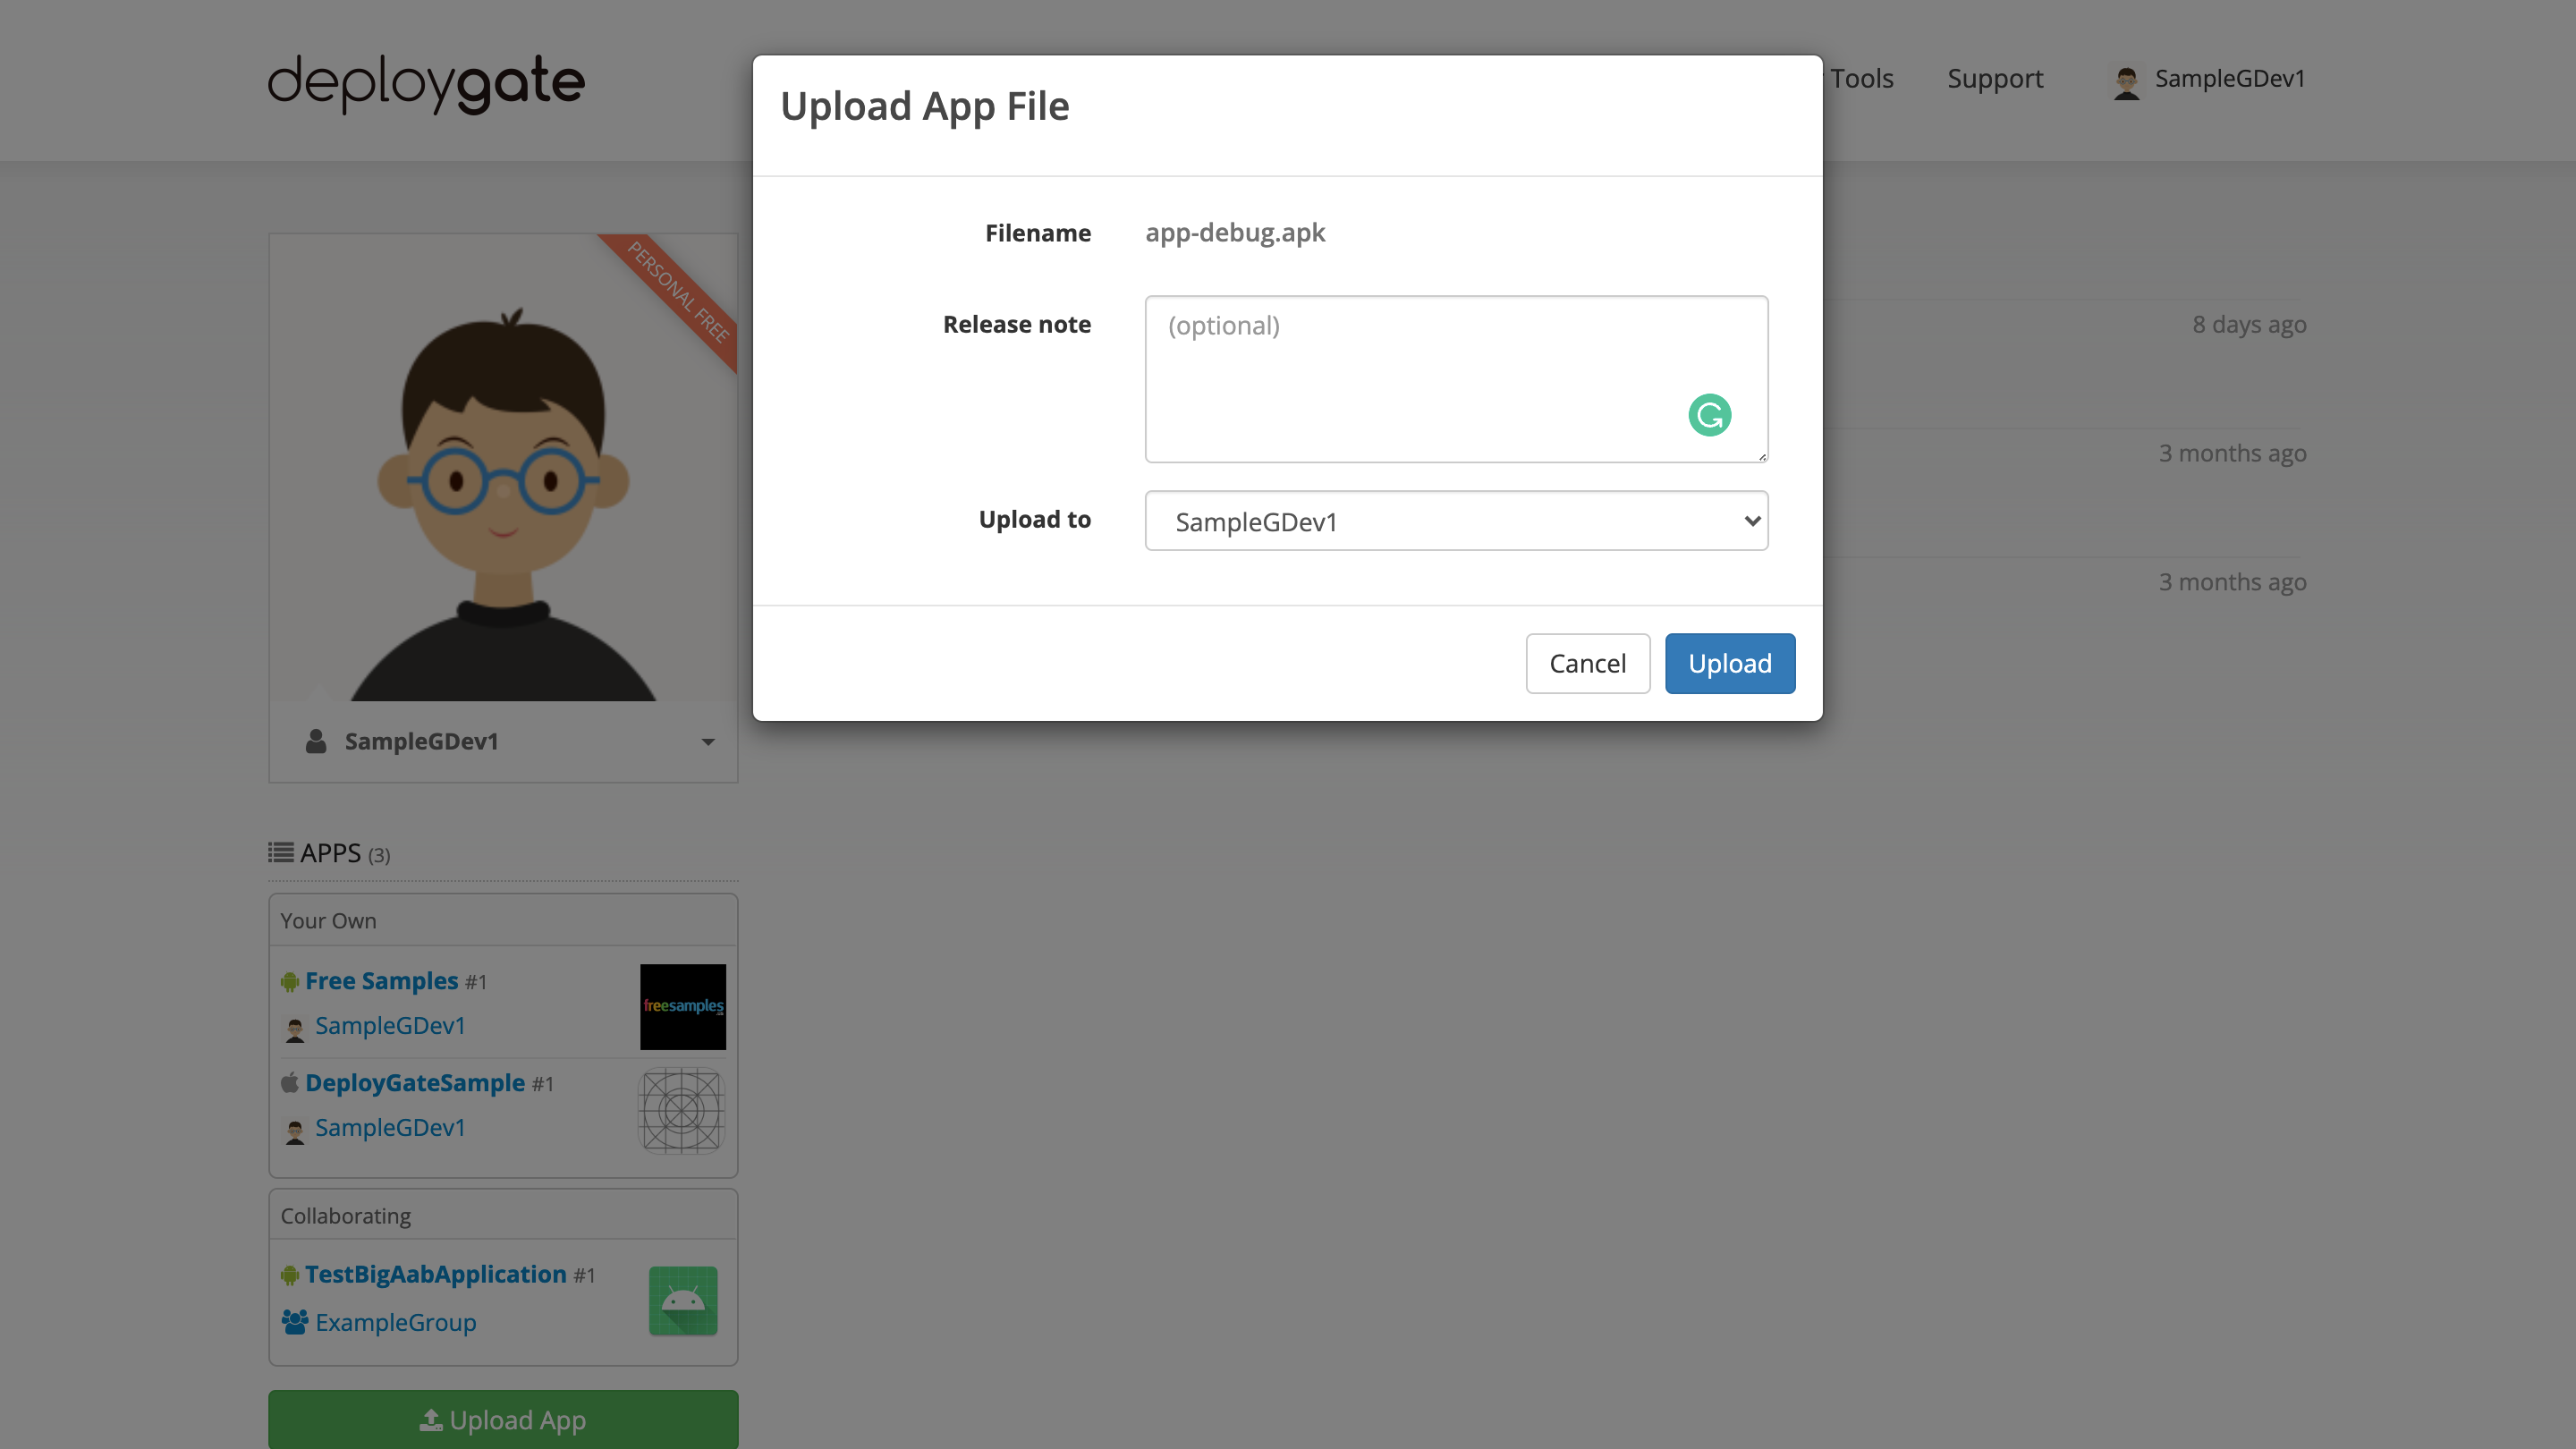
-
After uploading the app, the screen as the Screenshot below will be displayed. You can install the app via a QR code or links.
Upload with API
When using Upload API to upload to a Project, specify the Project's name (OWNER_NAME) in the path.
curl \
  --url "https://deploygate.com/api/users/${OWNER_NAME}/apps" \
  -H "Authorization: Bearer ${API_TOKEN}" \
  -X POST \
  -F "file=@sample.apk" \
  --form-string "message=sample"
When Using Instant Device Feature with iOS Apps:
When uploading iOS apps, you can use the ios_simulator_zip parameter to upload a zip file of the simulator build at the same time.
curl \
  --url "https://deploygate.com/api/users/${OWNER_NAME}/apps" \
  -H "Authorization: Bearer ${API_TOKEN}" \
  -X POST \
  -F "file=@sample.ipa" \
  -F "ios_simulator_zip=@sample_simulator.zip" \
  --form-string "message=sample"
Visit API Reference's Upload App for details about other options.
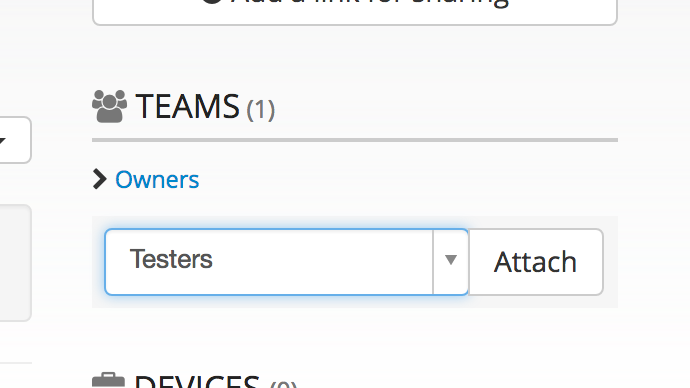
Set Up App Access Permissions
Immediately after uploading a new app, only users on the Owner team can view the app. For the app to be visible to other teams, you must link those teams with the app.
Use a browser to open the app management screen. Go to the Team section on the right side of the screen to select the teams you would like to attach to the app.