Flexible Plan Setup Guide
Thank you for choosing the Flexible Plan. This guide outlines the first steps for using DeployGate, beginning with creating a Workspace. You can make the most of DeployGate's features by following these steps.
1. Use DeployGate's Basic Features
1.1 Set Up Your Workspace
-
Log in to DeployGate with your Workspace Administrator account.
-
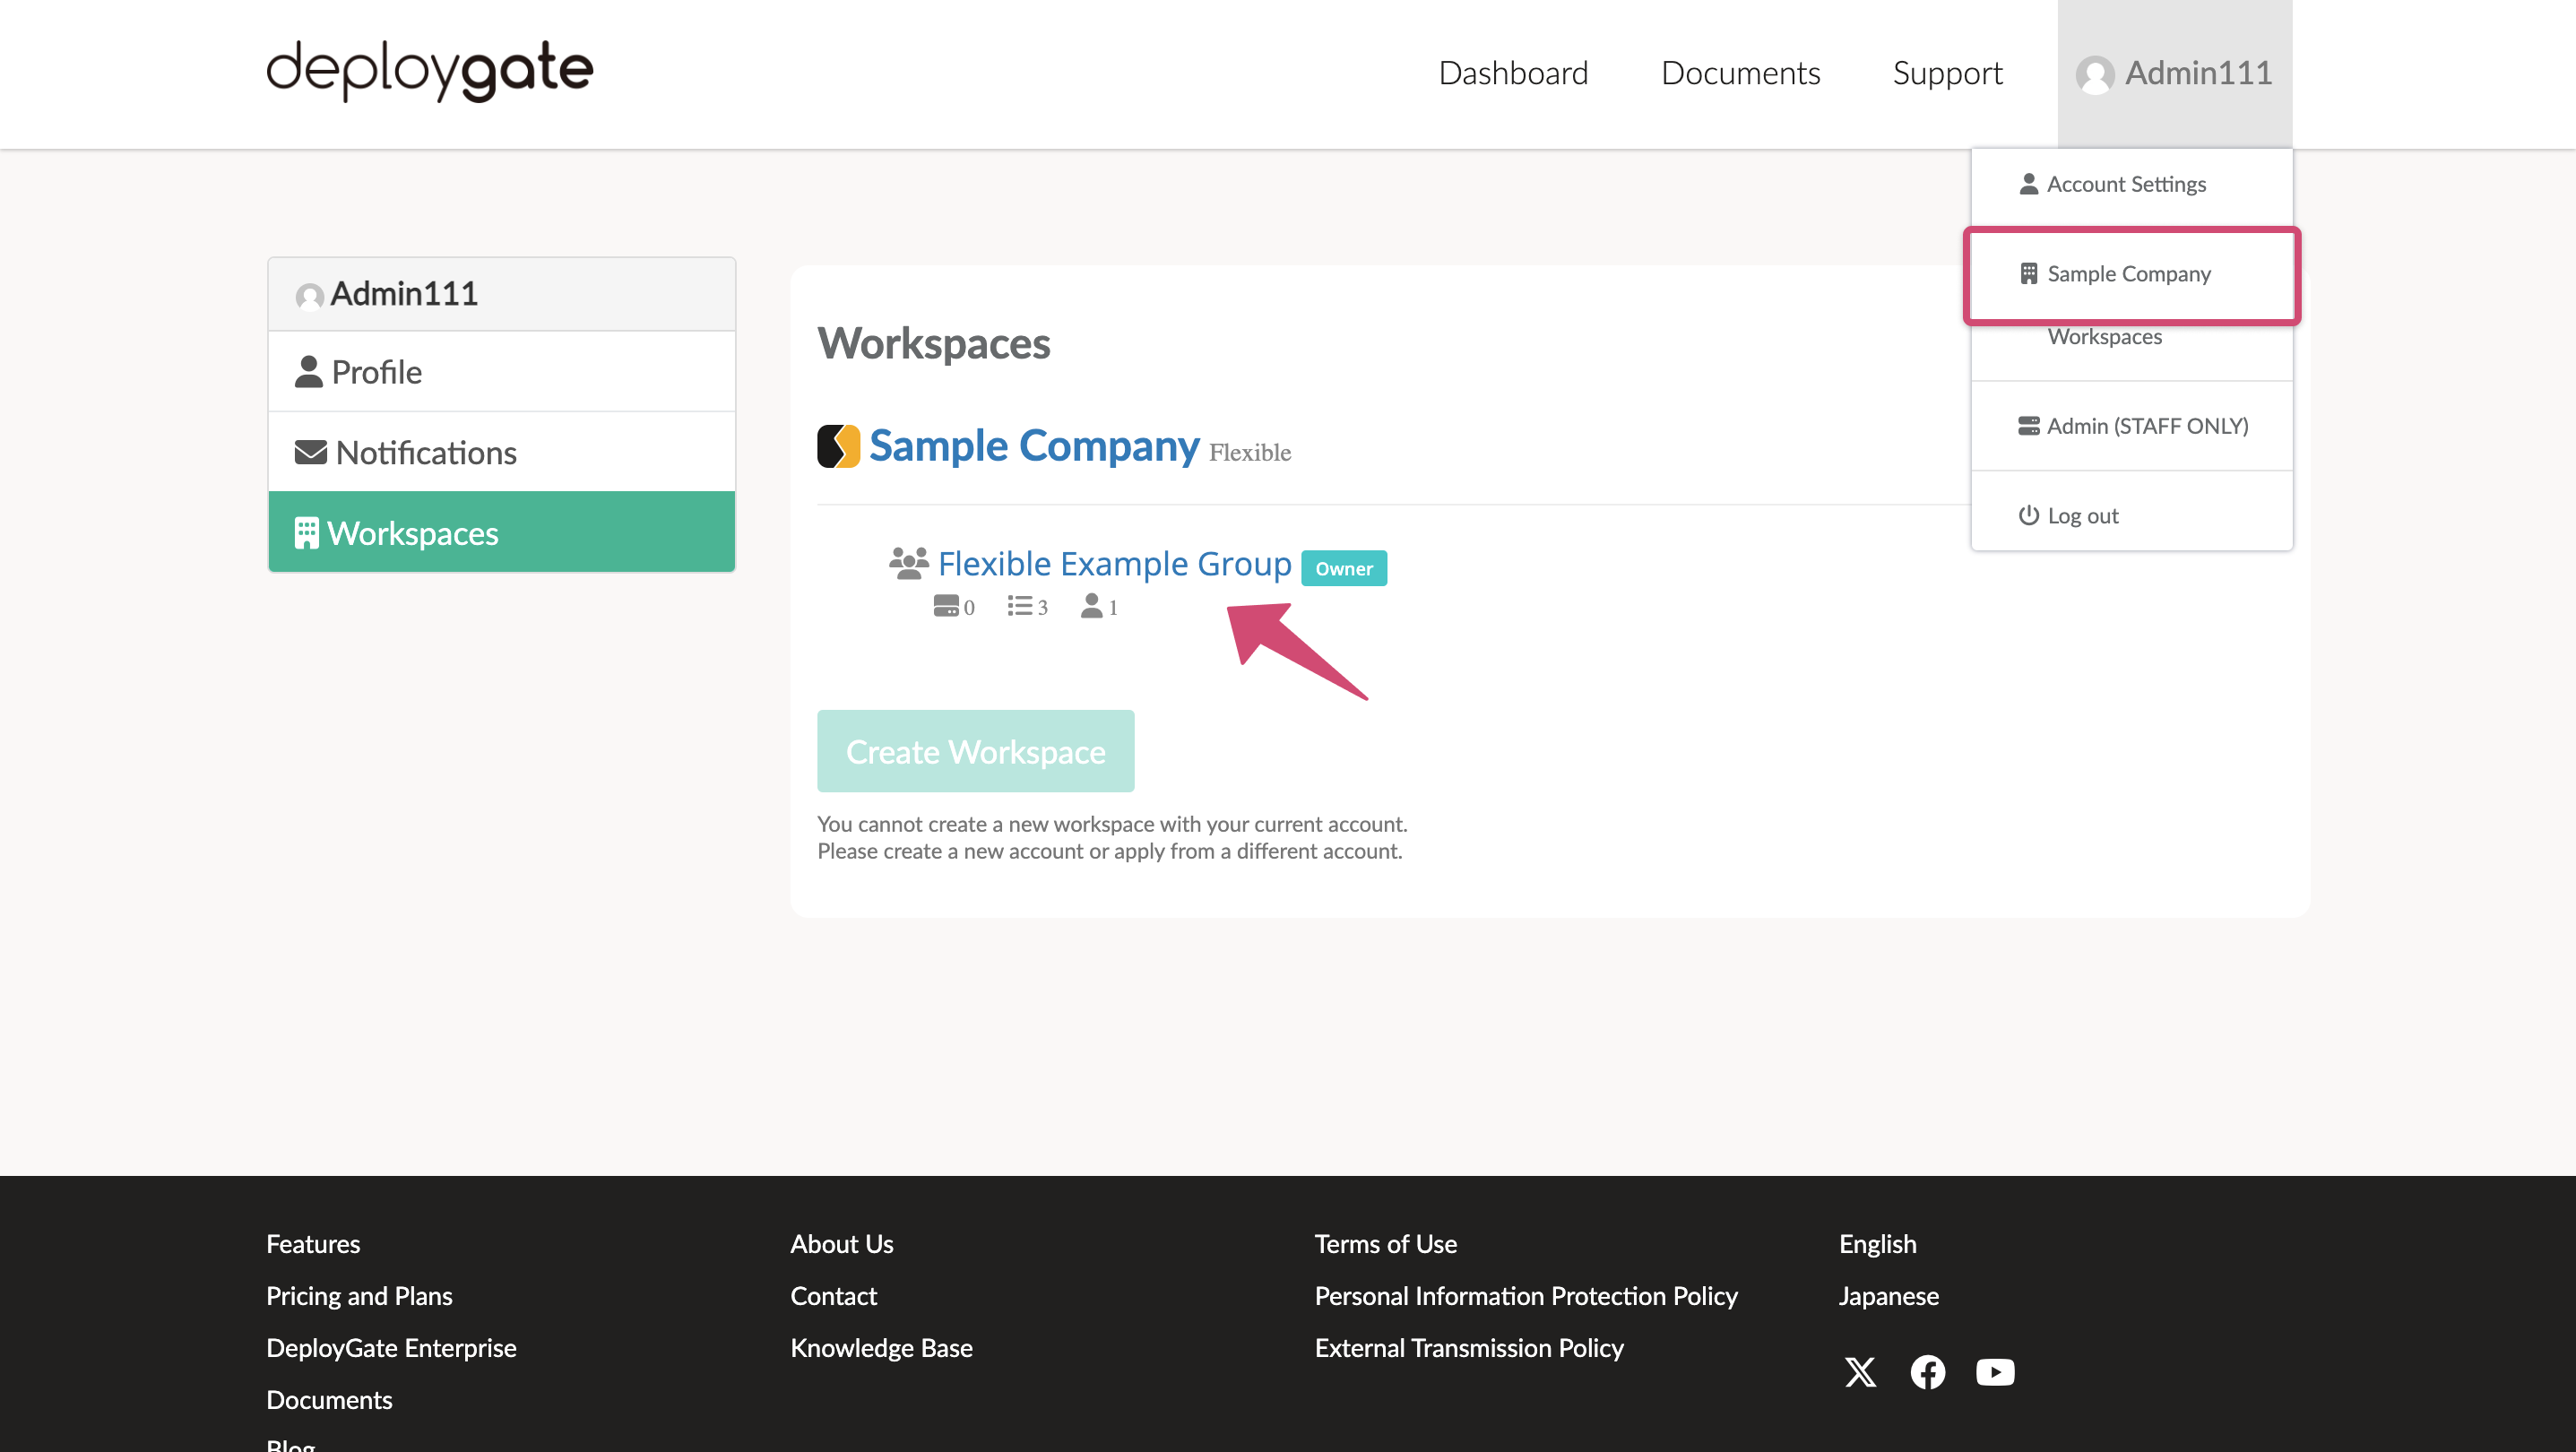
Hover over your user icon/account name at the top right of the page to view the menu and click on your Workspace name (*) to access the Workspace Admin Console. *This is the company name provided when you submitted your application.
-
Click on Settings in the upper right corner of the Workspace Admin Console to configure additional Workspace settings.
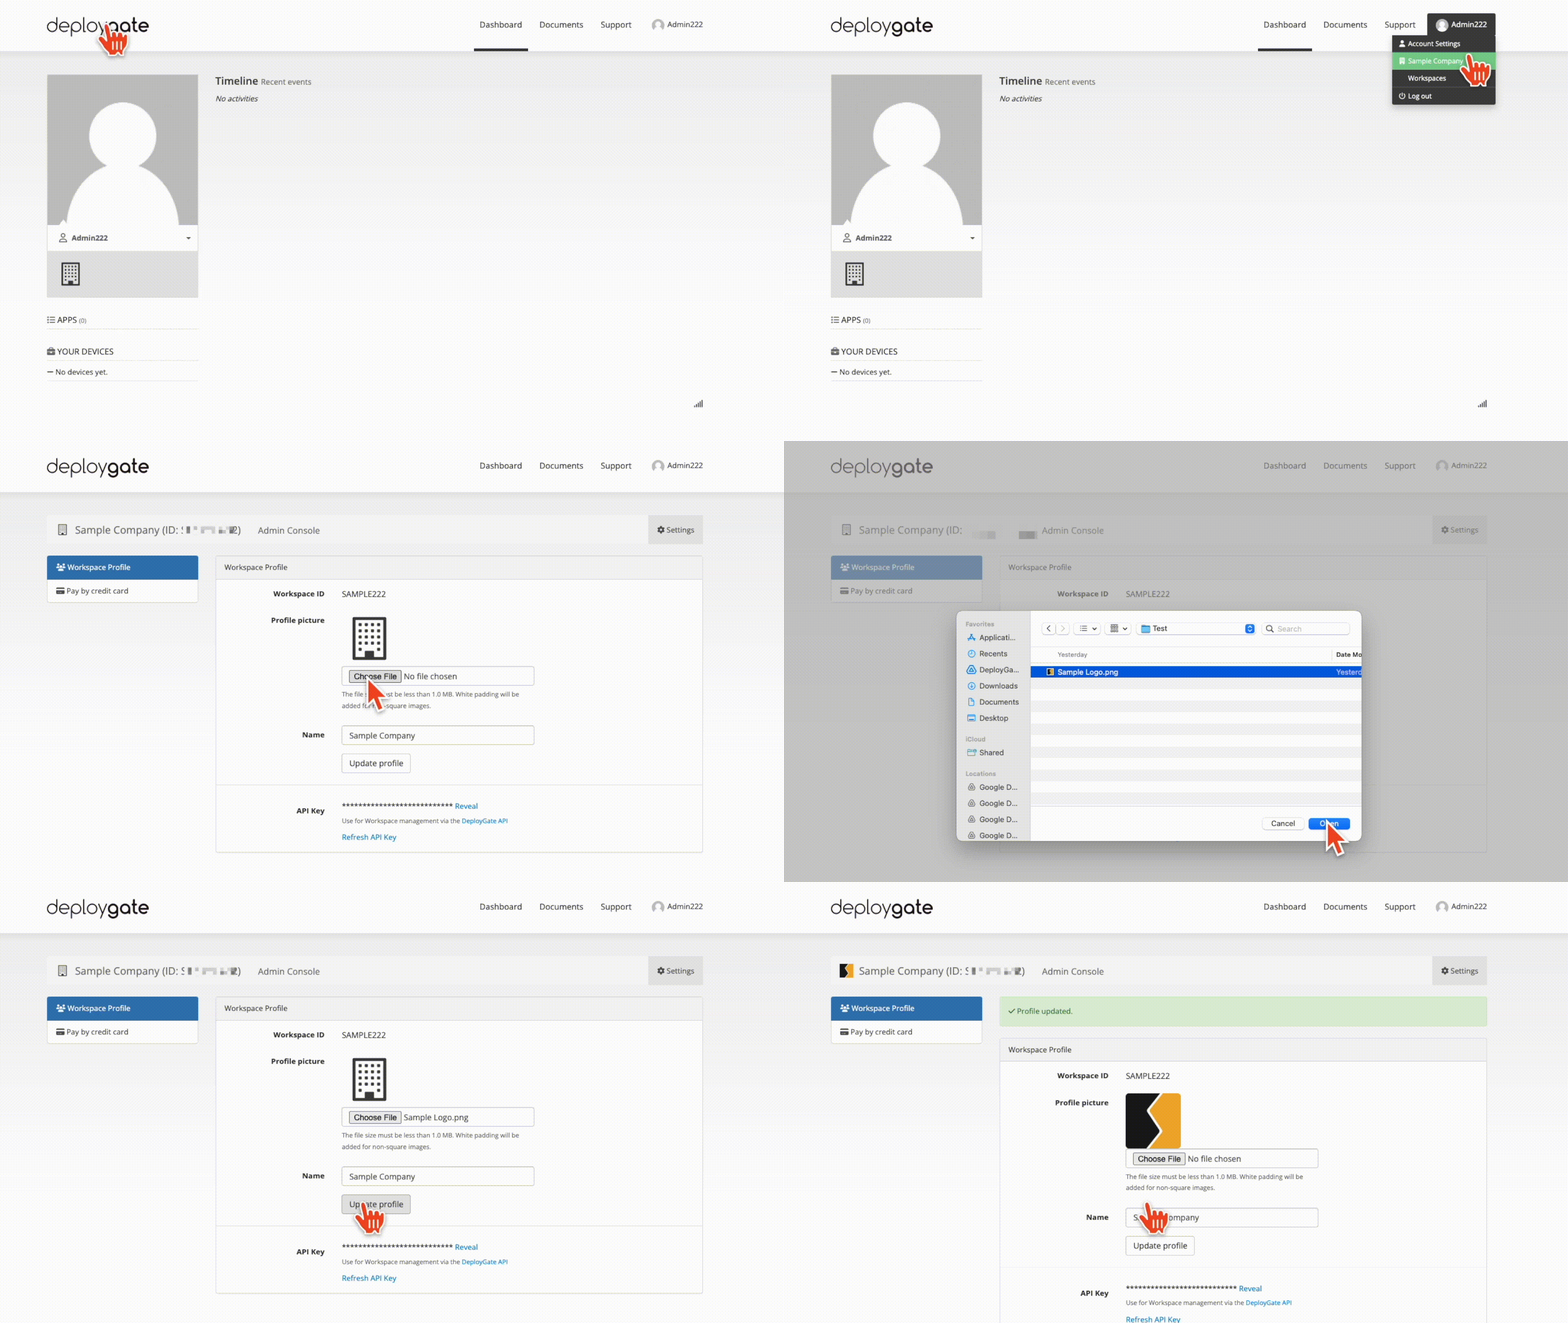
You can upload a profile image or change the Workspace display name as needed.
1.2 Create an Organization
-
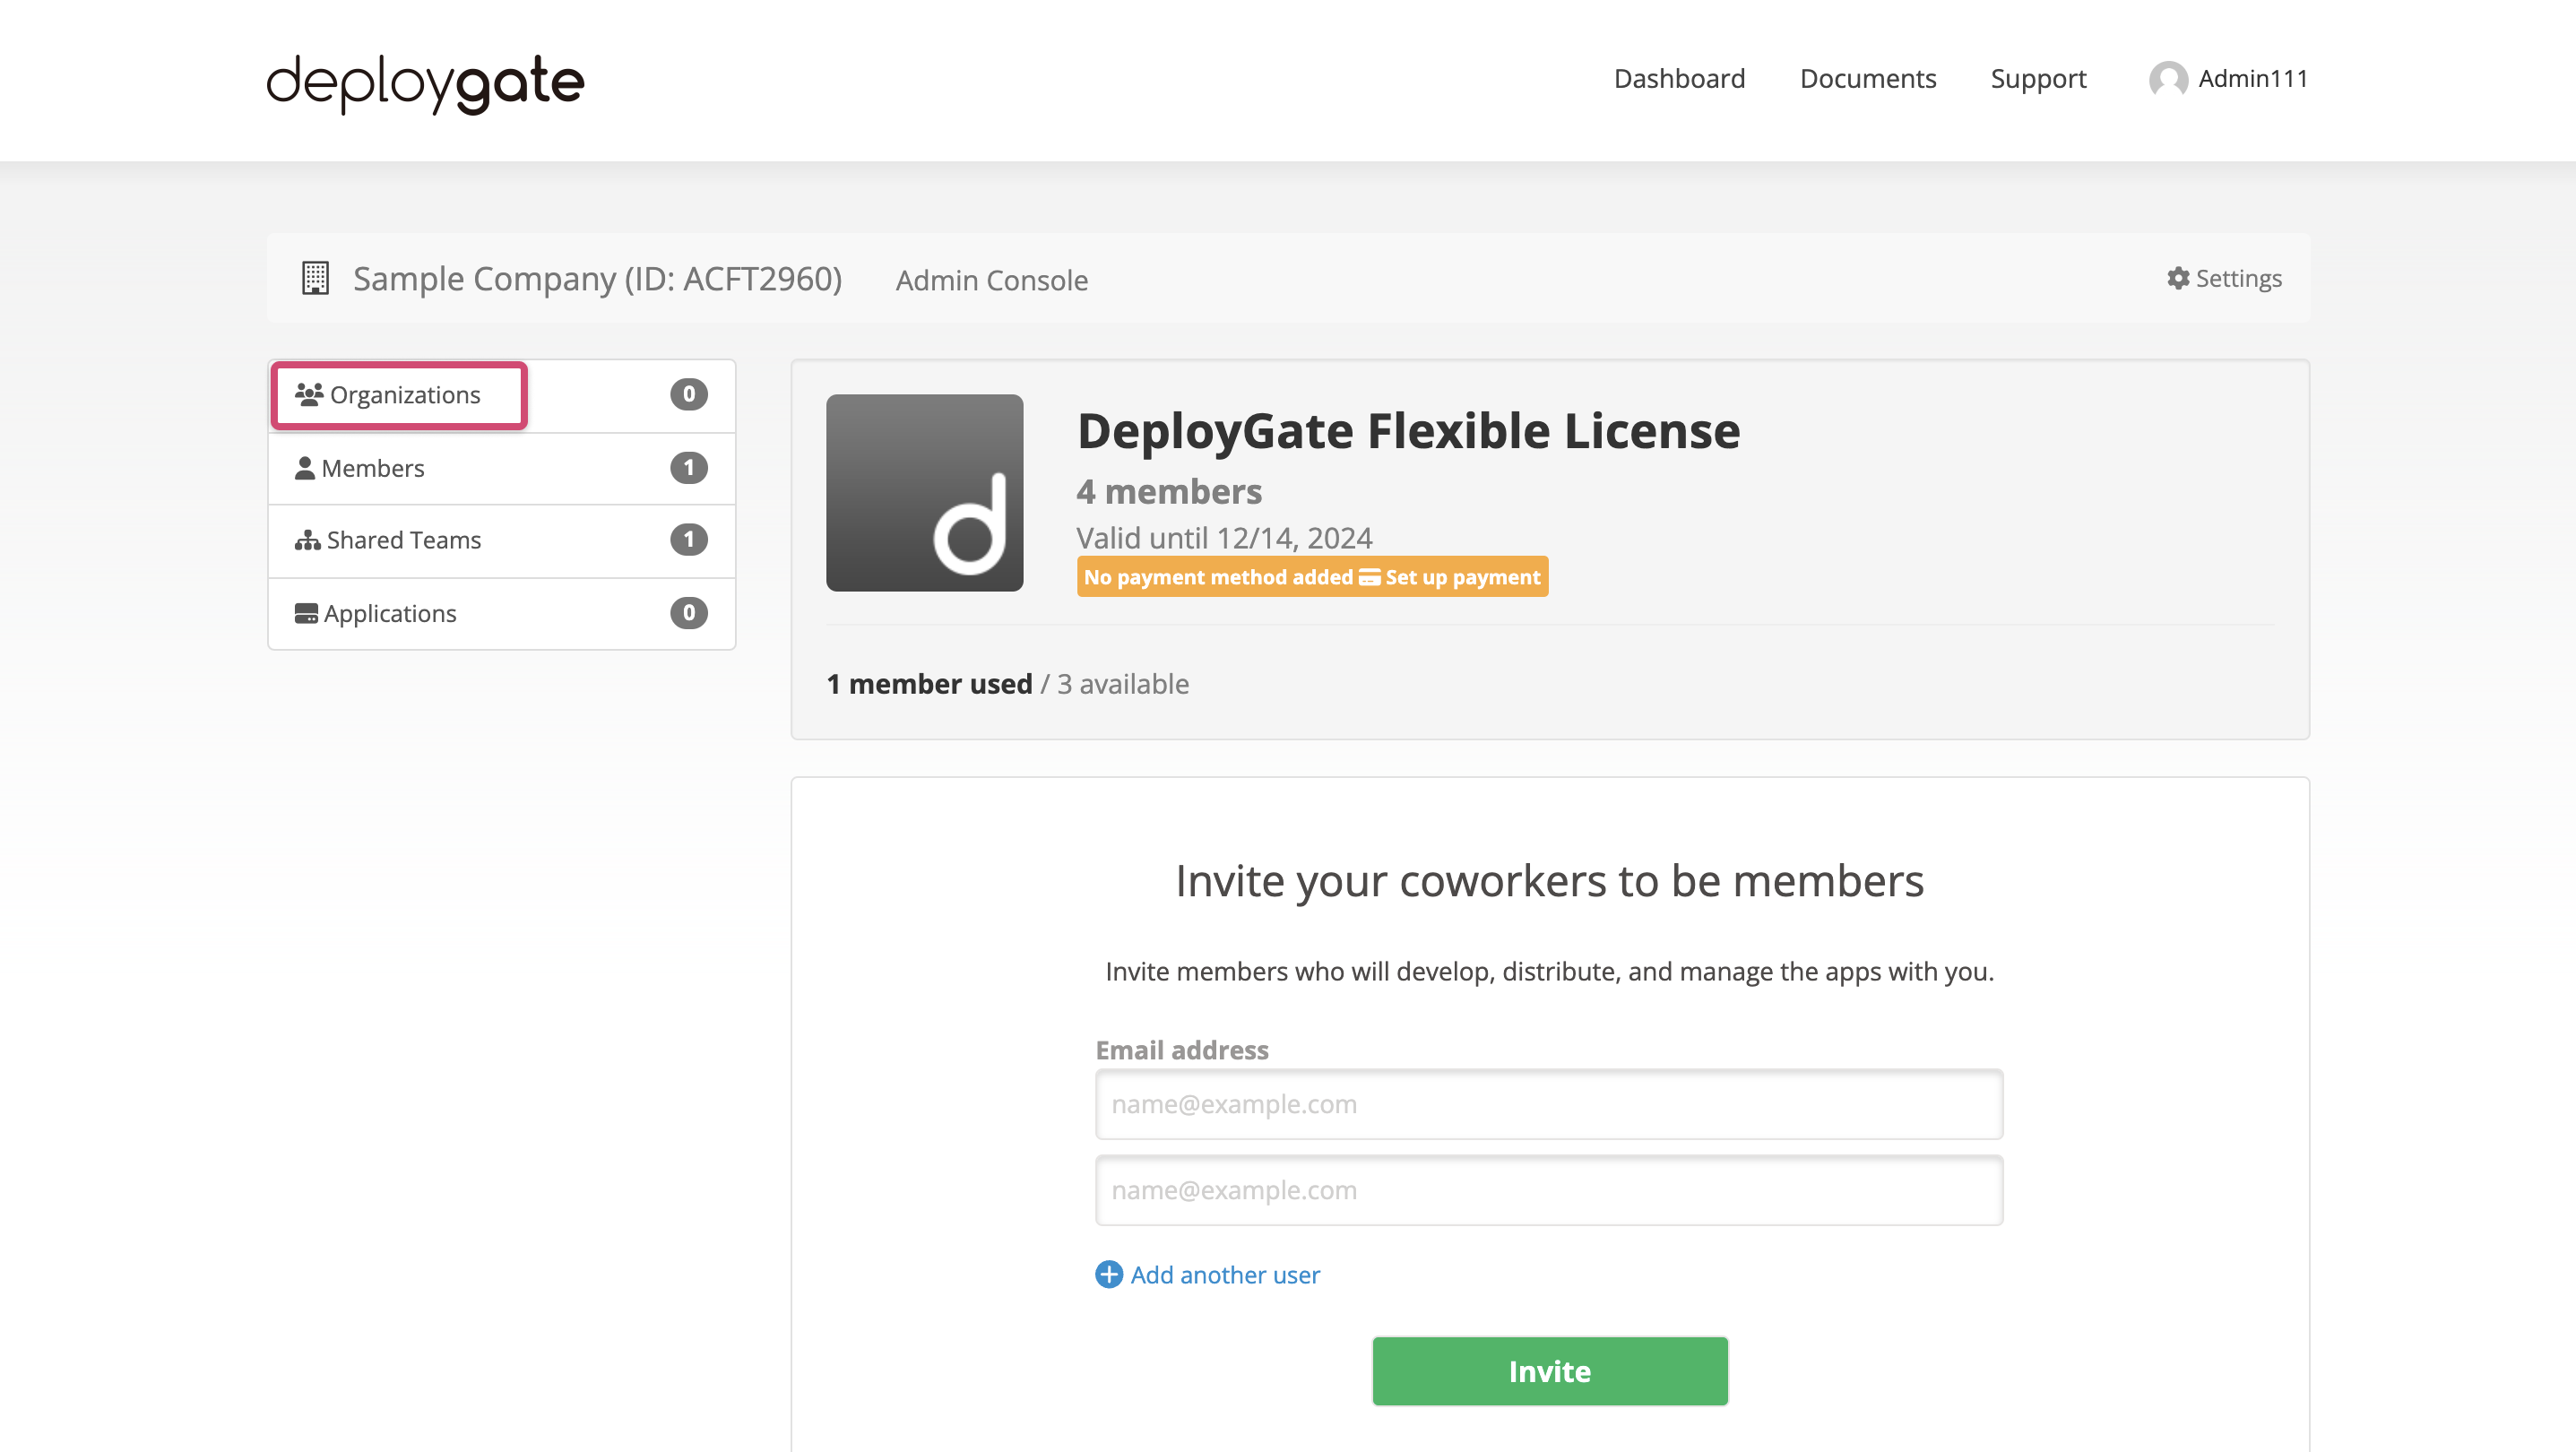
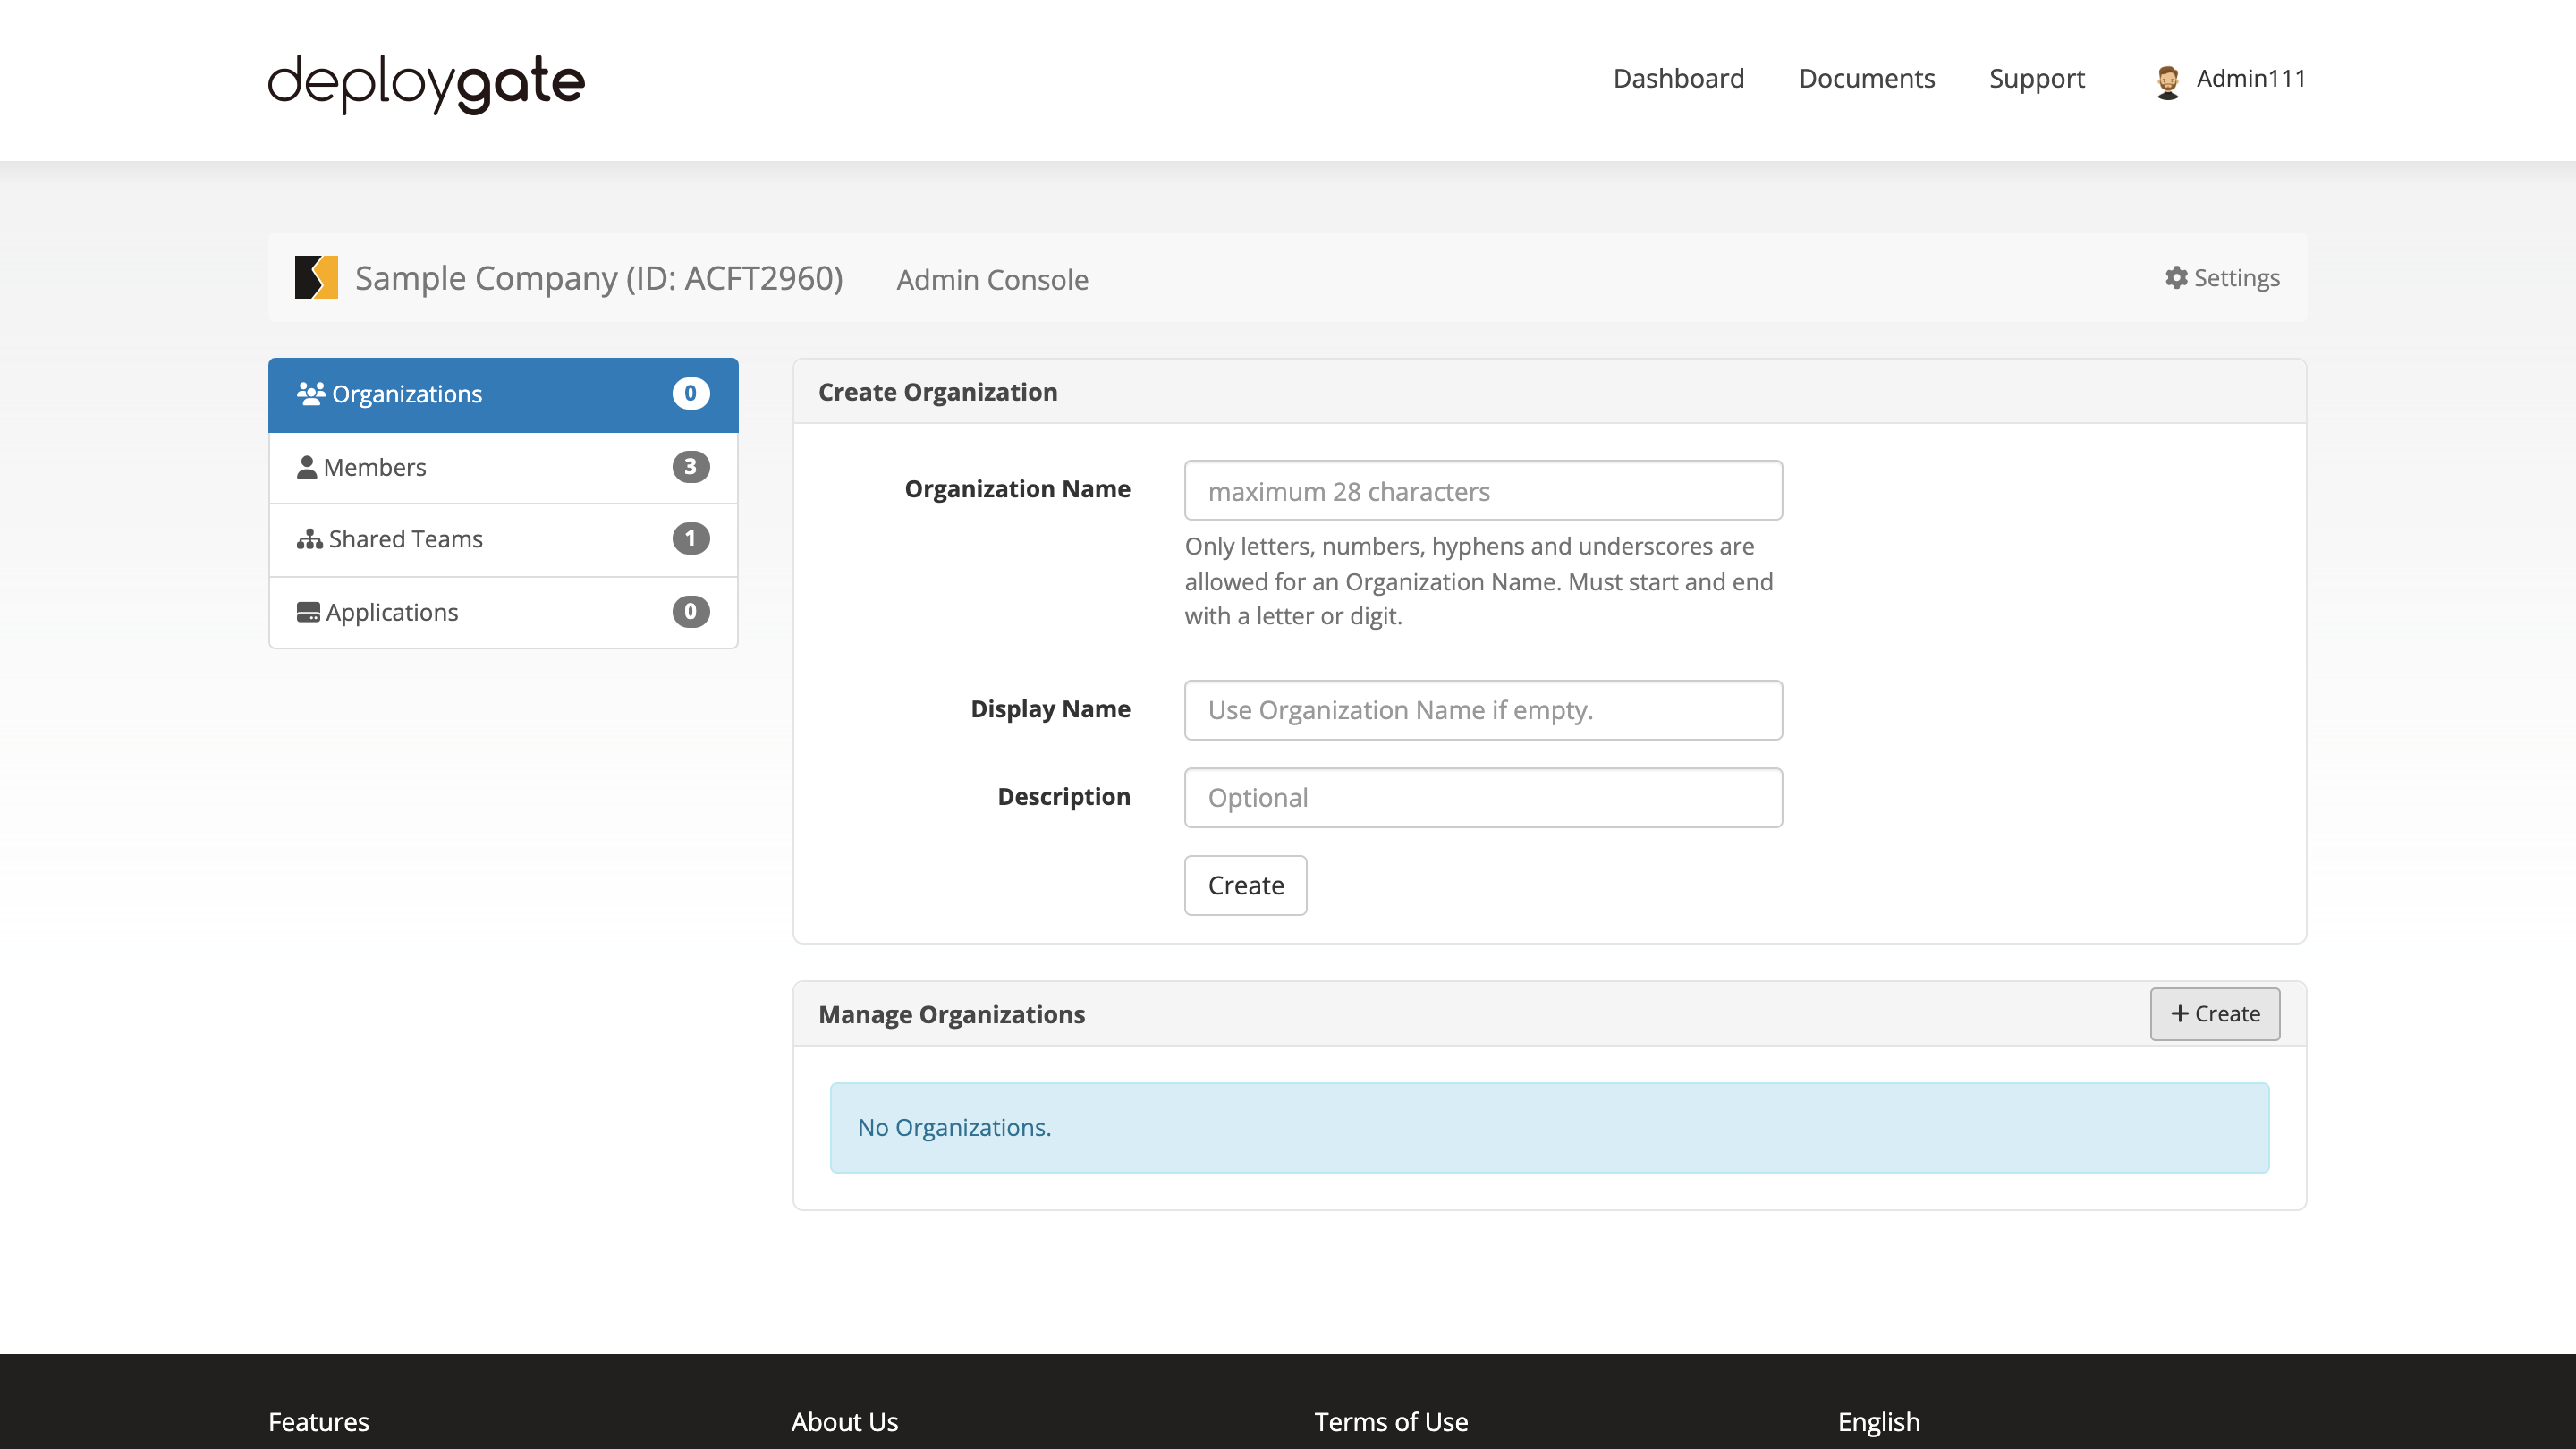
Click on
Organizations Settingsfrom the Workspace Admin Console’s left menu.
-
Click on the
Createbutton in the top right corner of the Manage Organizations screen to create a new Organization.
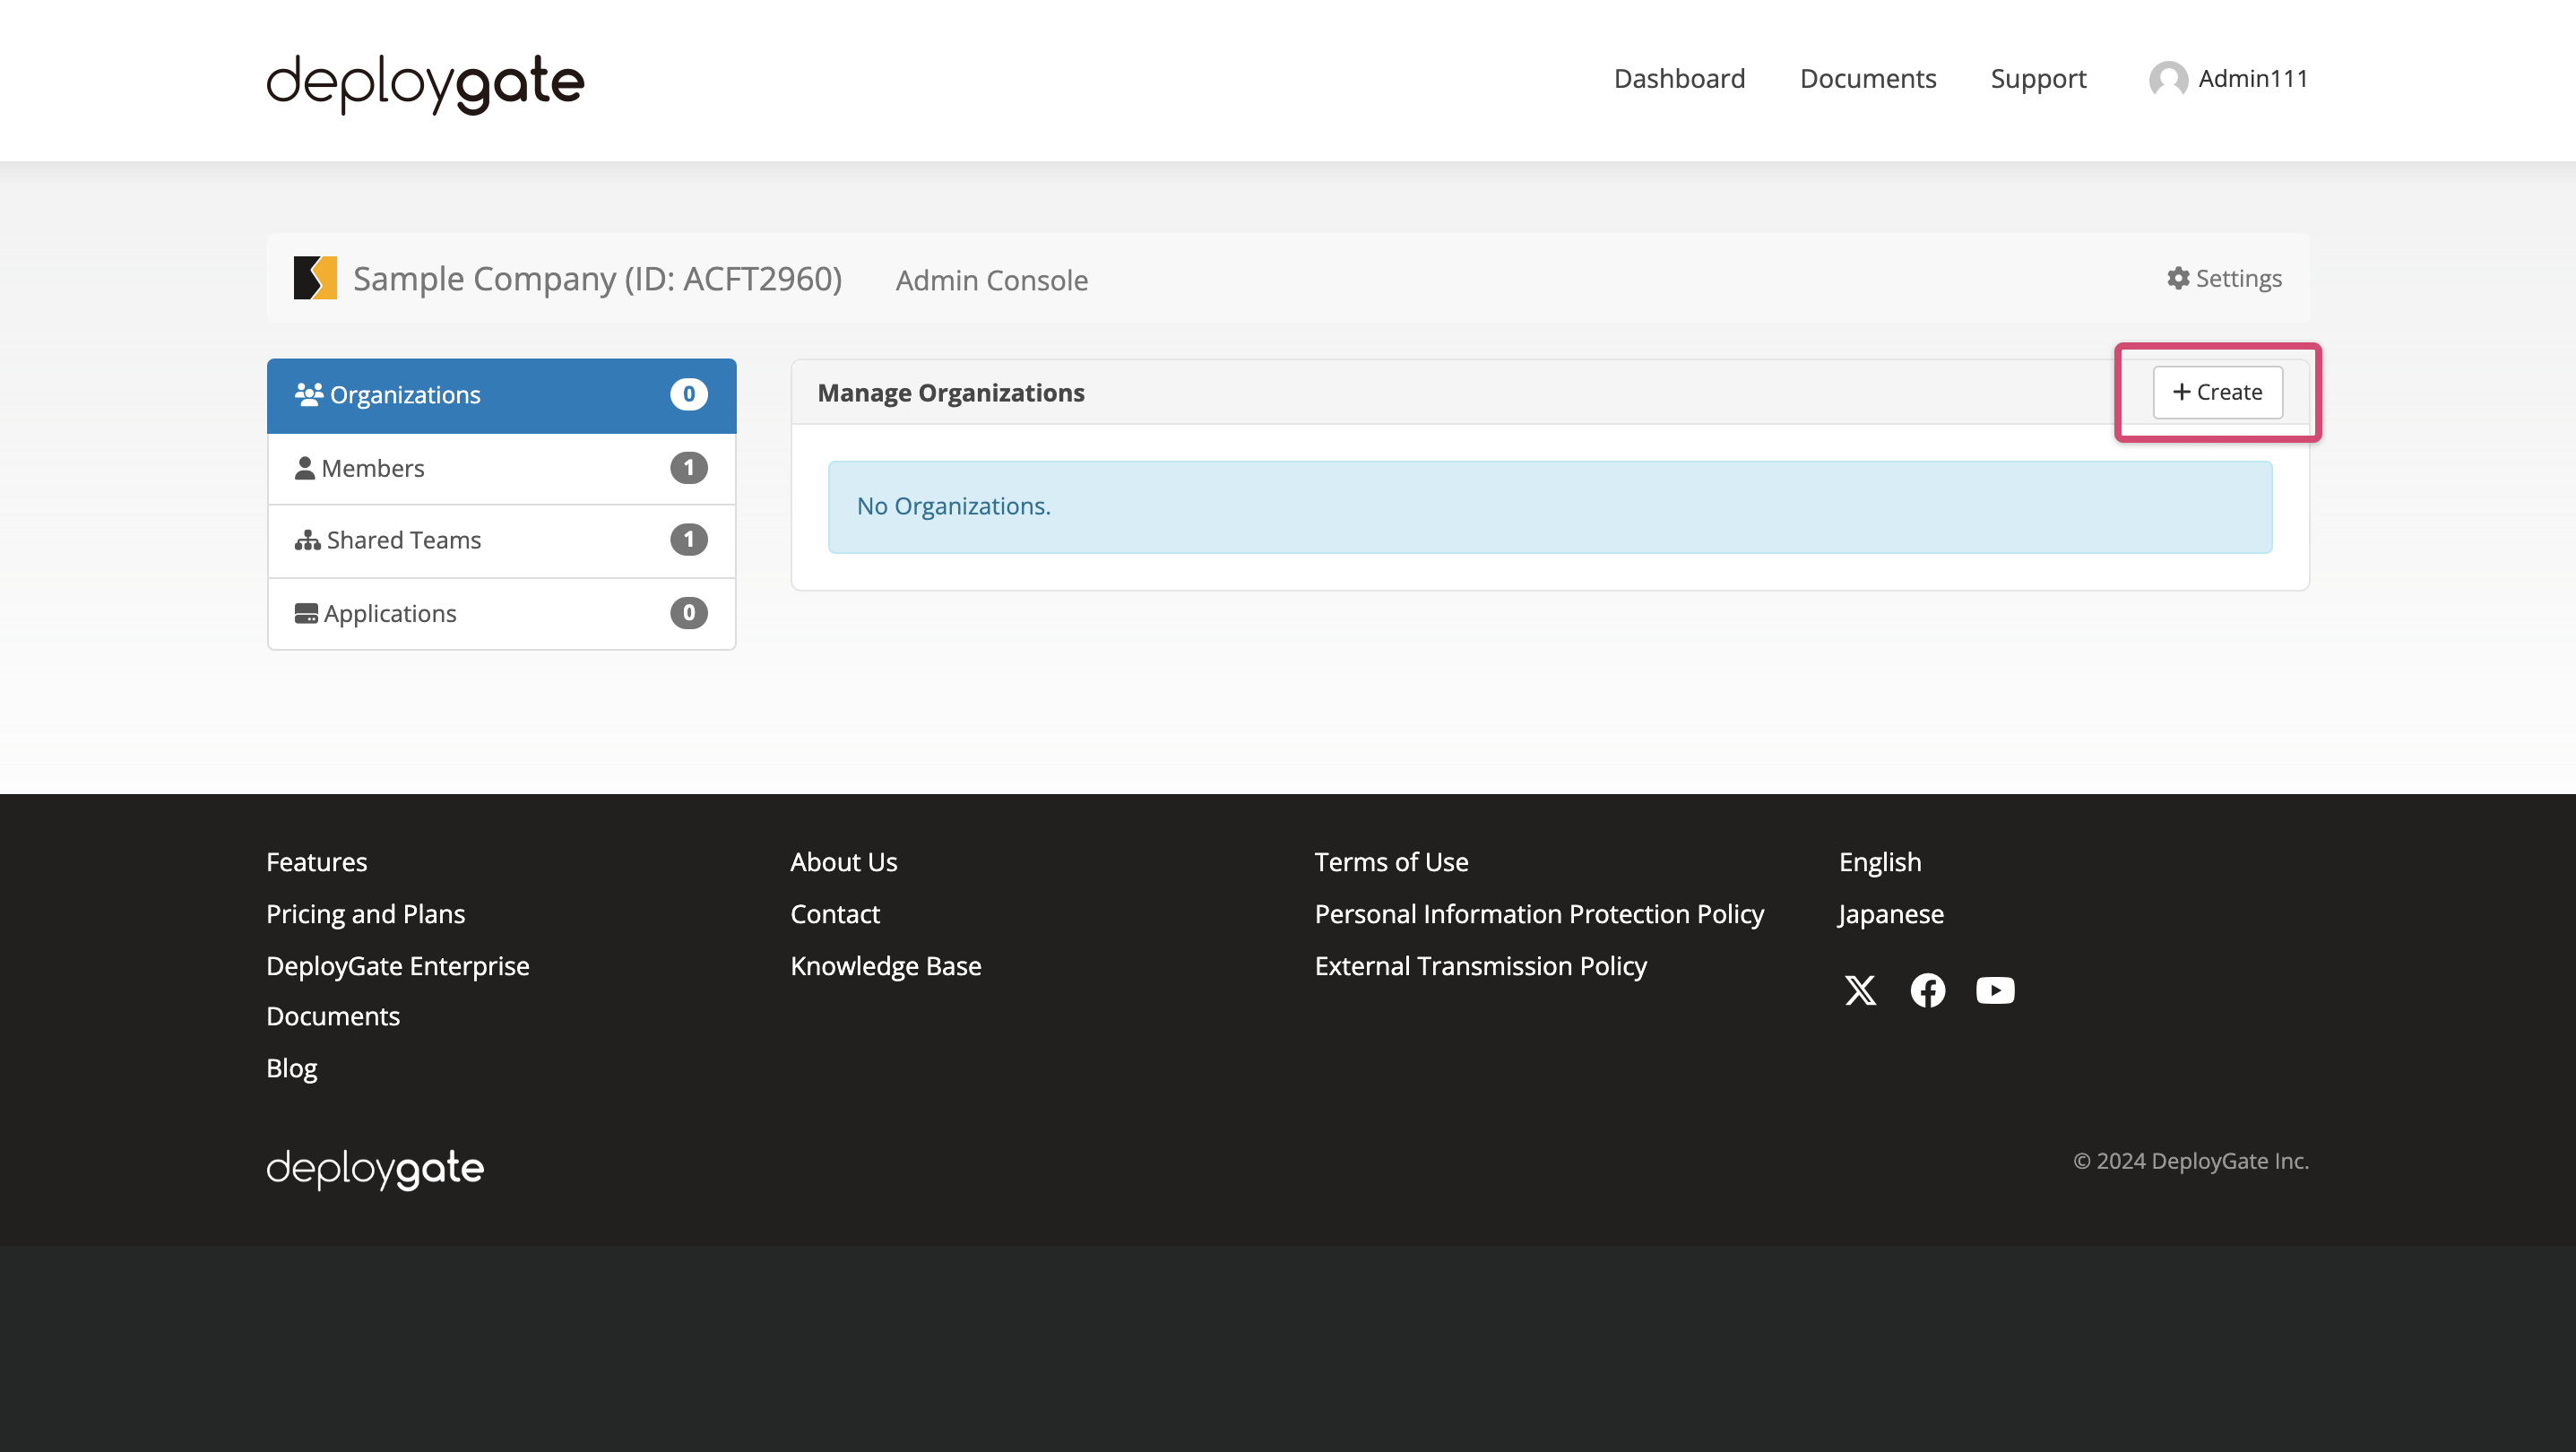
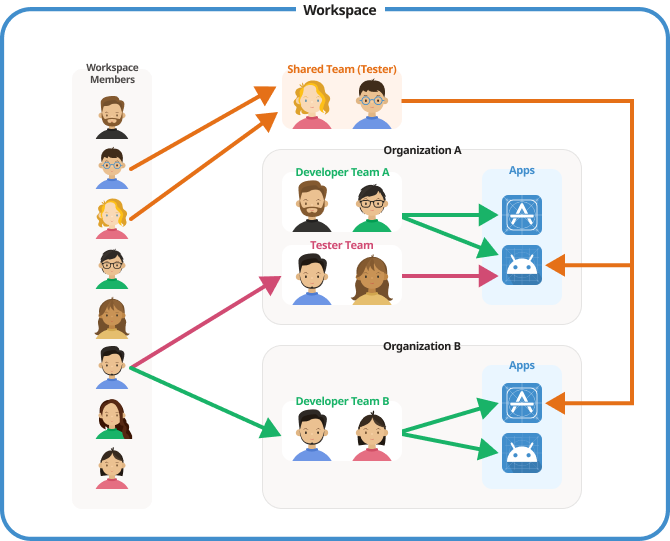
You can create multiple Organizations within a Workspace.
By creating an Organization for each project or internal department, you can manage access permissions more efficiently.
Each application will be uploaded to a specific Organization.
The following diagram illustrates the relationships between Workspaces, Organizations, Teams, and Applications.
- Enter the Organization name, display name (optional), and Organization description (optional), then click
Create.
While you can change the display name at any time, you cannot modify the Organization name once selected.
- Click on
Organizationsfrom the left menu to return to the Manage Organizations screen. You should see the newly created Organization in the list.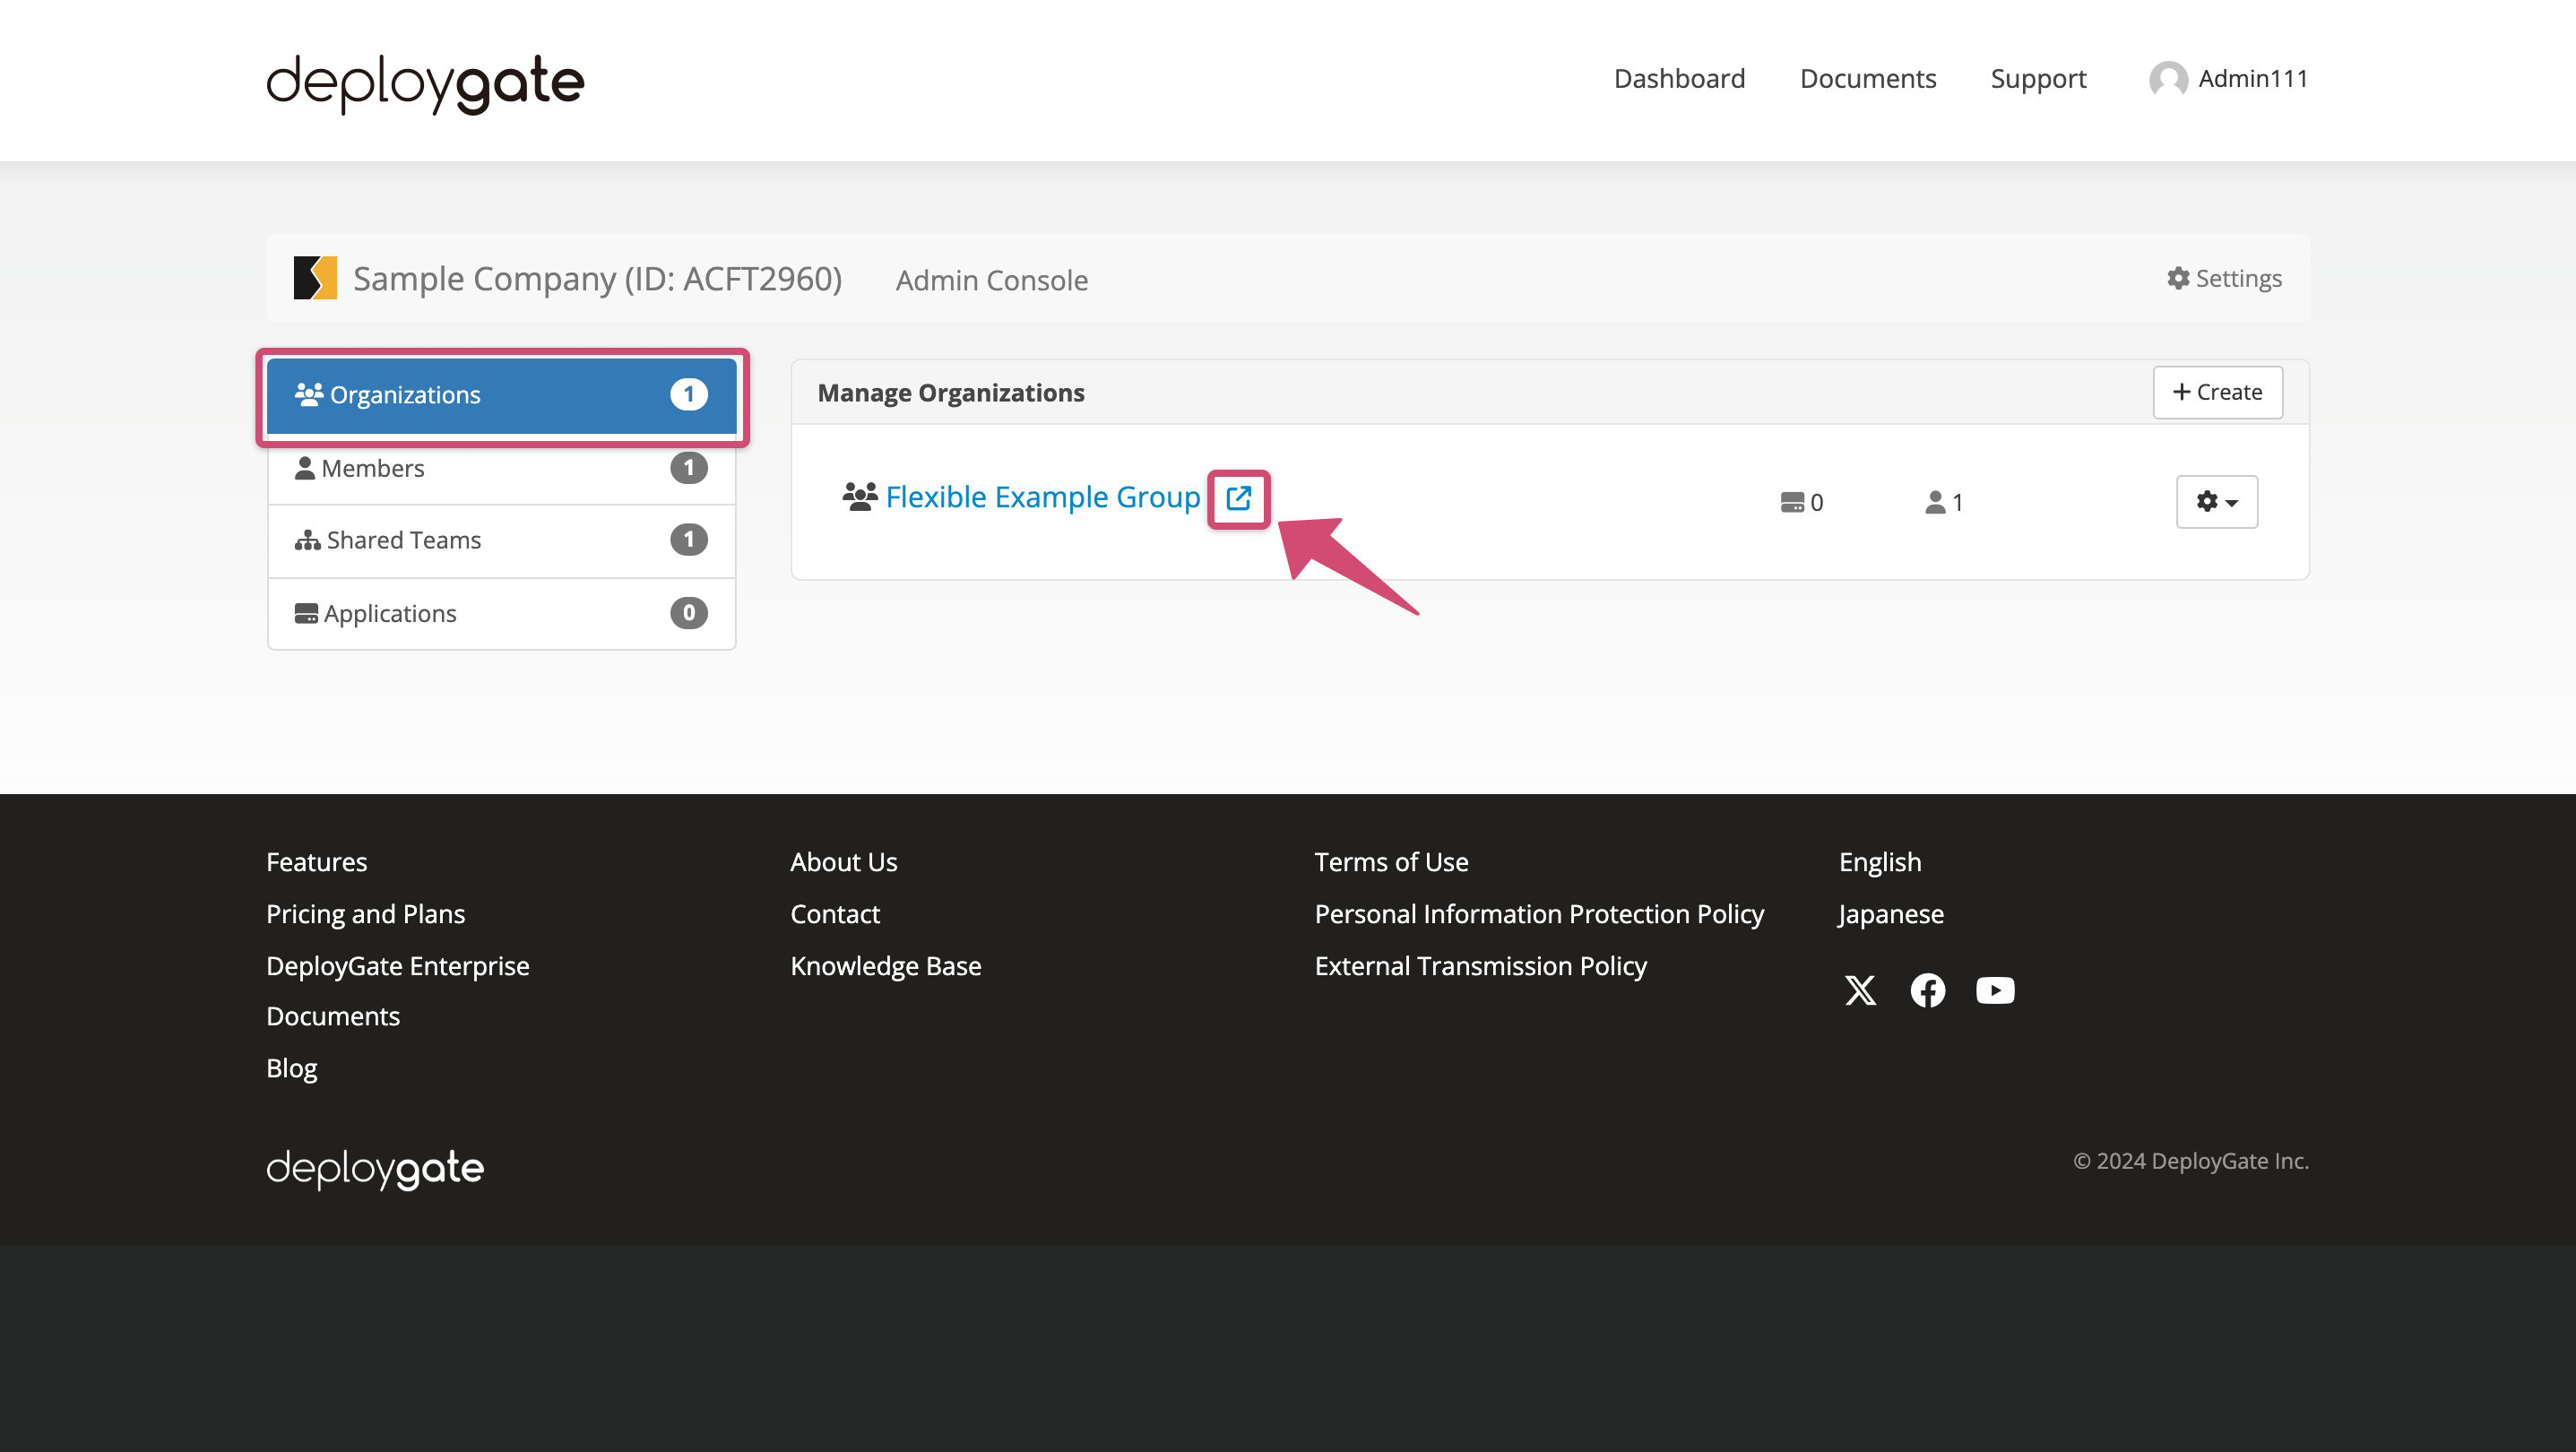
1.3 Uploading an Application
-
Hover over your user icon/account name at the top right of the page to view the menu and click on
Workspaces. -
On this screen, you will see a list of Organizations created within the Workspace. Click on the Organization you created earlier.
-
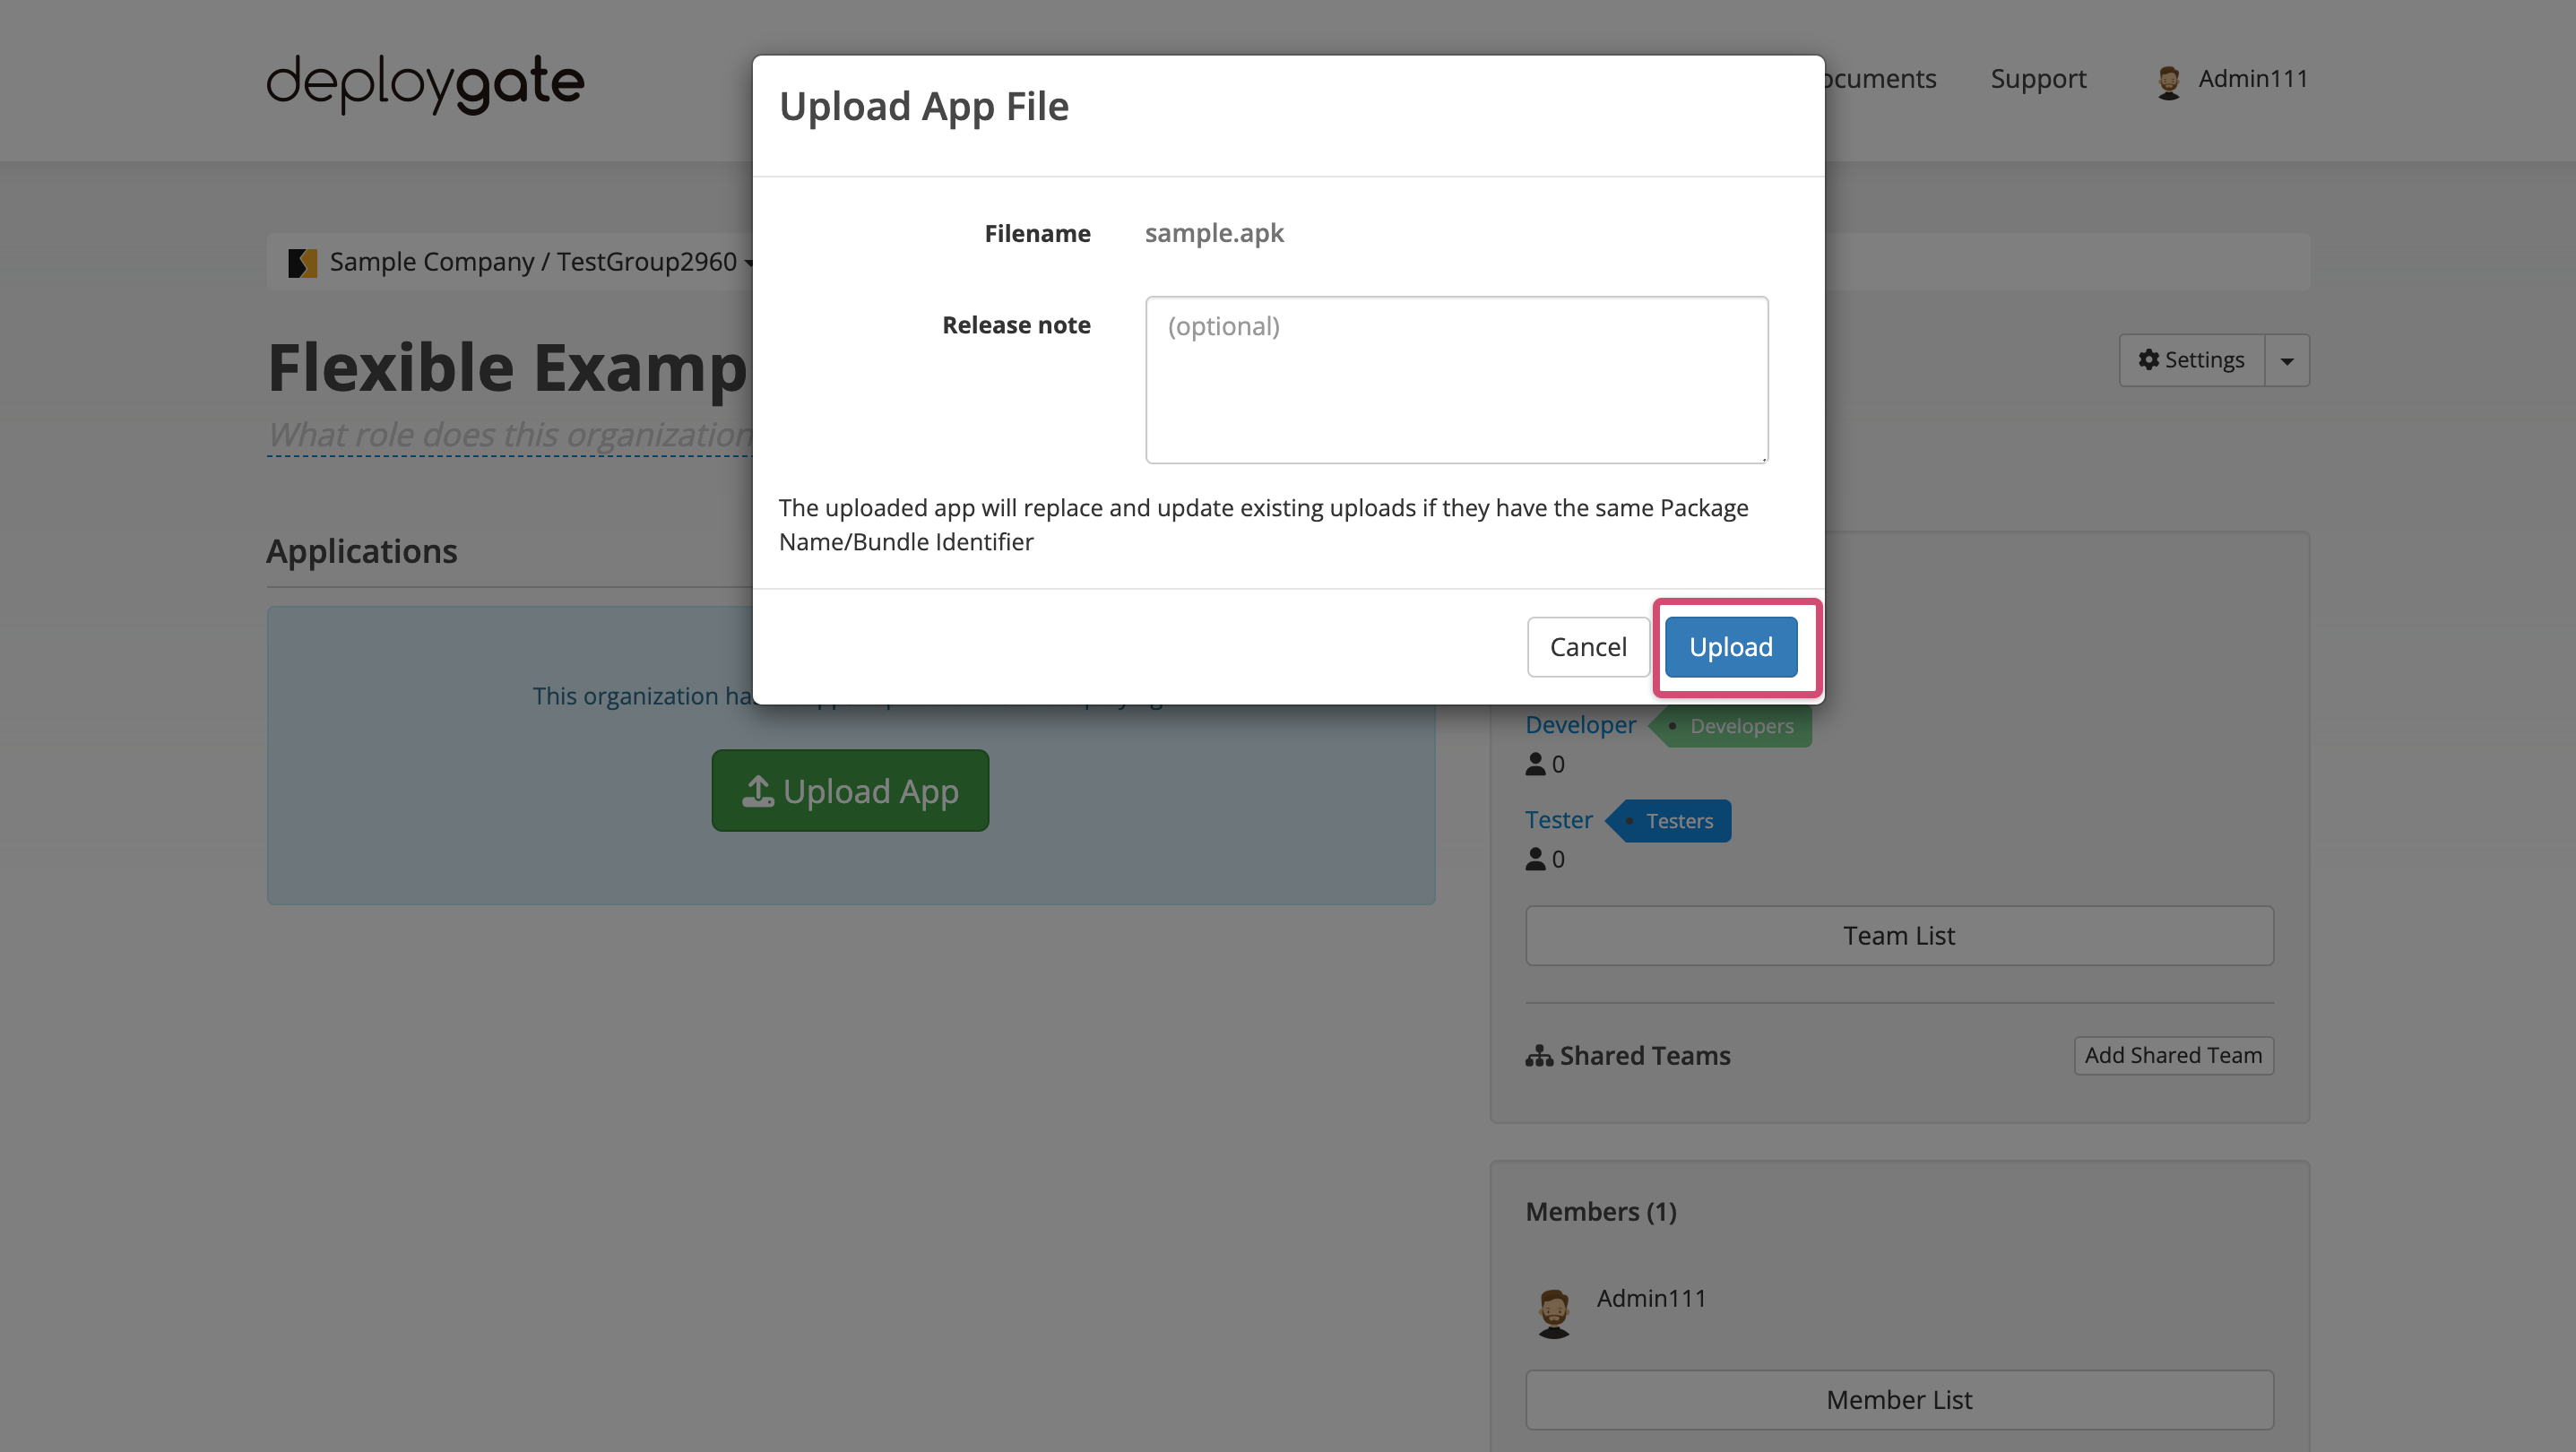
When the following screen appears, click the
Uploadbutton.
This will open a file selection dialog. Select an APK/AAB file or an IPA file to upload the app to the Organization.
Once the upload is complete, the app management screen will open.
-
After uploading the app, you will be redirected to the App Details screen, as shown below. A QR code for installing the app on your device will appear.
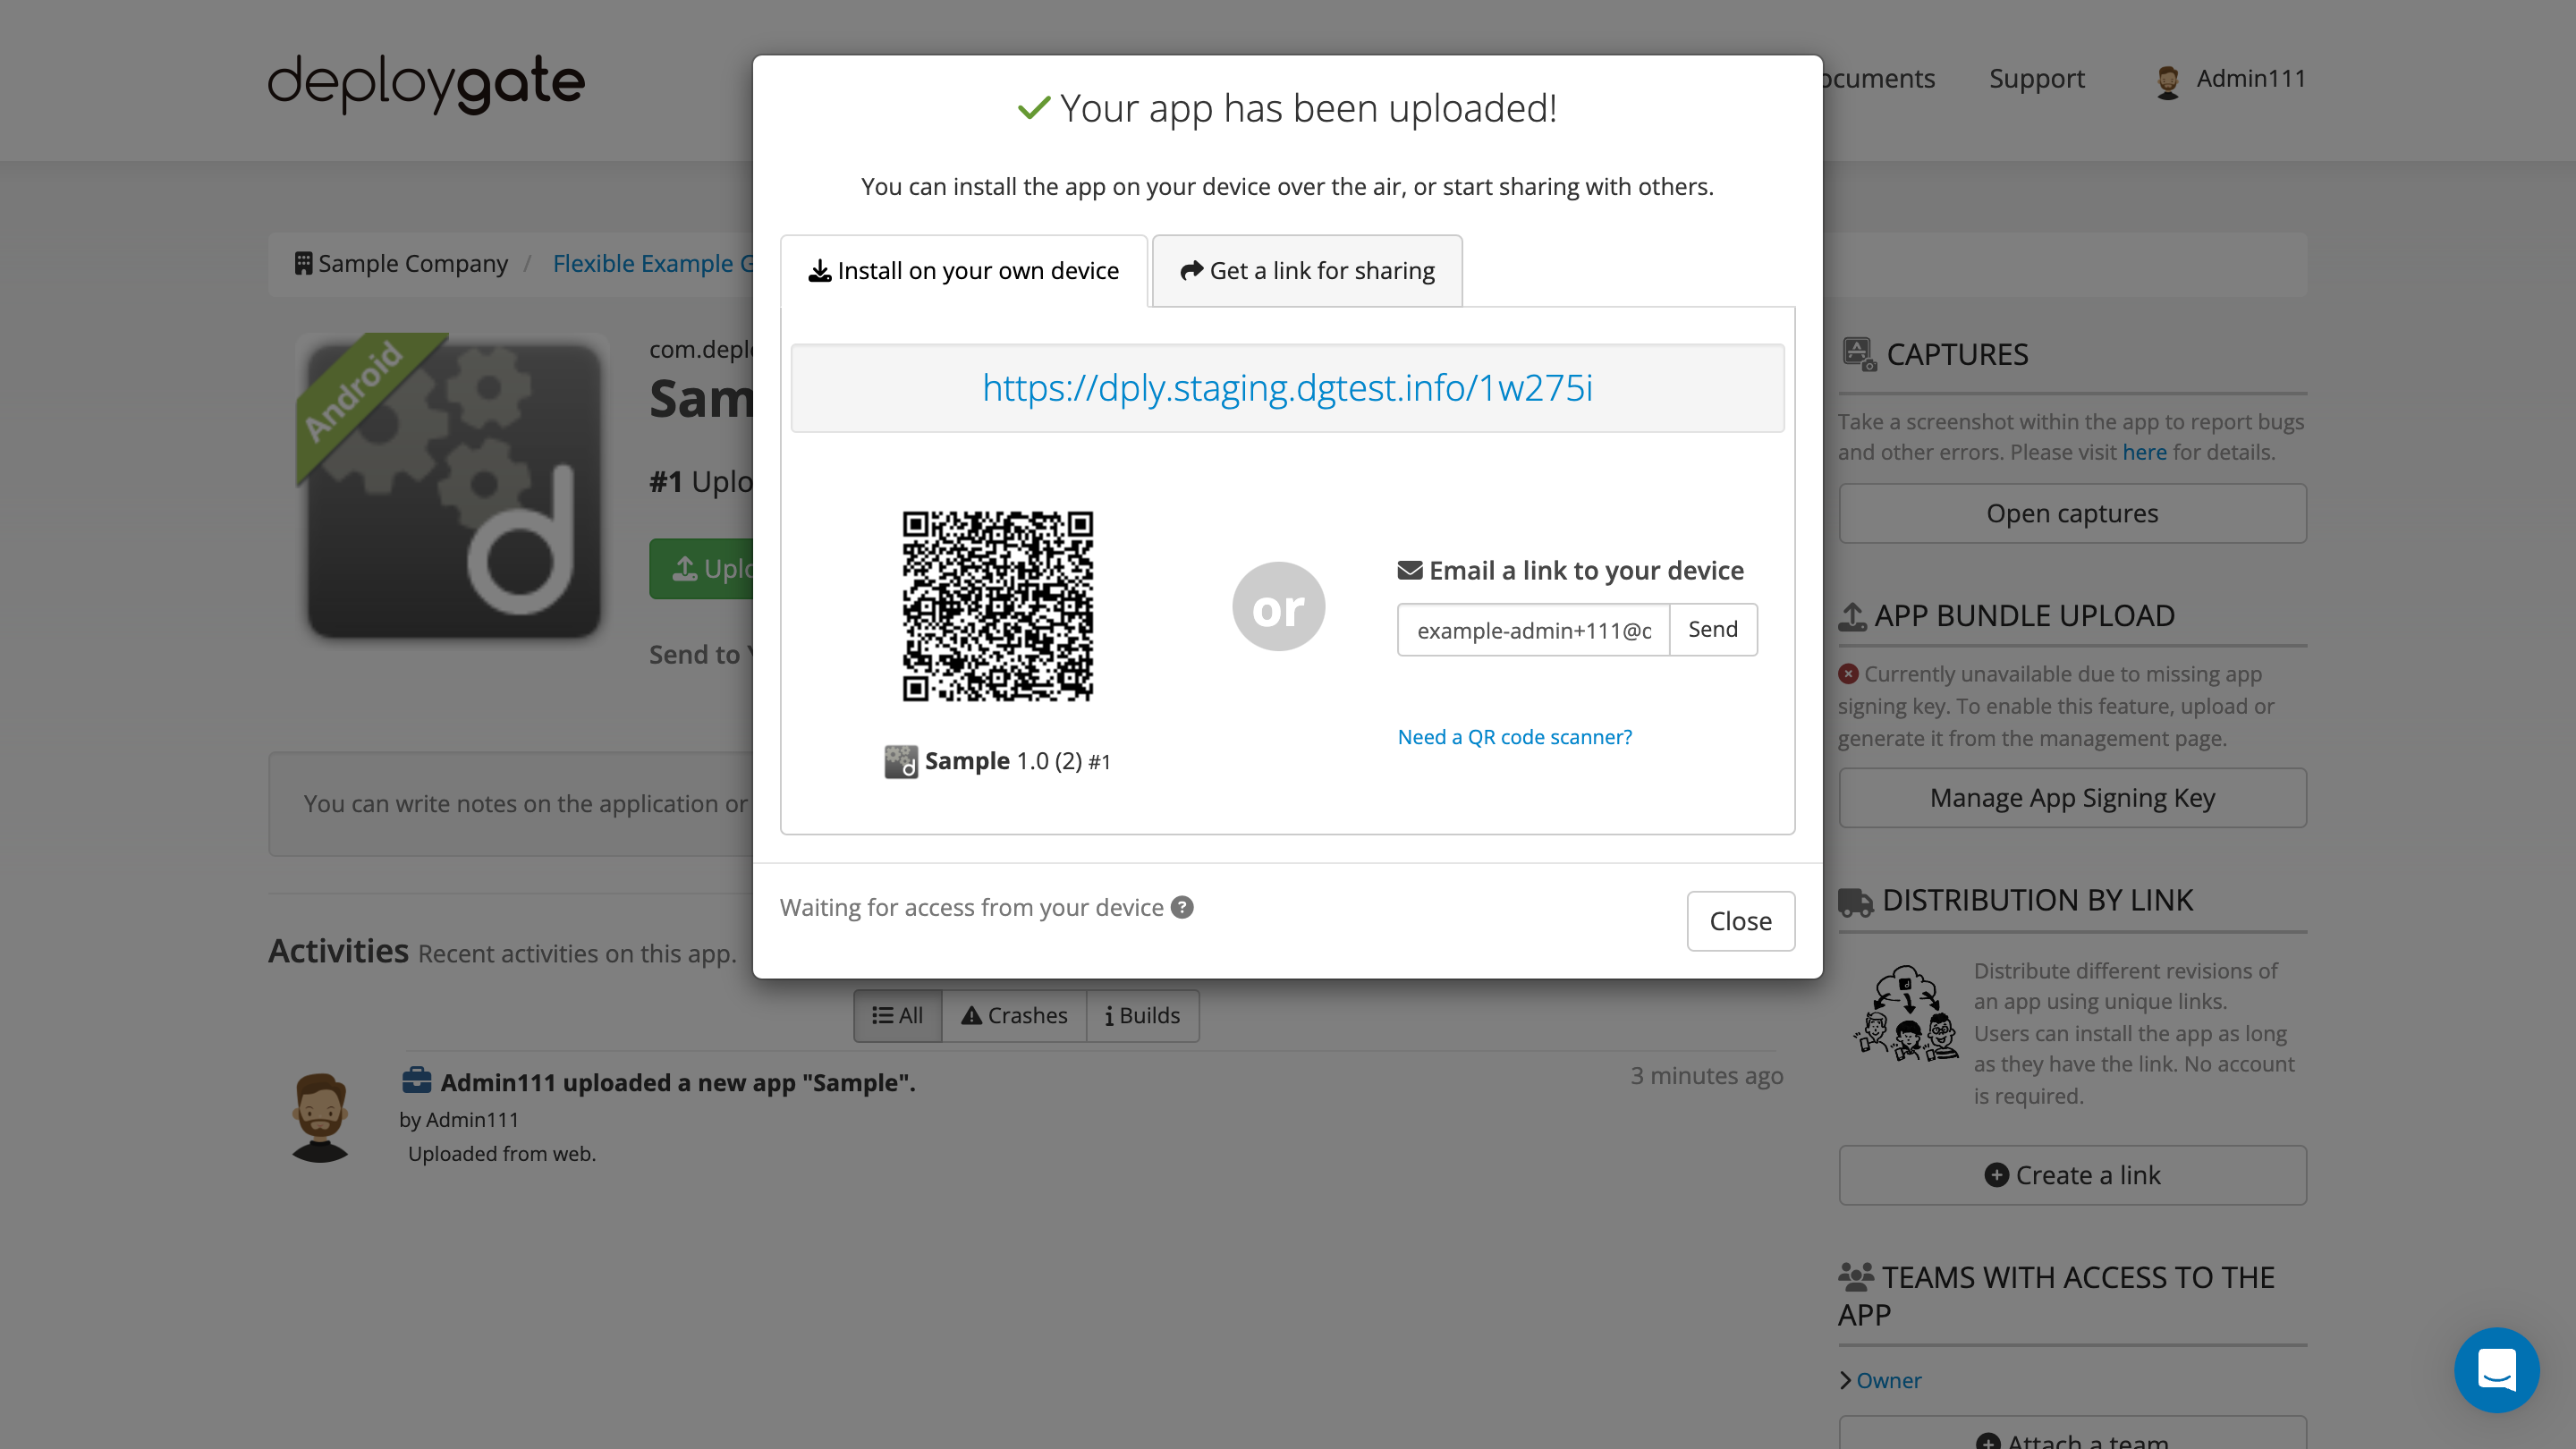
1.4 Installing the App on your Device
Please refer to the following documents for information on installing apps on your device:
2. Distribute the App to Others
2.1 Distribute App by Member Distribution Method
DeployGate offers two distribution methods: "Member Distribution" and "Link Distribution."
- Member Distribution: Ideal for regularly sharing the app with specific users, such as a development team.
- Requires account registration
- Update notifications available
- Detailed log management
- Access to all revisions
- Link Distribution: Ideal for sharing a specific app revision with a wide range of testers.
- No account registration required
- Distribution limited to one revision
For more details, please refer to Two Distribution Methods.
You can also choose different distribution methods depending on the application.
2.2 Inviting Members to the Workspace for Member Distribution
Let’s try Member Distribution, where testers register accounts and participate as members.
Using Member Distribution offers several benefits, such as:
- More detailed log tracking
- Access control via accounts
- Access to features like the Capture Feature.
You can invite members using methods such as Inviting Members from the Workspace or Inviting Members via API.
In this example, we will invite members directly from the Team to grant them access to the application.
-
From the left menu, click on
Organizations, then click the icon next to the applicable Organization in the list.
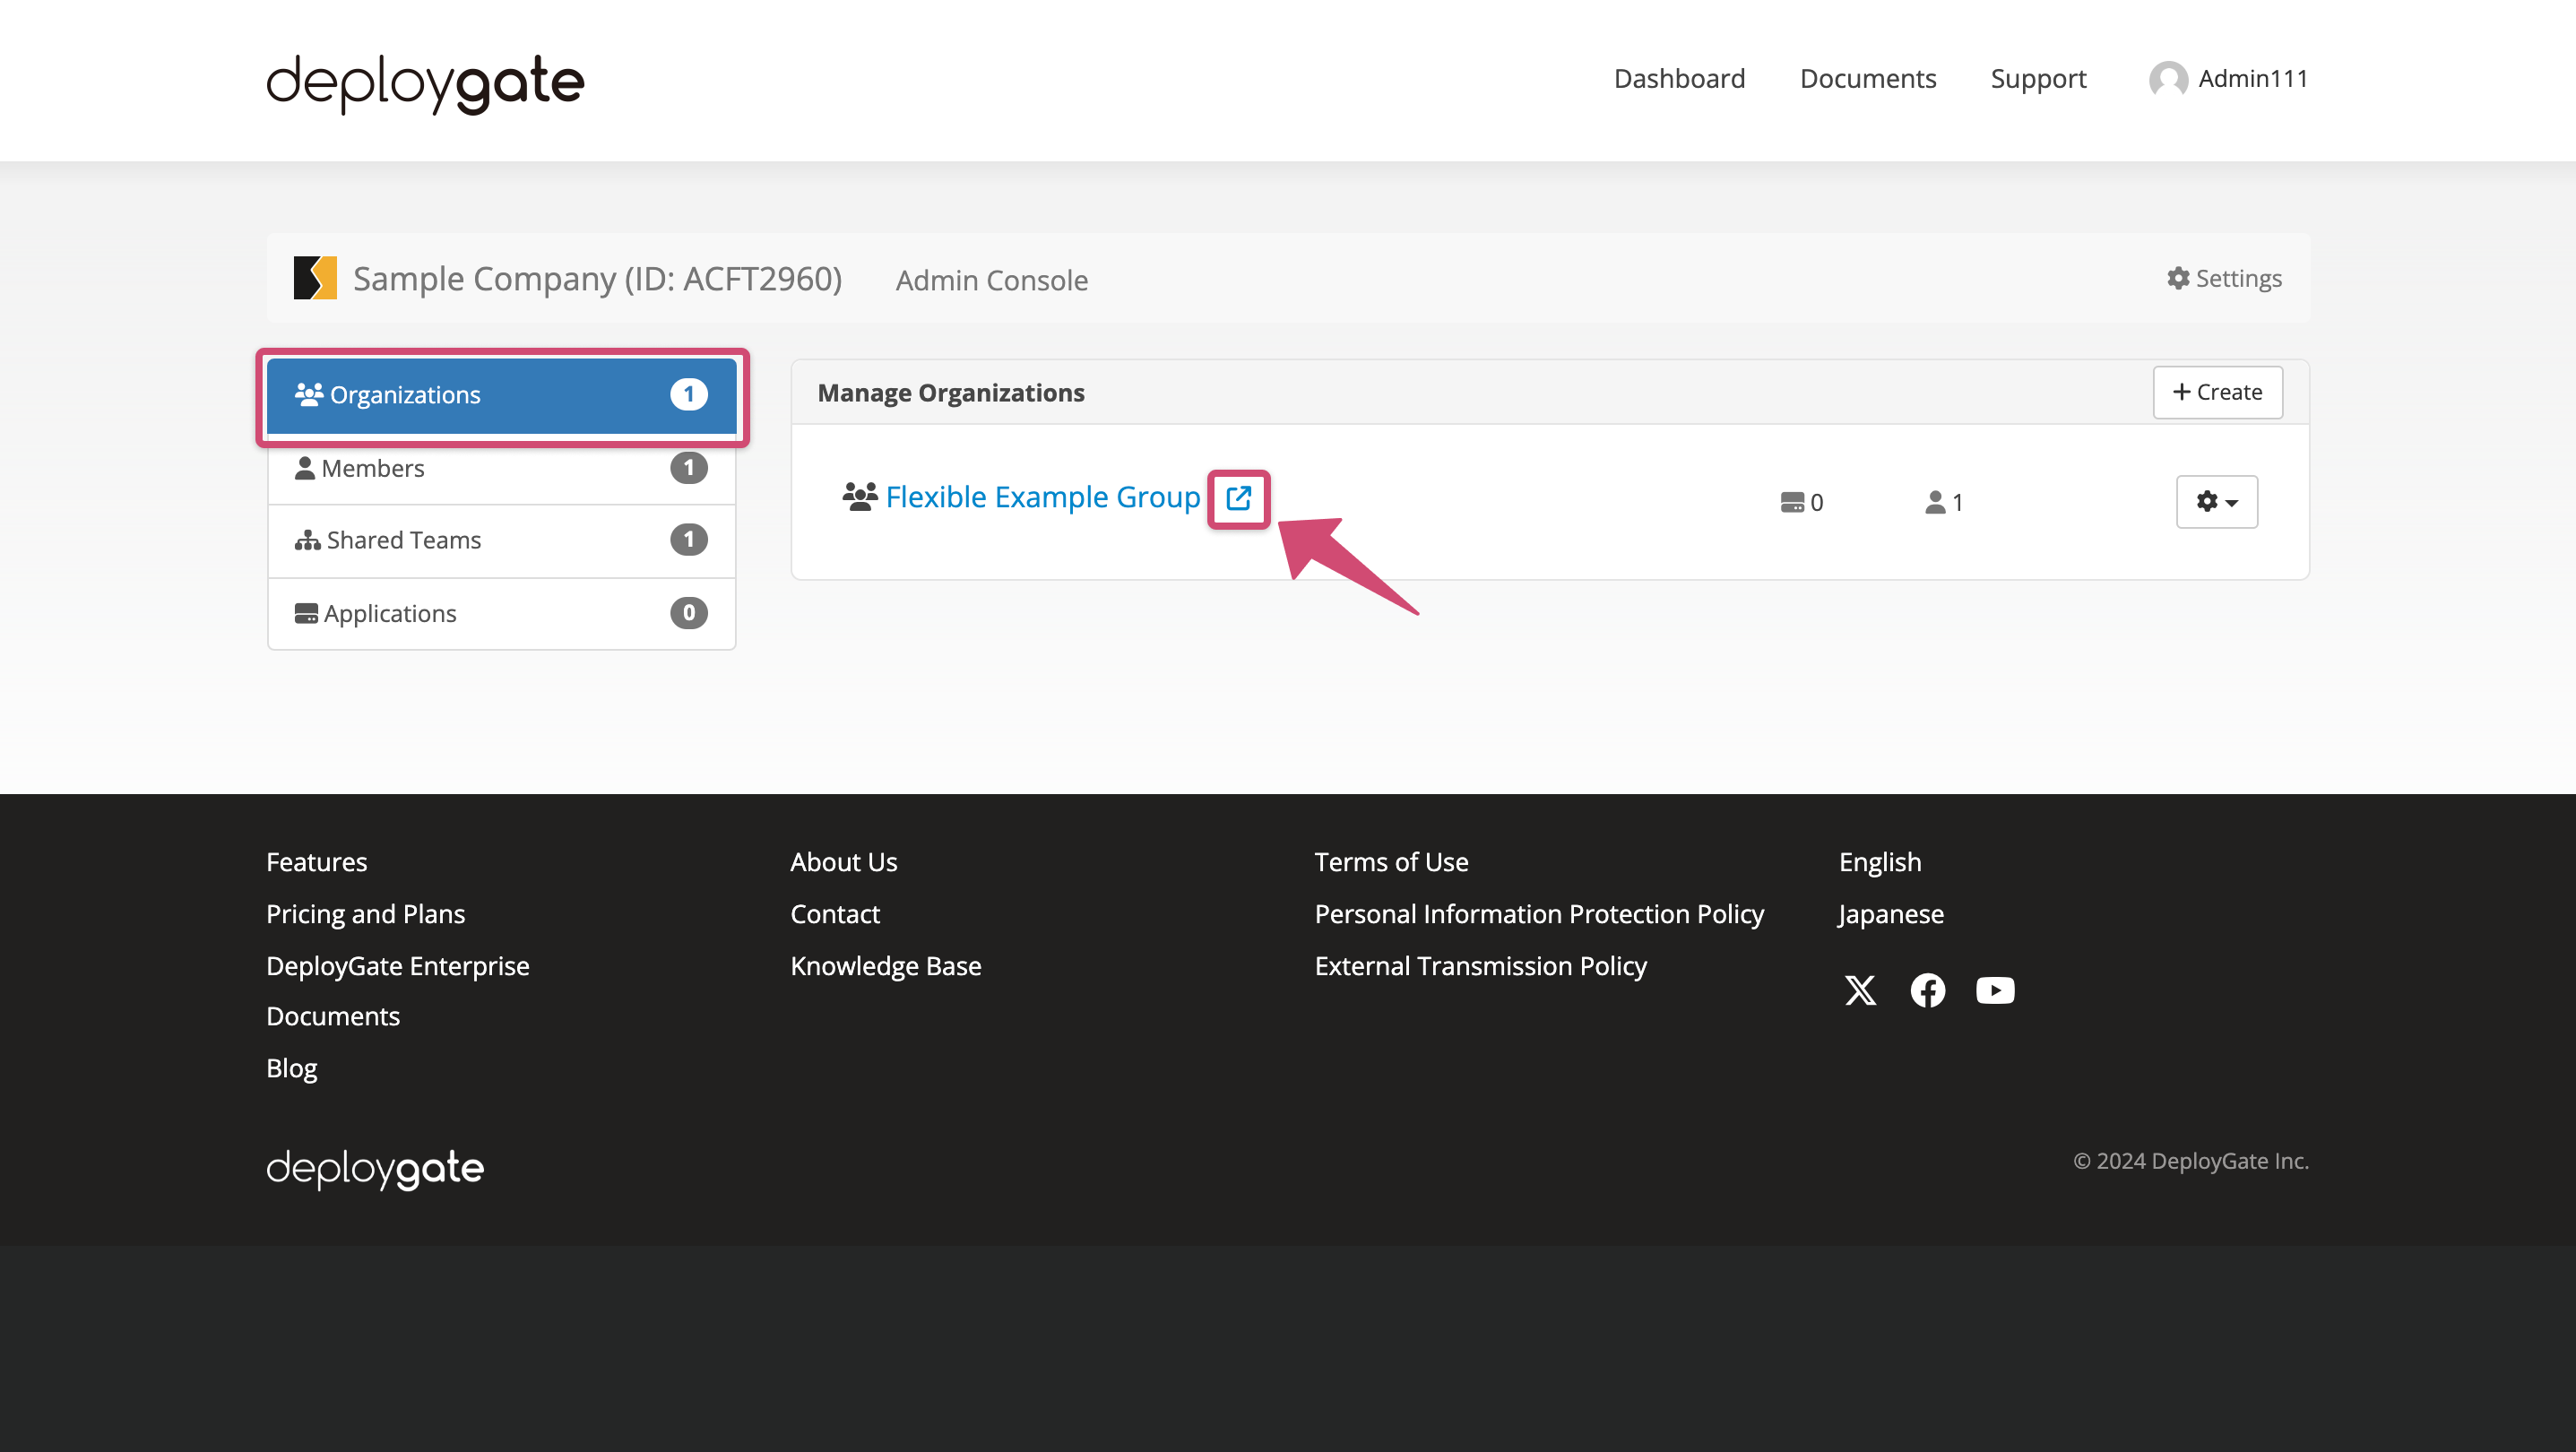
-
On the Organization Management Screen, click
Team List.
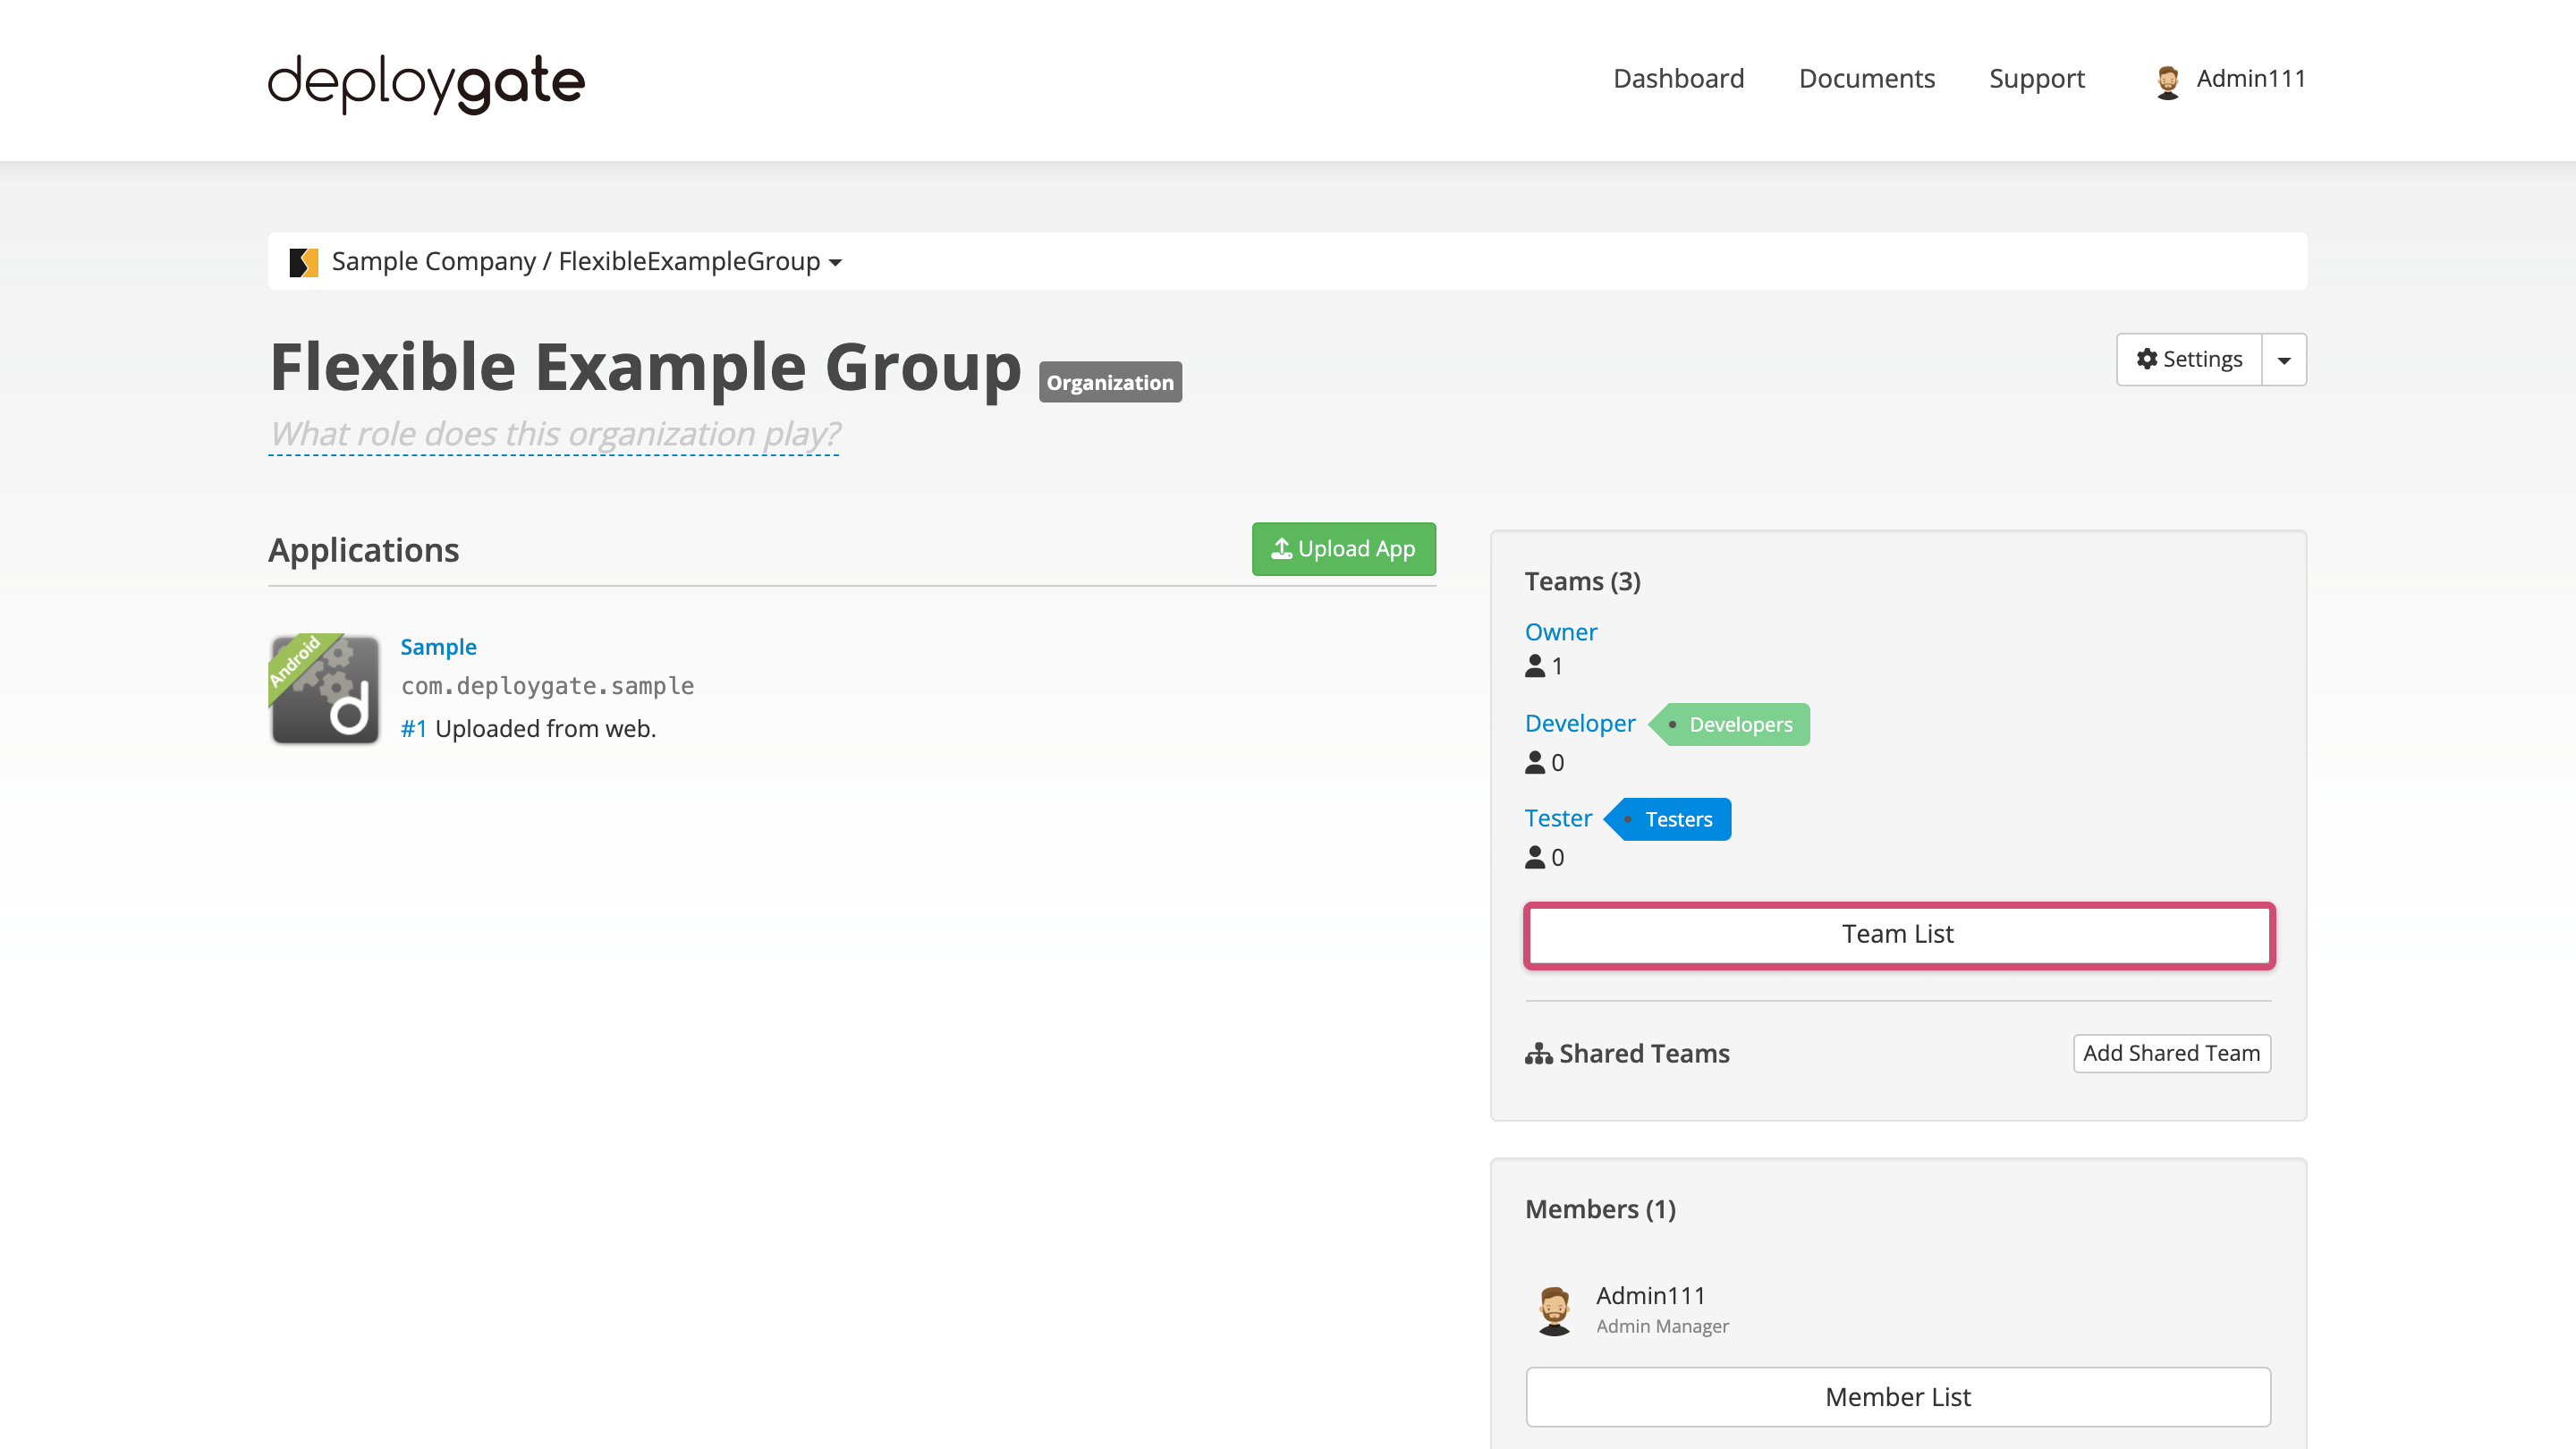
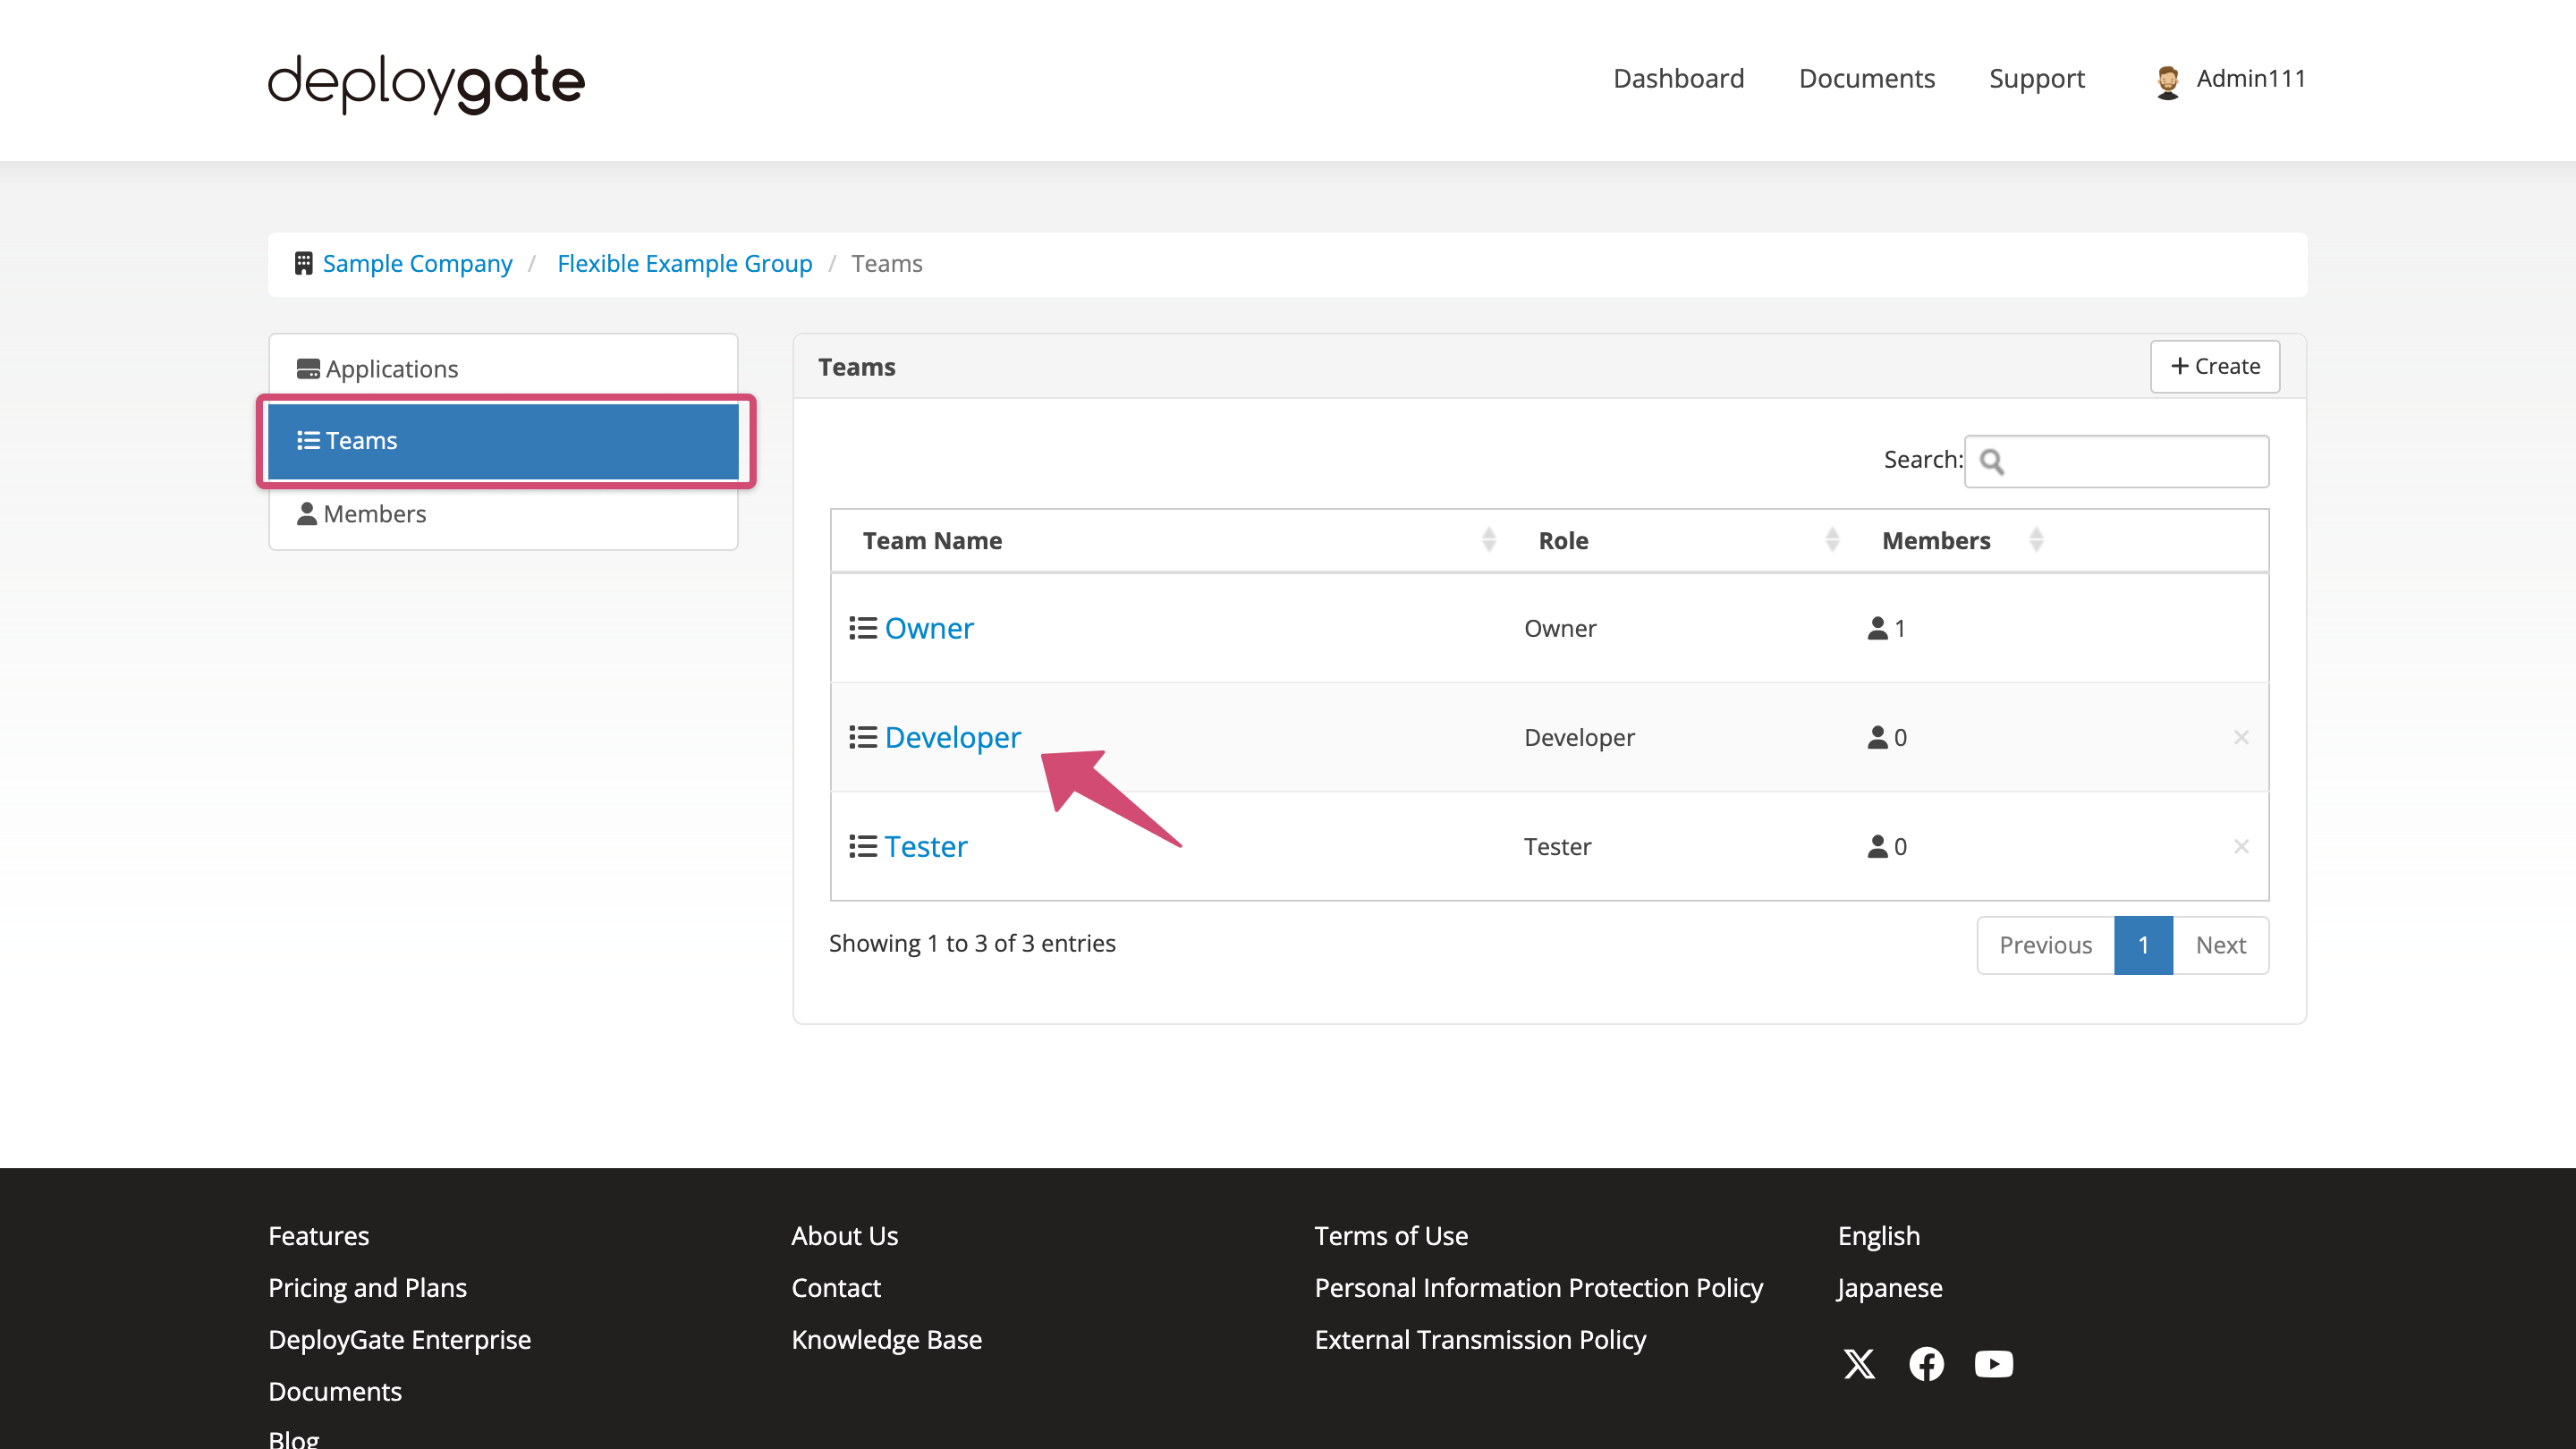
- The Team Details page will appear.
The default Teams are those for Owners, Developers, and Testers.
Click on
Developerto invite someone to the Developer Team.
- You can configure permissions for each team. -> Team Roles
- You can also create new teams. -> Create New Teams
-
Click
Invite New Memberto launch the invitation form.
Enter the email address of the person you wish to invite and clickInvite and Add to Workspace.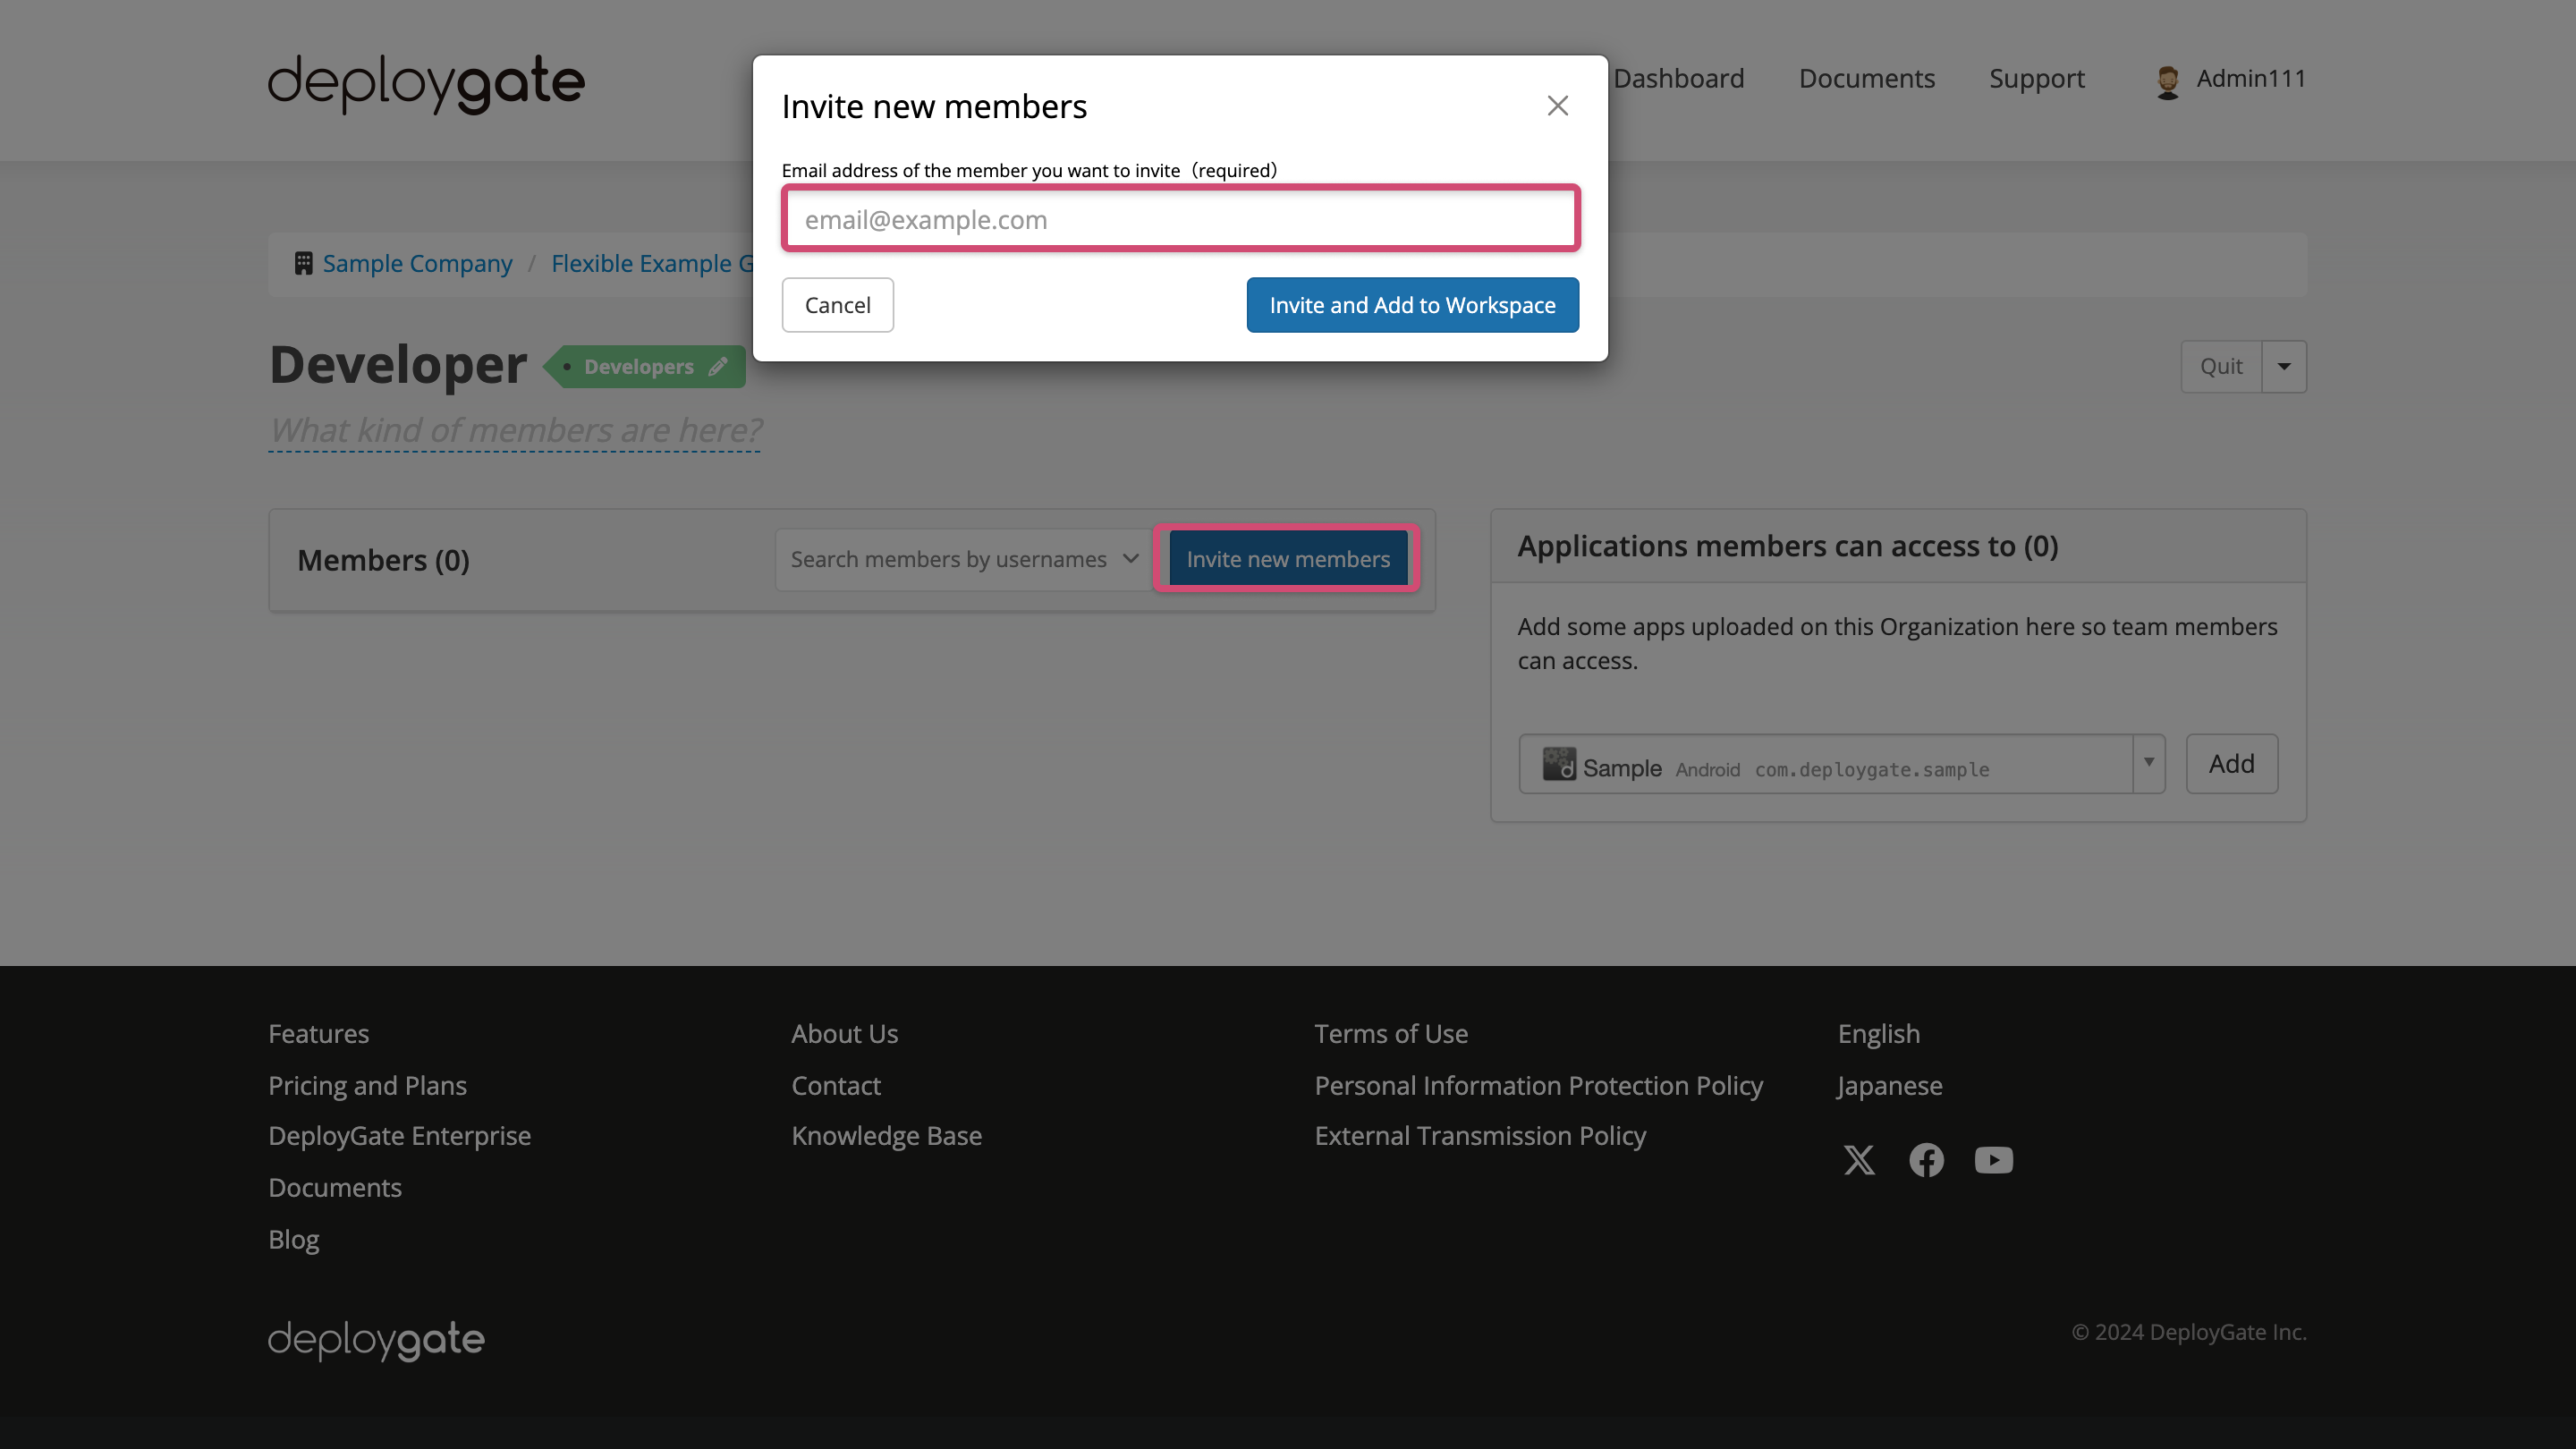
An invitation email will be sent to the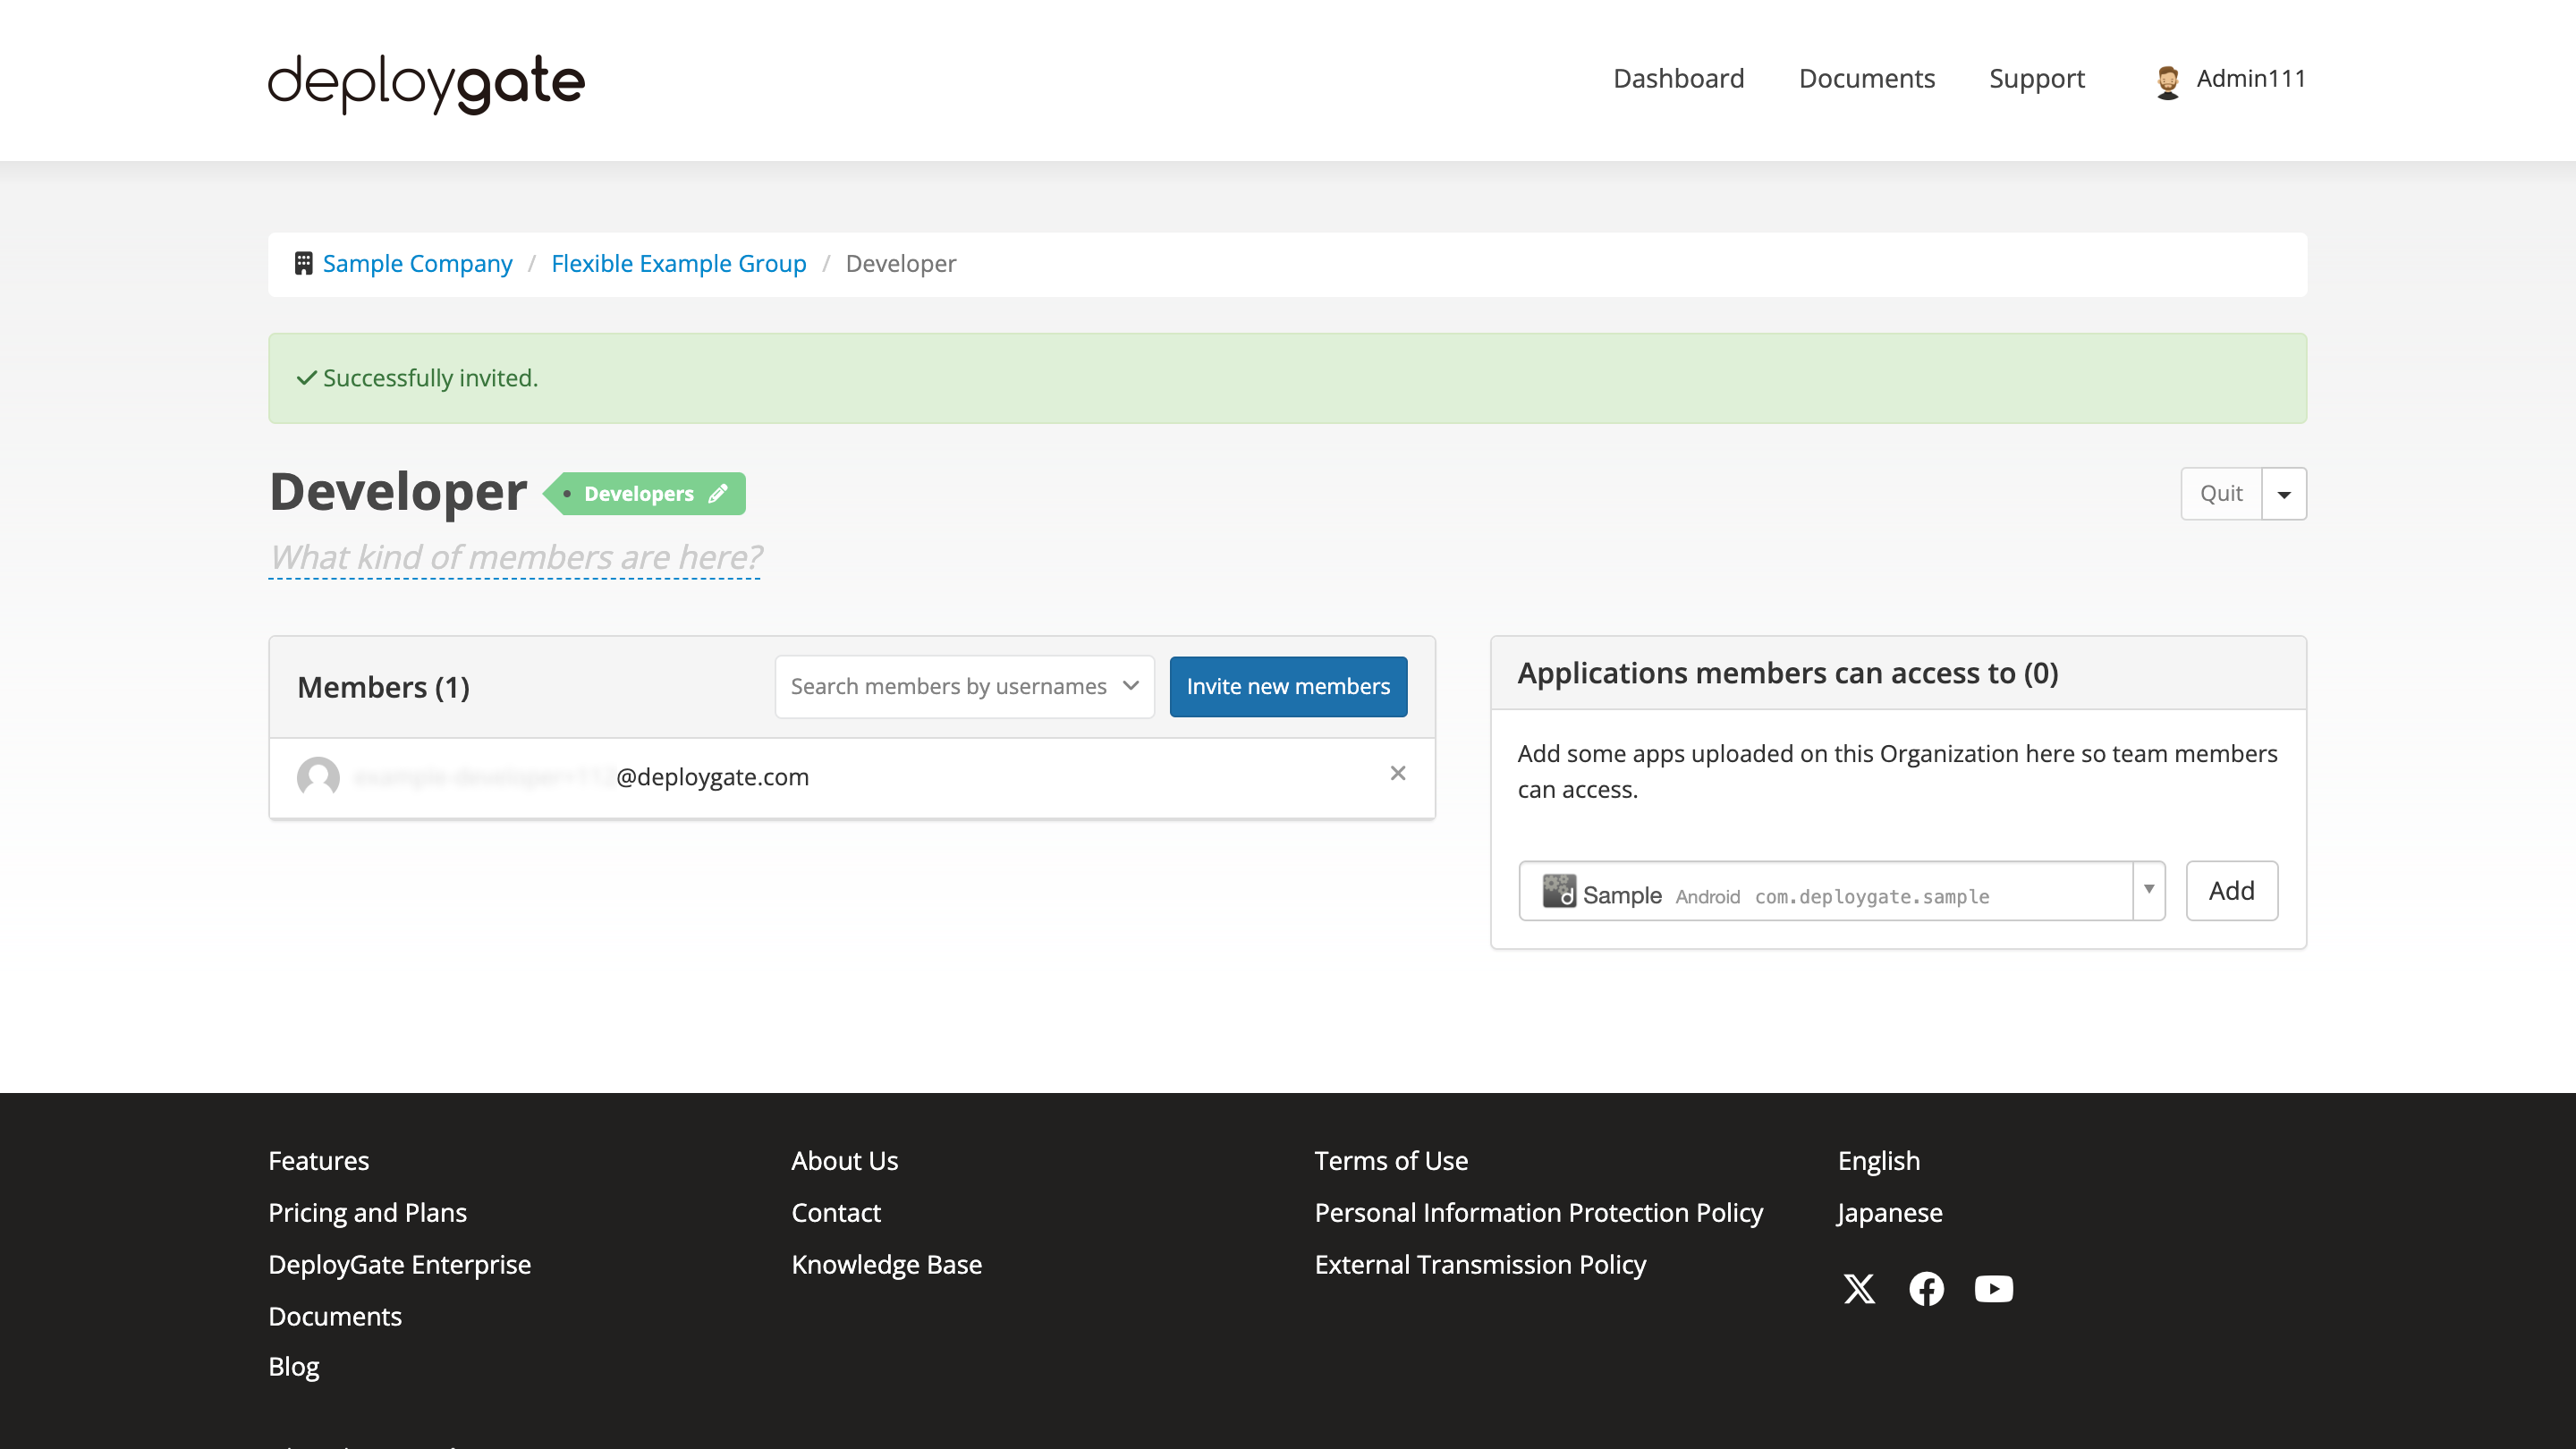
-
Go to the
Applications members can access toon the right side of the screen and select the application you want to grant access to.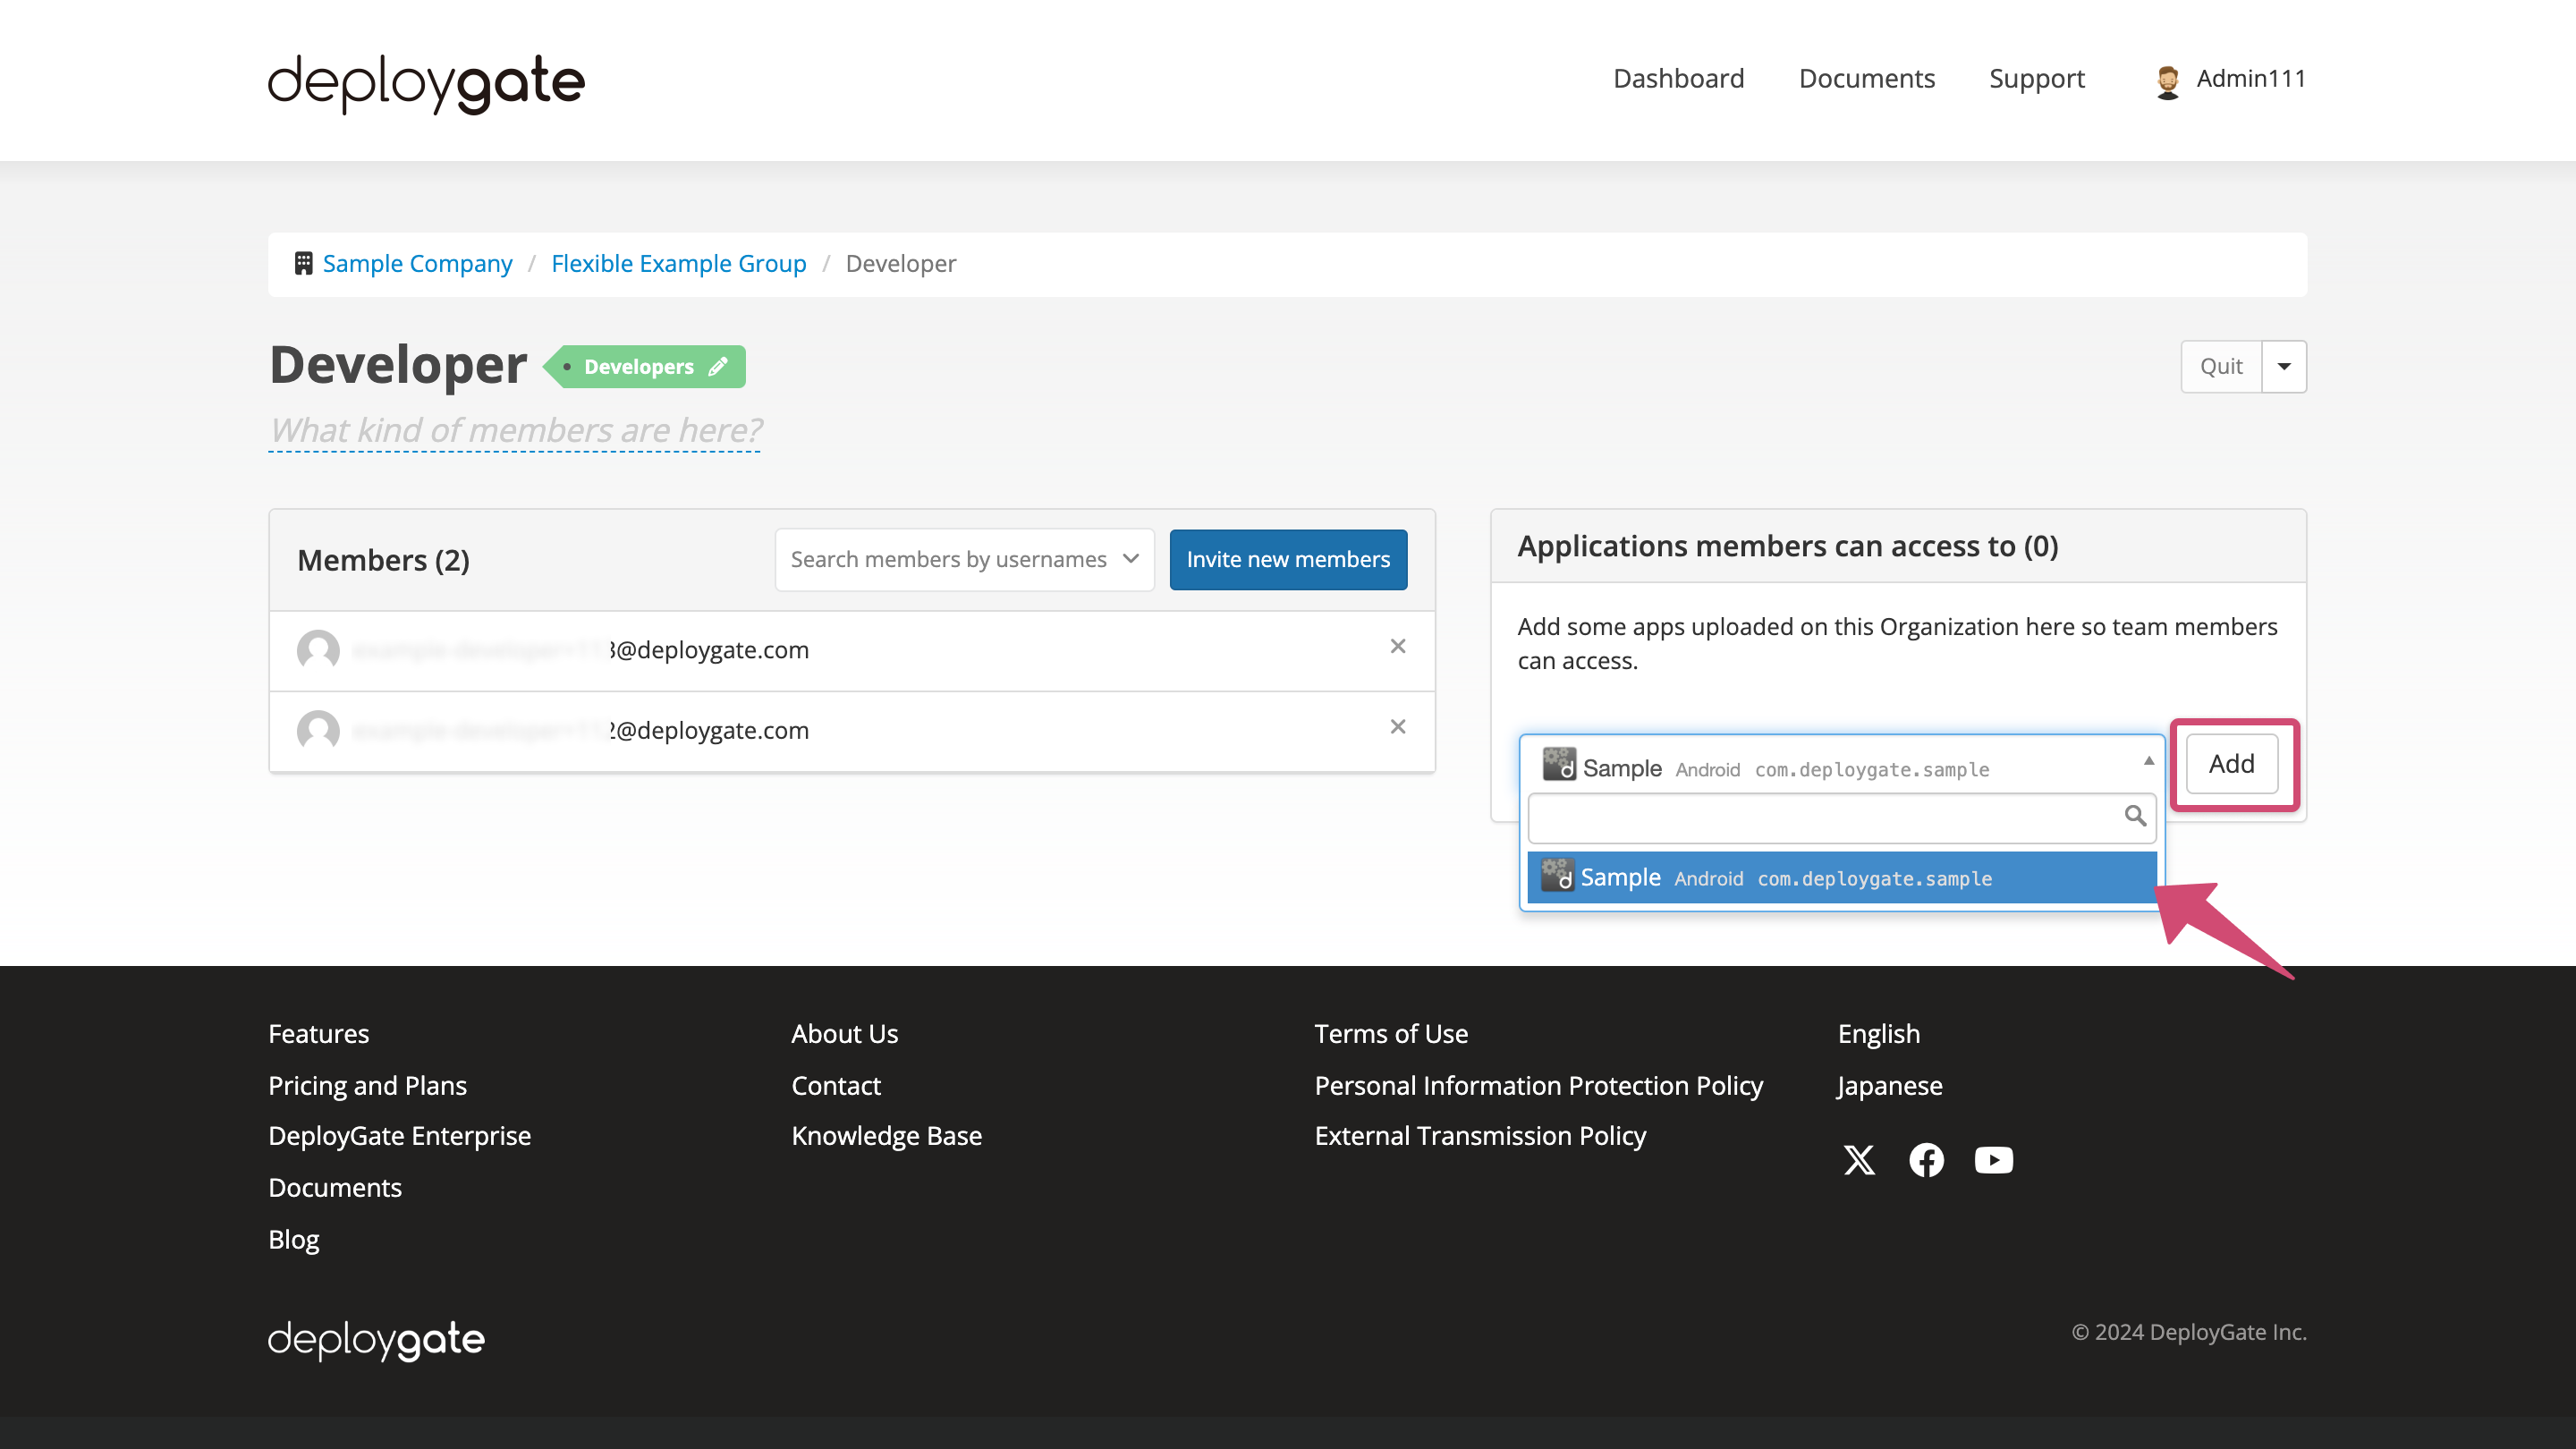
-
The invitee should follow the instructions on the following page to install the app: -> Installing Apps Distributed via Member Distribution
Member Distribution provides notifications for app updates and allows downloads of all revisions.
We recommend using Member Distribution for individuals who are regularly involved as development members.
2.3 2.3 Distribute Apps via Link Distribution
With Link Distribution, users can install the app without creating an account, making it ideal for large-scale beta testing with numerous testers.
However, this method does not support account management, so detailed tracking, such as identifying individual app downloaders, is not possible.
It is possible to restrict access with a password or to members with accounts.
With Link Distribution, it is possible to restrict access to members with accounts.
- Account management allows for detailed log tracking.
- You can use The capture feature.
- You can specify and distribute only a specific revision.
-
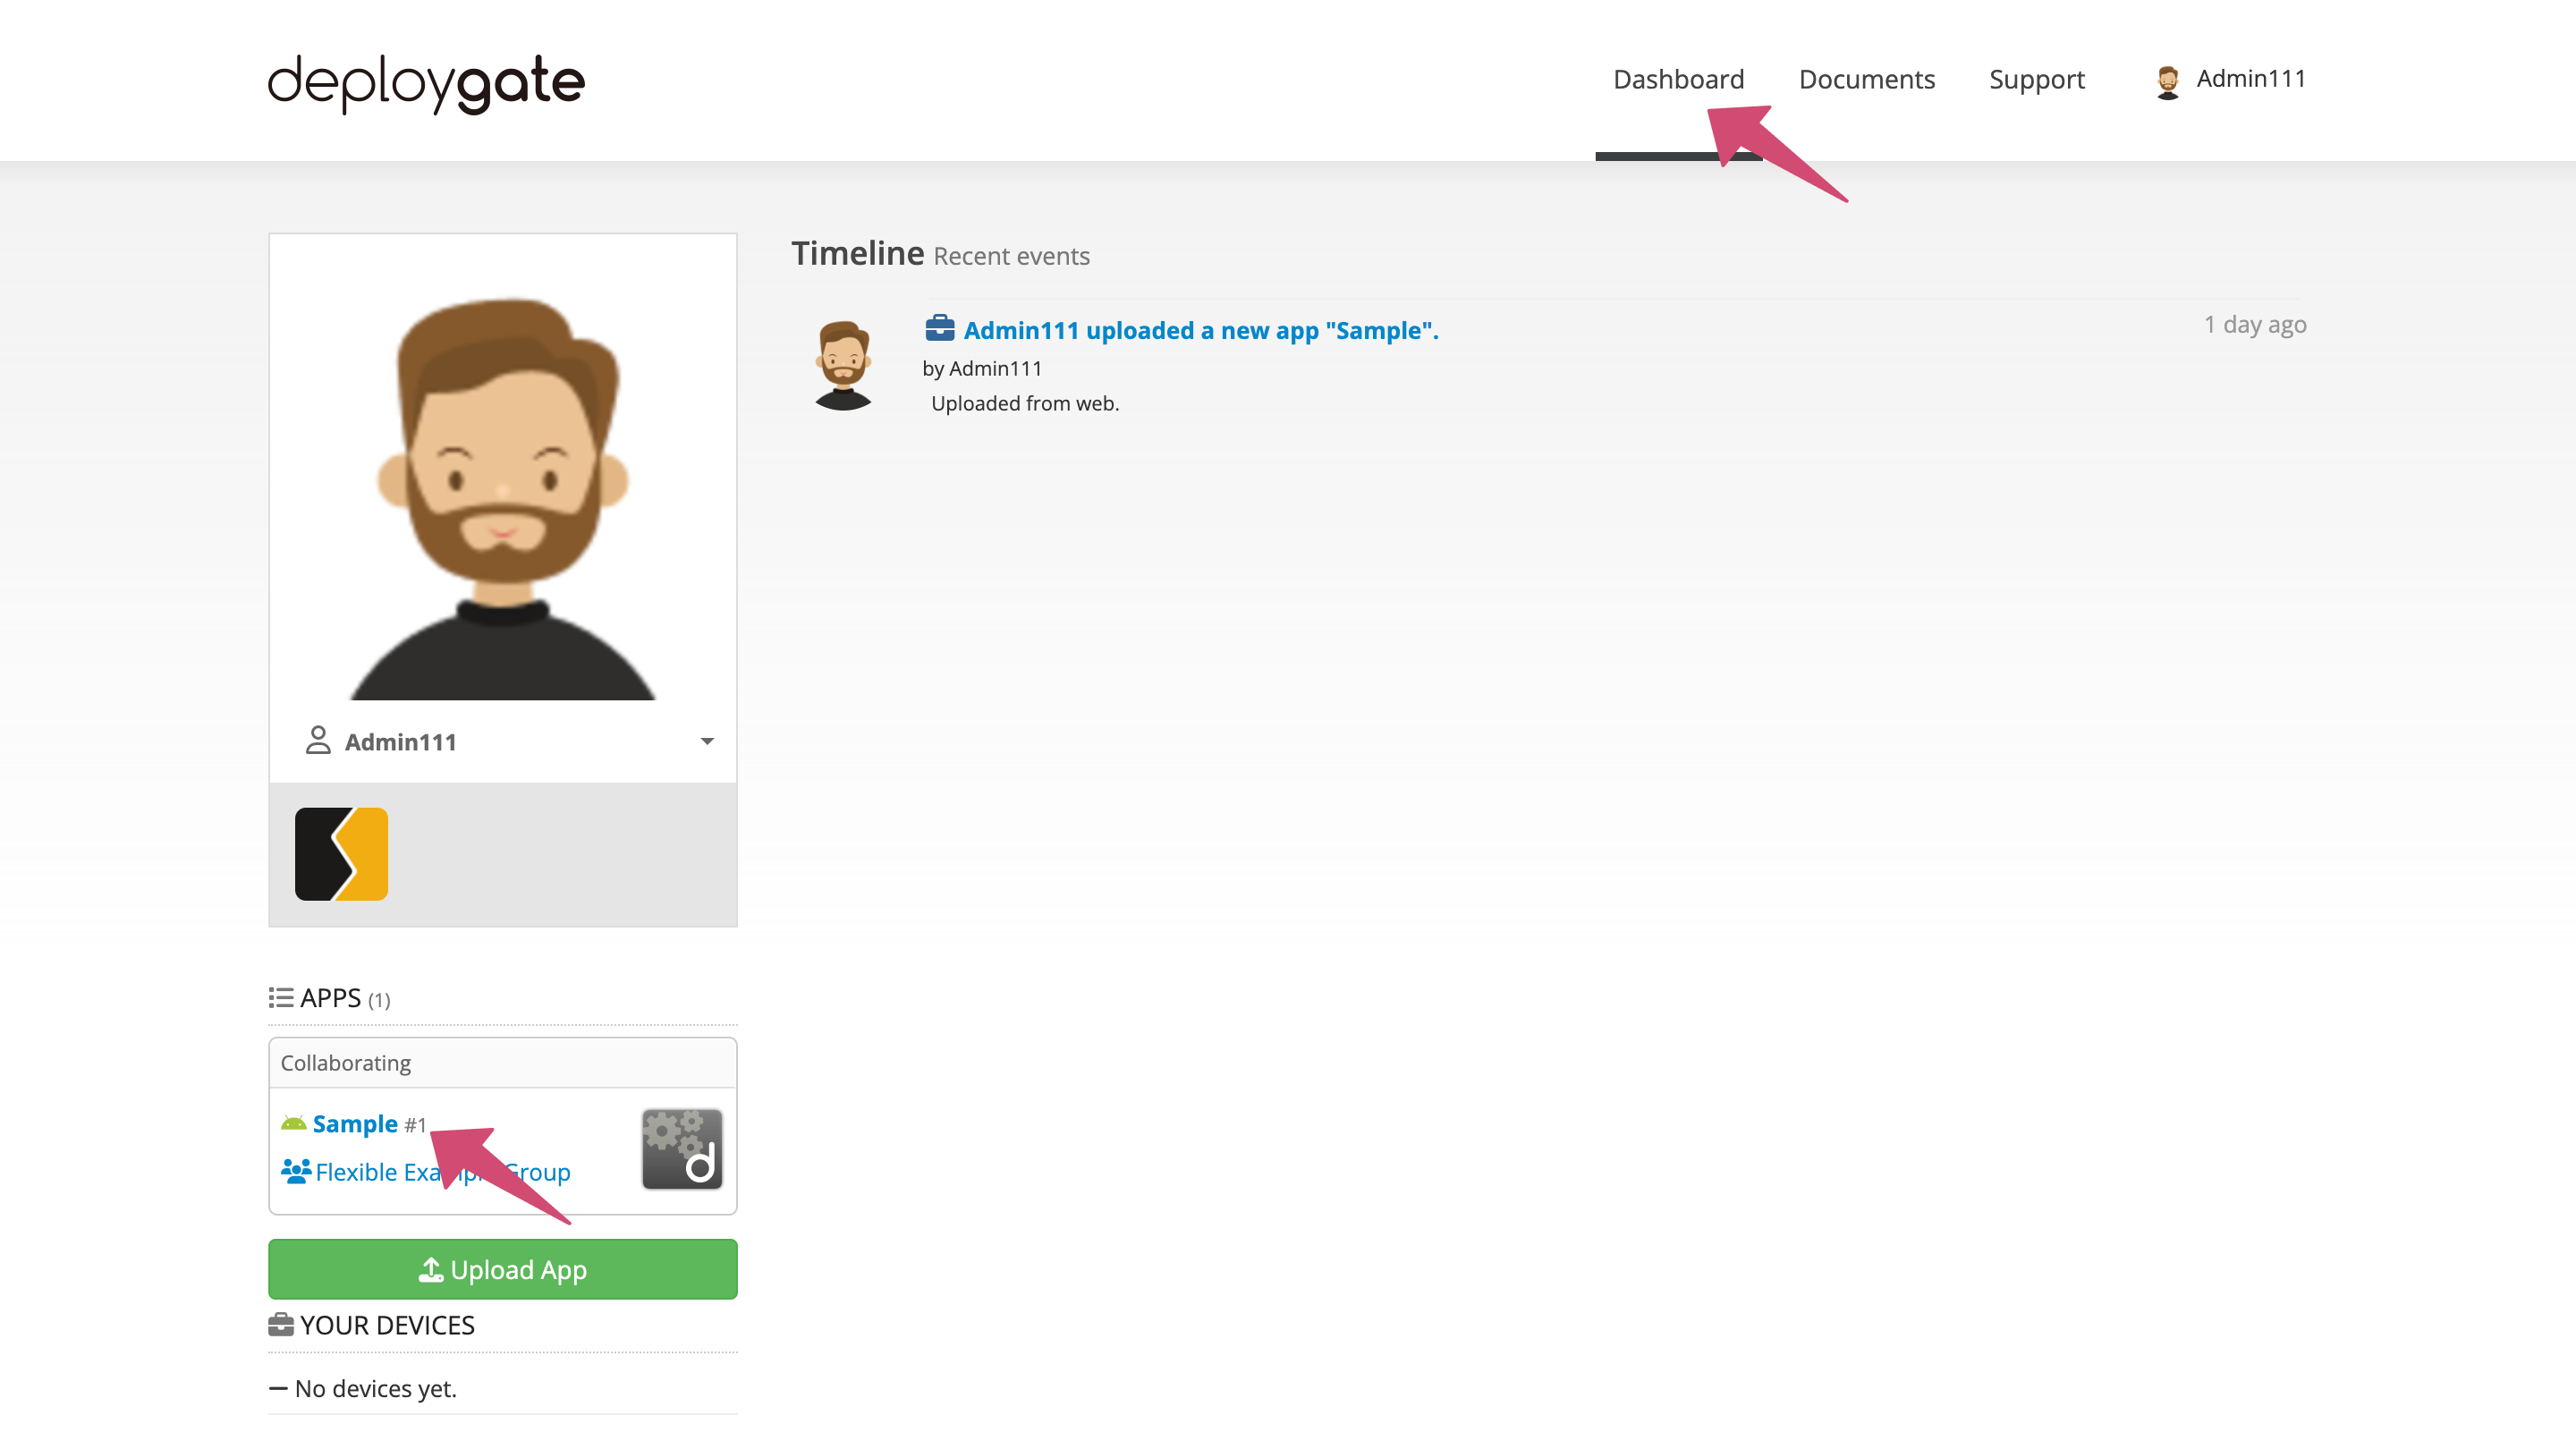
Select the app from the Dashboard.
-
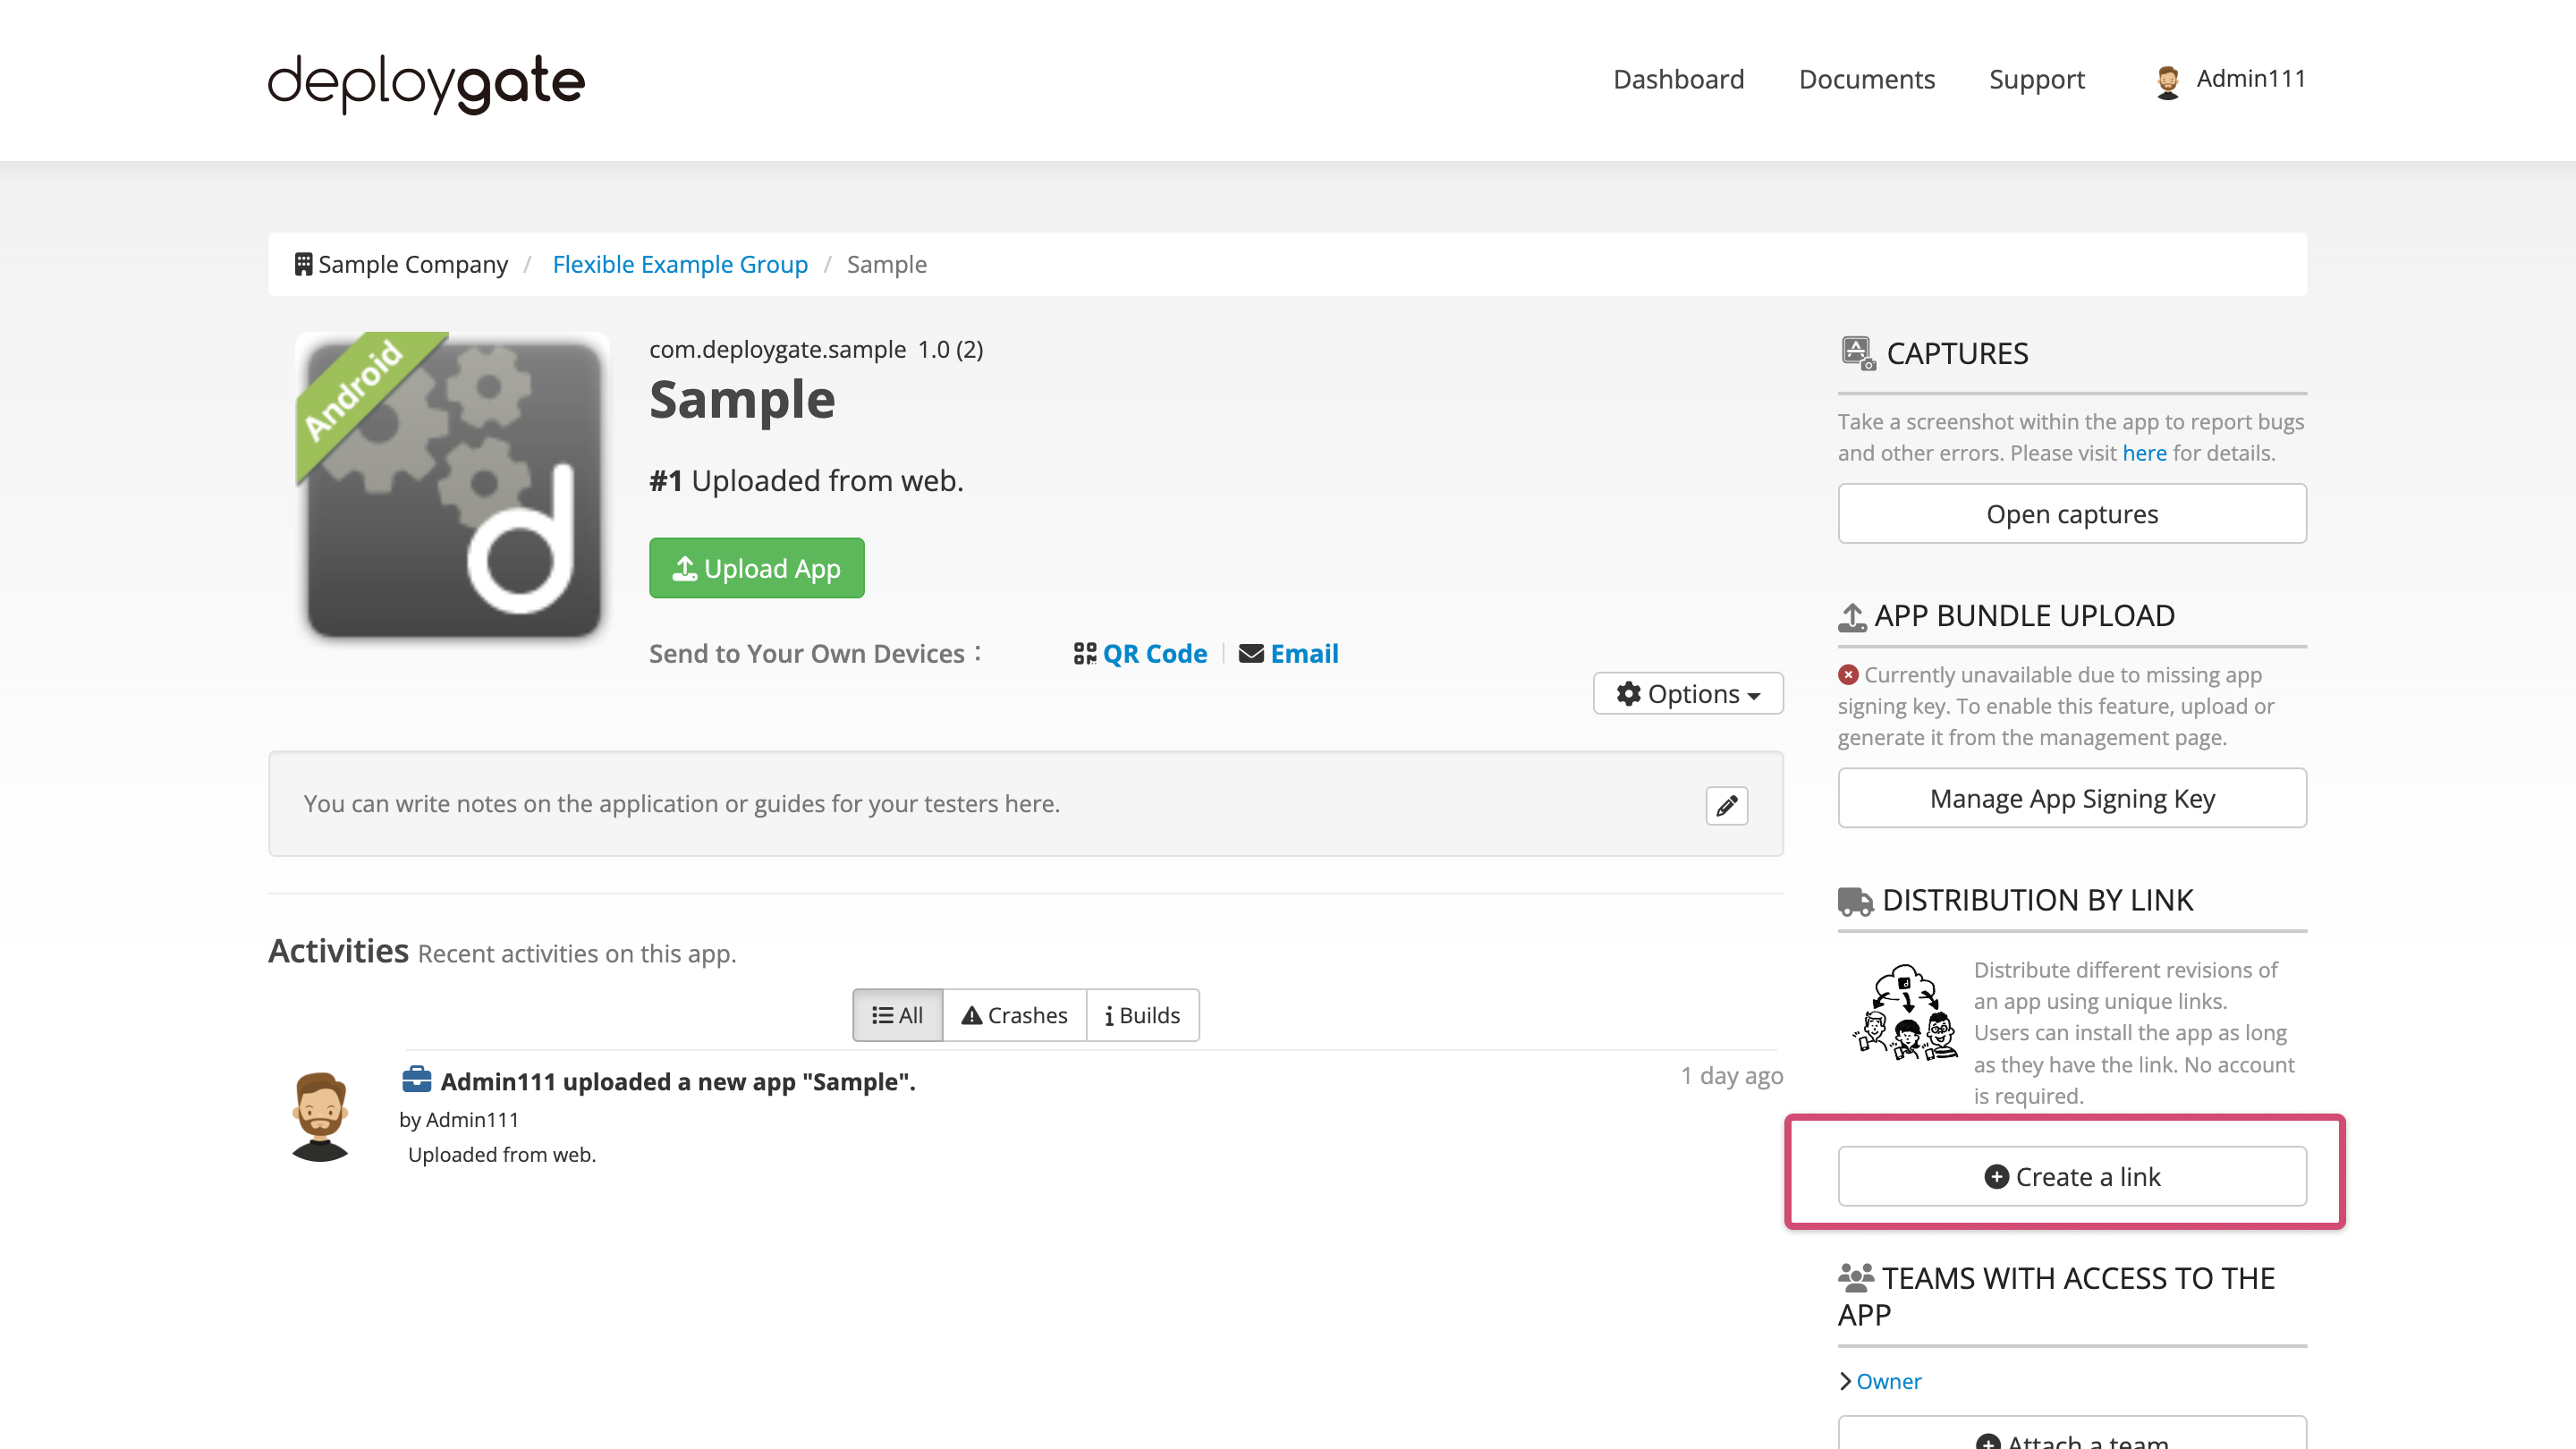
On the App Details screen, click
Create a Link.
-
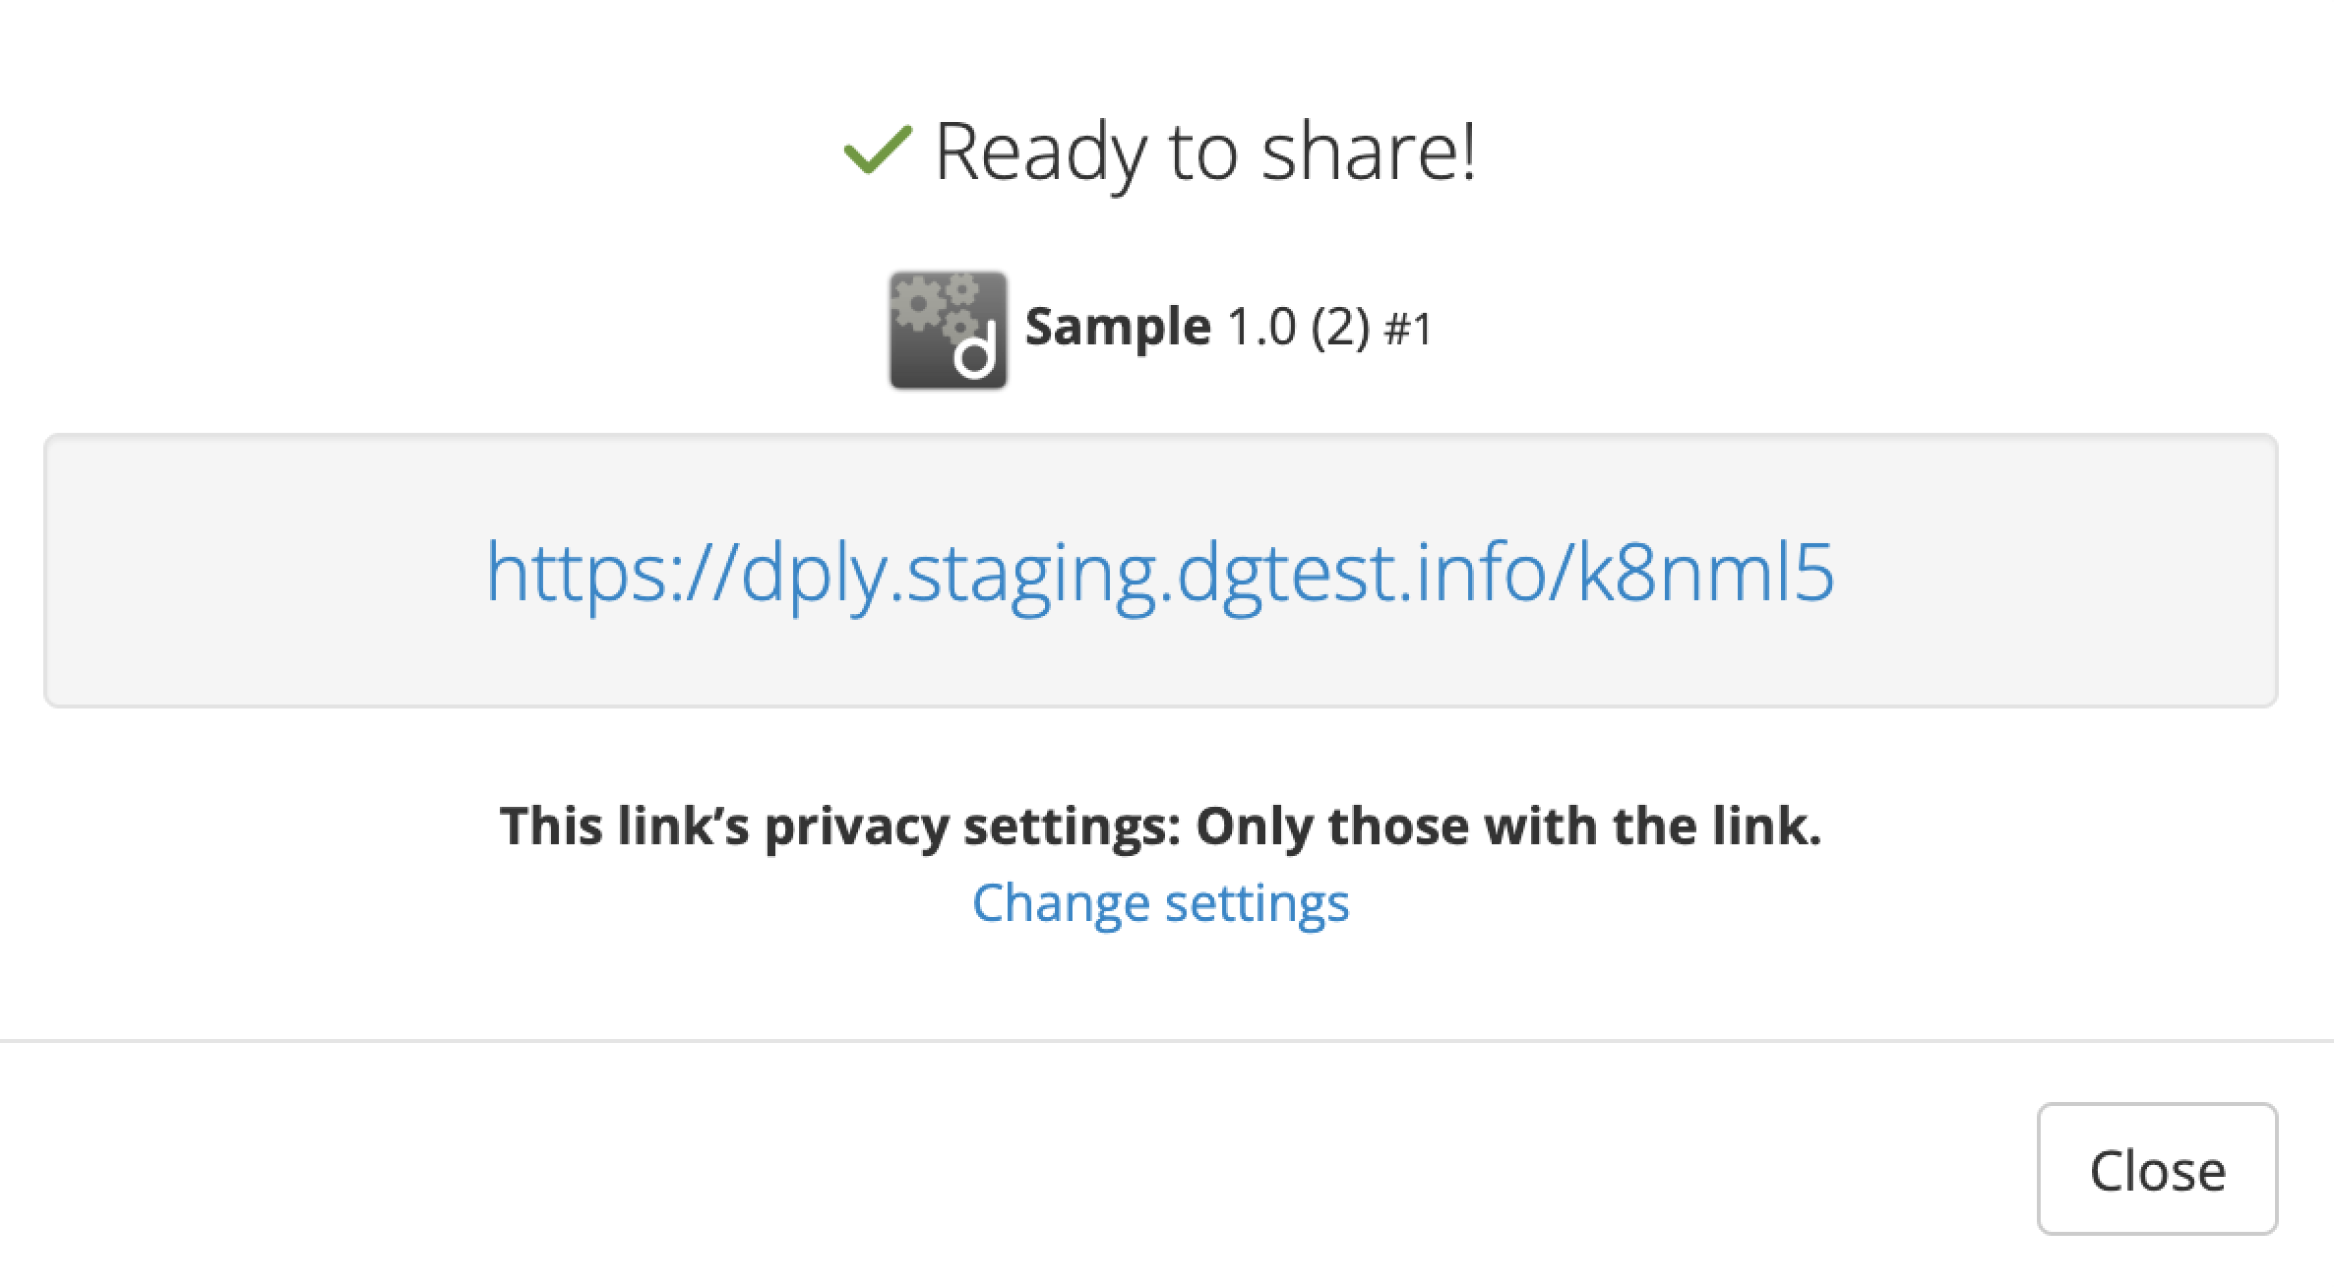
When the following screen appears, copy the URL and share it with your members.
After closing the screen, the Distribution Page will appear.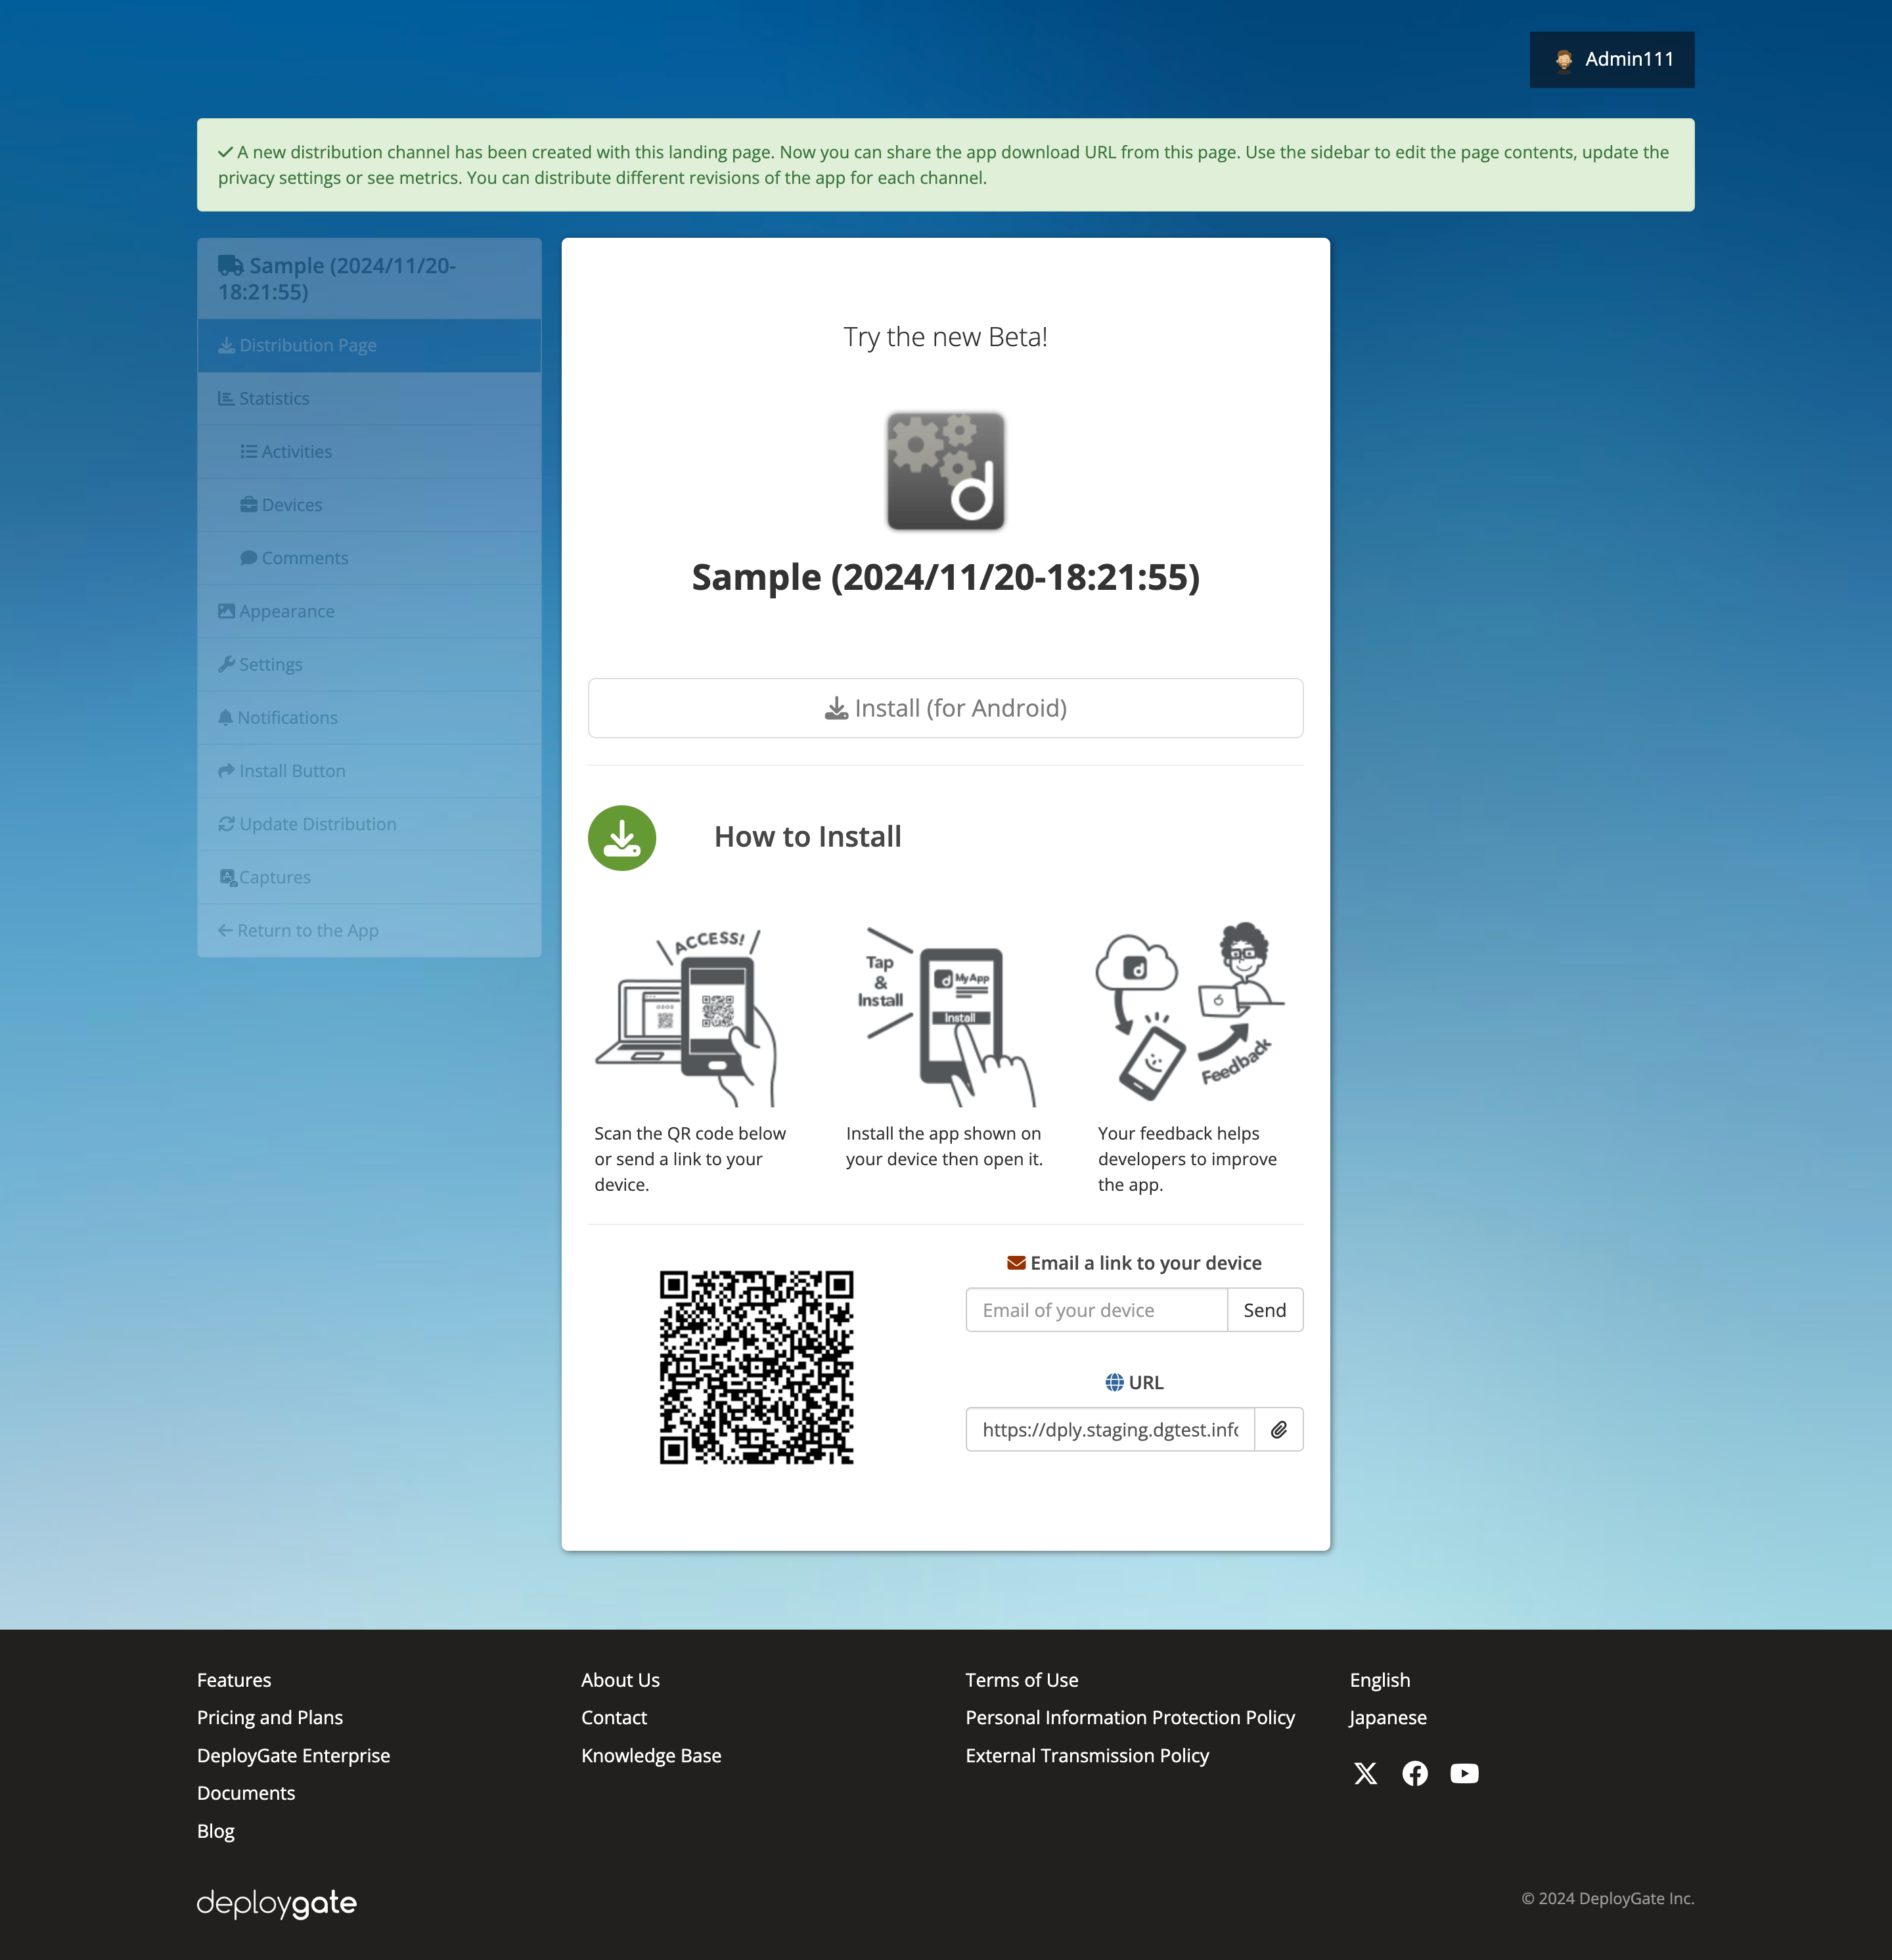
The Distribution Page is customizable. The “Distribution Page” is the page that shared URL recipients can access.
-
The Distribution Page allows for detailed configuration.
-> Setting Up the Distribution Page -
BYou can restrict access to the page with the
Only team memberswith access to the app setting. This configuration confers Member Distribution benefits, including Capture feature use and detailed access management.
-> Configuring Distribution Page Visibility
- Link Distribution URL recipients should follow the instructions on this page to install the app:
-> Installing Apps Distributed via Link Distribution
3. Mastering DeployGate with More Convenient Features
DeployGate provides tools to support a more efficient application development cycle.
Here are some convenient features to try:
3.1 Using Capture to Collect Feedback on Distributed Apps
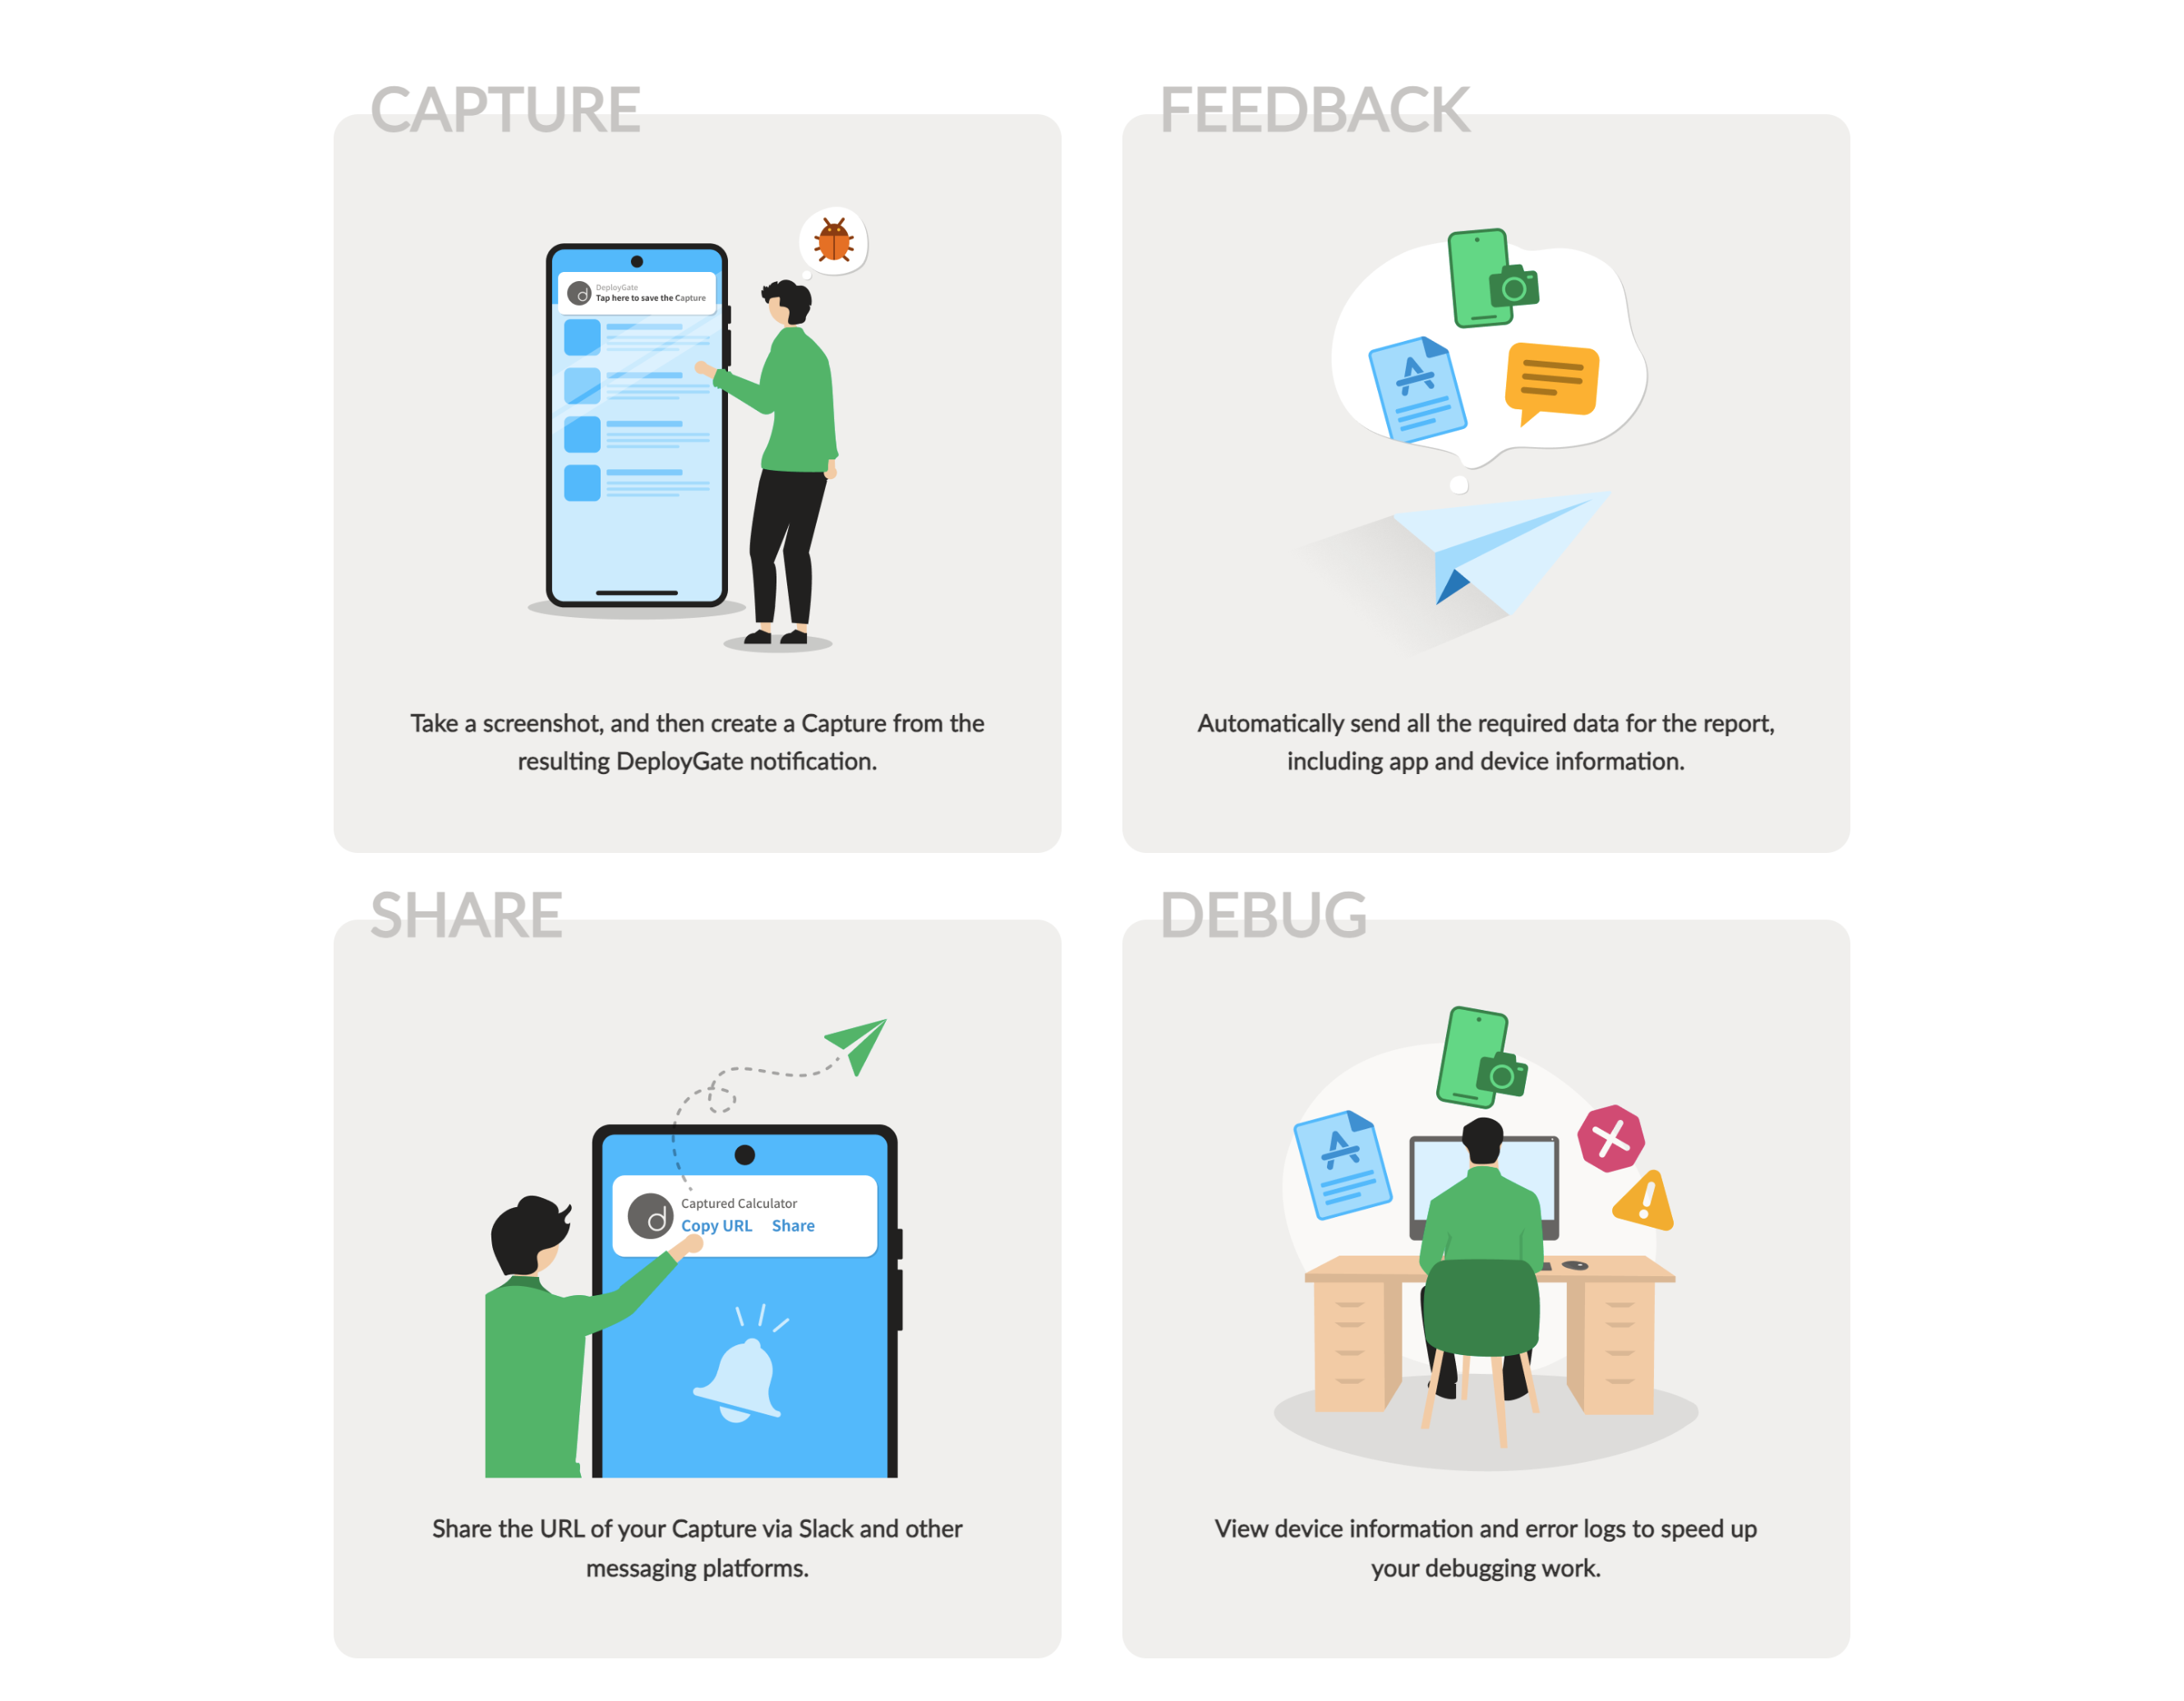
The Capture feature makes it easy to report bugs with screenshots of the issue. With this feature, taking a screenshot of an app under development allows the DeployGate app to automatically collect:
- Logs from just before the screenshot was taken
- Device information
- Information about installed apps
- Other details useful for debugging
This data is then easily shareable between developers and testers.
For more details, refer to Developer Guide: Capture Feature
The Capture feature is only available with Member Distribution or Link Distribution with the members-only .
Currently, only Android apps are supported.
3.2 Integrating Chat to Receive Notifications
By integrating DeployGate with your chat service, you can effortlessly share various updates that occur during app development with your entire team.
-> Chat Notification
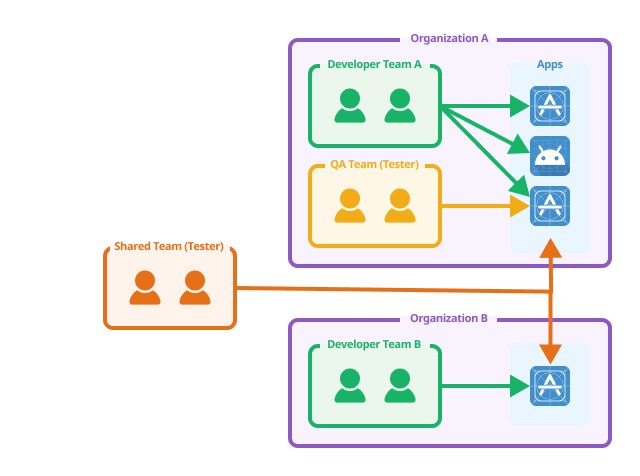
3.3 Using Shared Teams to Share Testers Across Organizations
The Shared Team feature allows you to share teams across Organizations within a Workspace.
This is useful when a particular department requires constant access to multiple development apps, such as a dedicated internal QA team.
-> Creating Shared Teams
3.4 Streamlining Development Cycles with the API
Leveraging DeployGate's API can help reduce manual tasks and improve operational efficiency.
For detailed specifications and sample code, please refer to this page.
-> DeployGate API Reference
4. Migrating Applications from Other Plans to your Workspace
Unless you are currently on the Flexible plan, you can migrate existing Organizations and applications from any other plan to your Workspace.
4.1 Migrating Organizations from an Individual Plan (Free Plan) to your Workspace
You can migrate your Individual Plan Organizations seamlessly to your Flexible Plan Workspace. -> Migrating Individual Plan Organizations to a Flexible Plan Workspace
4.2 Migrating Organizations from Discontinued Corporation & Organization Plans (Startup, Business, Large Business) to a Workspace
You can also migrate your Discontinued Plan Organizations to a Flexible Plan Workspace.
Please verify the required number of members before initiating the migration.
-> Migrating Legacy Discontinued Plan Organizations to a Flexible Plan Workspacee
4.3 Migrating Applications from Old Personal Plans (Personal Free, Personal Pro) to a Workspace
The Old Personal Plans, including the Personal Free and Personal Pro Plans, did not have the concept of "Organizations" that our current plans offer. Apps were uploaded directly.
As a result, you must migrate each app individually when migrating to a Flexible Plan Workspace.
-> Migrating Applications from Legacy Personal Plans to a Flexible Plan Workspace