Add/Delete UDID of New Devices
Add UDID of New Devices to iOS App
To distribute Ad-hoc builds on iOS to new devices, you must add the UDIDs of those devices to the Provisioning Profile.
Steps to Add UDIDs
-
Obtain UDIDs from DeployGate
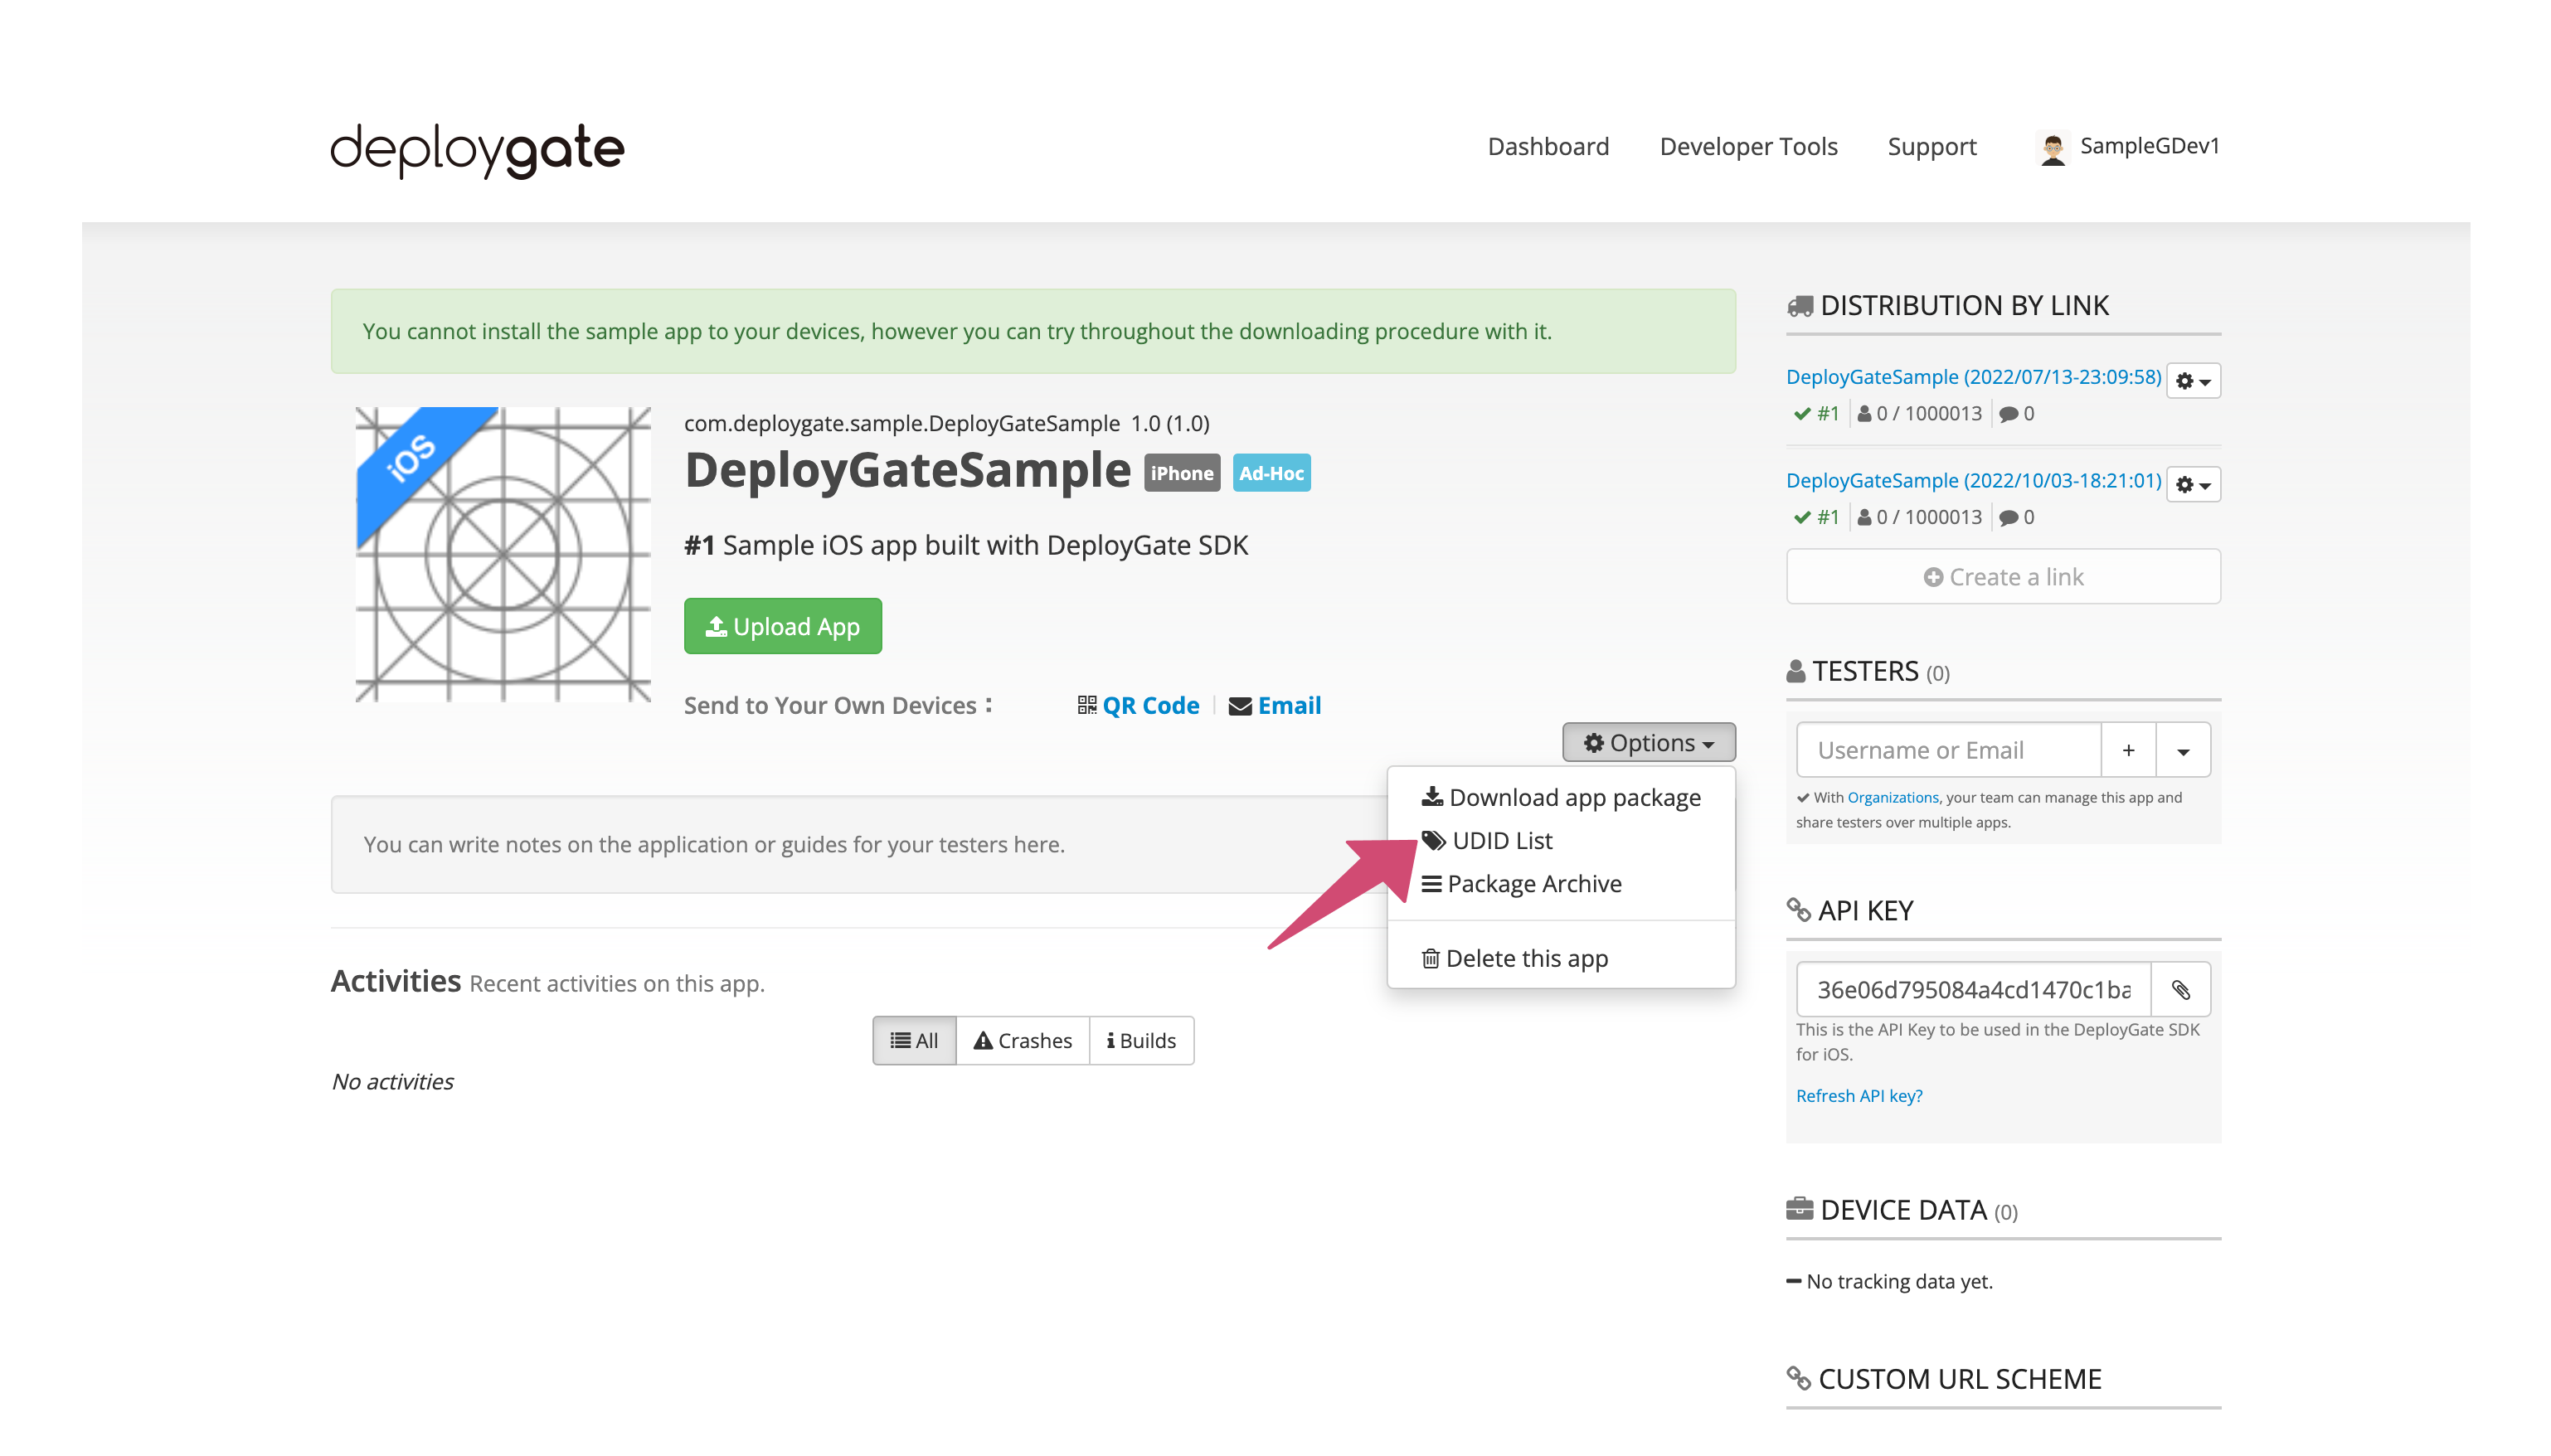
- Go to the app management screen's options and select "UDID List" to view a list of users and the UDIDs of their devices
- See the Obtain UDID from DeployGate section below for details
-
Register UDIDs in Apple Developer Center
- Log in to Apple Developer Center
- Navigate to "Certificates, Identifiers & Profiles"
- Select "Devices" from the sidebar
- Click the "+" button to register a new device
- Enter the device name and UDID, then click "Continue"
- You can also register multiple devices at once by uploading a file
- For detailed instructions, see Apple's official guide
-
Update Provisioning Profile
- In Apple Developer Center, go to "Profiles"
- Select the Ad-Hoc Provisioning Profile you want to update
- Click "Edit" and add the newly registered devices
- Download the updated Provisioning Profile
-
Build and Archive with Xcode
- Install the updated Provisioning Profile in Xcode
- Build and archive your app with the new profile
- For detailed steps, see Steps to Create IPA File Using Xcode
Obtain UDID from DeployGate
DeployGate has a UDID acquisition feature. Use any of the following methods to add a device to the app, and the device’s UDID will become obtainable through DeployGate.
(1) Use the “Send to Your Own Devices” option from the app details page.
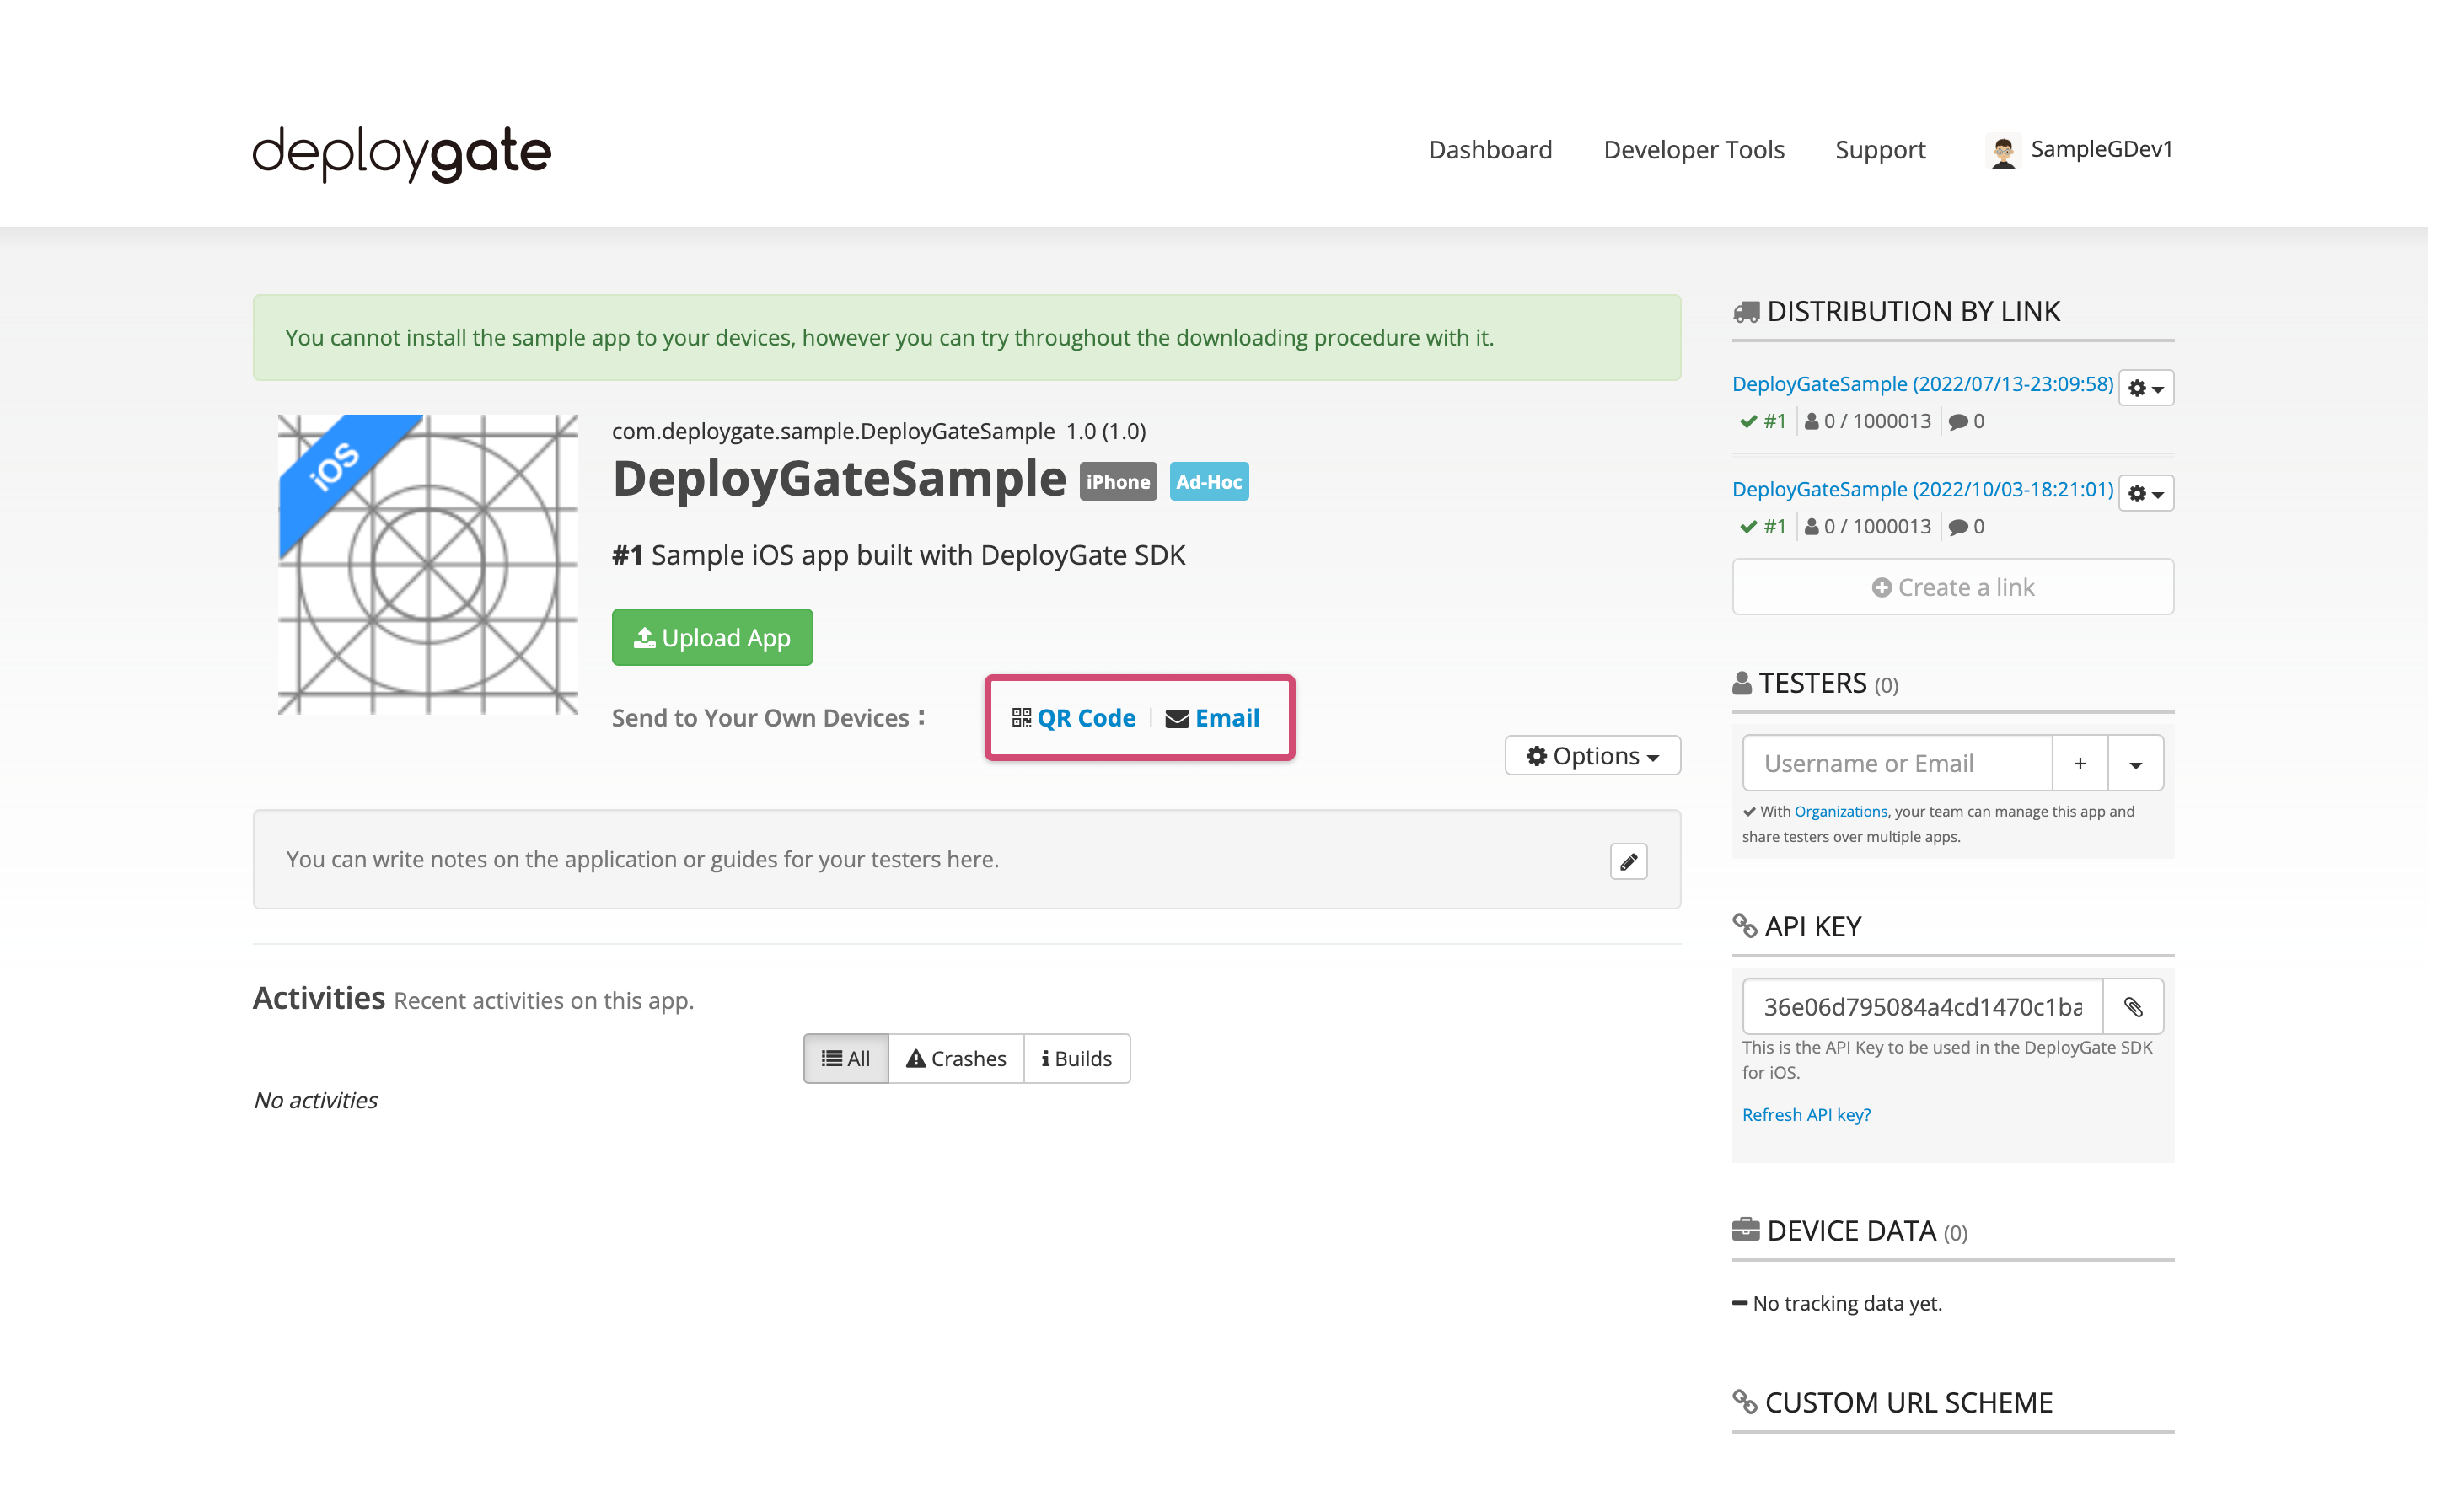
(2) Create a link using the “Distribution by Link” method, then access the link from a test device, and “Join Test.”
(3) Use the app’s “Distribution to Members” method and install DeployGate onto your device as an app’s member.
Display UDID List
After following the previous steps, selecting “UDID List” on the app details page will display the UDID List of all enrolled devices.

The UDID List will display the following.
- UDIDs registered in the Provisioning Profile
- UDIDs of devices owned by users invited to the app (including yours)
- UDIDs of devices that used the distribution page
Delete Registered UDID
1. If the UDID is registered in the Provisioning Profile
Delete the UDID from the Provisioning Profile.
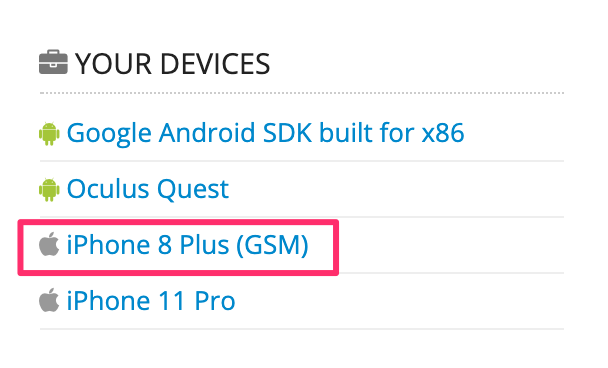
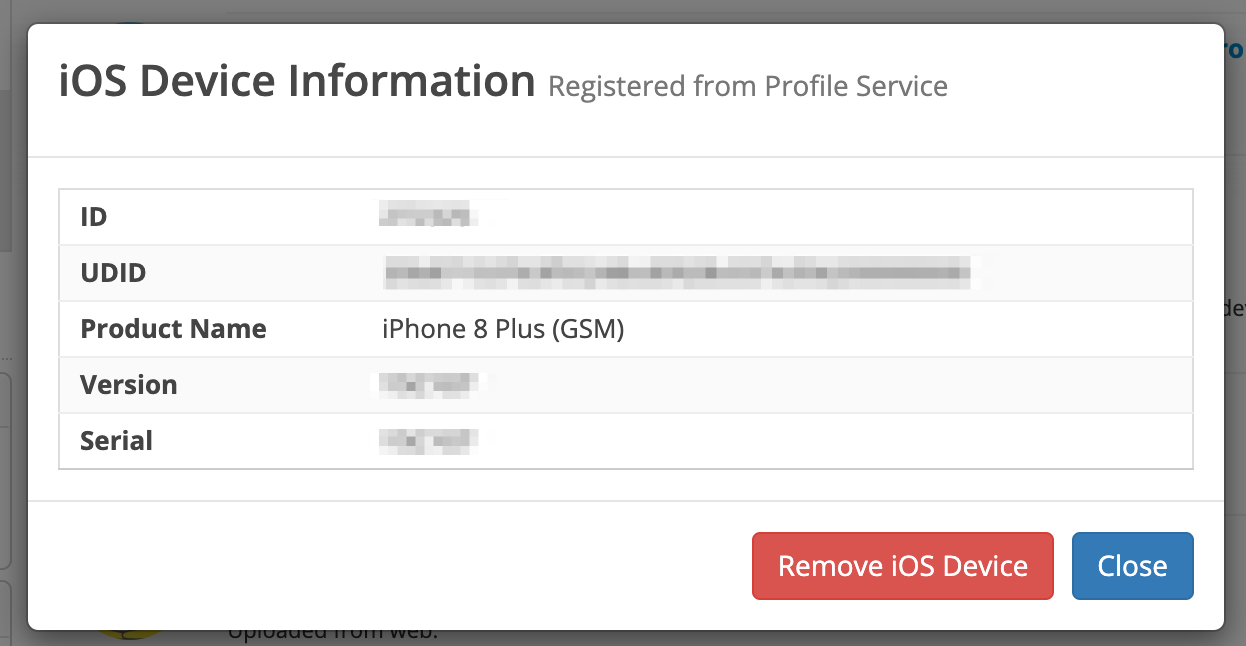
2. Deleting a UDID of a device linked to a user
Go to “Dashboard” > “Your Devices,” select the applicable device, and click on “Remove iOS Device.”
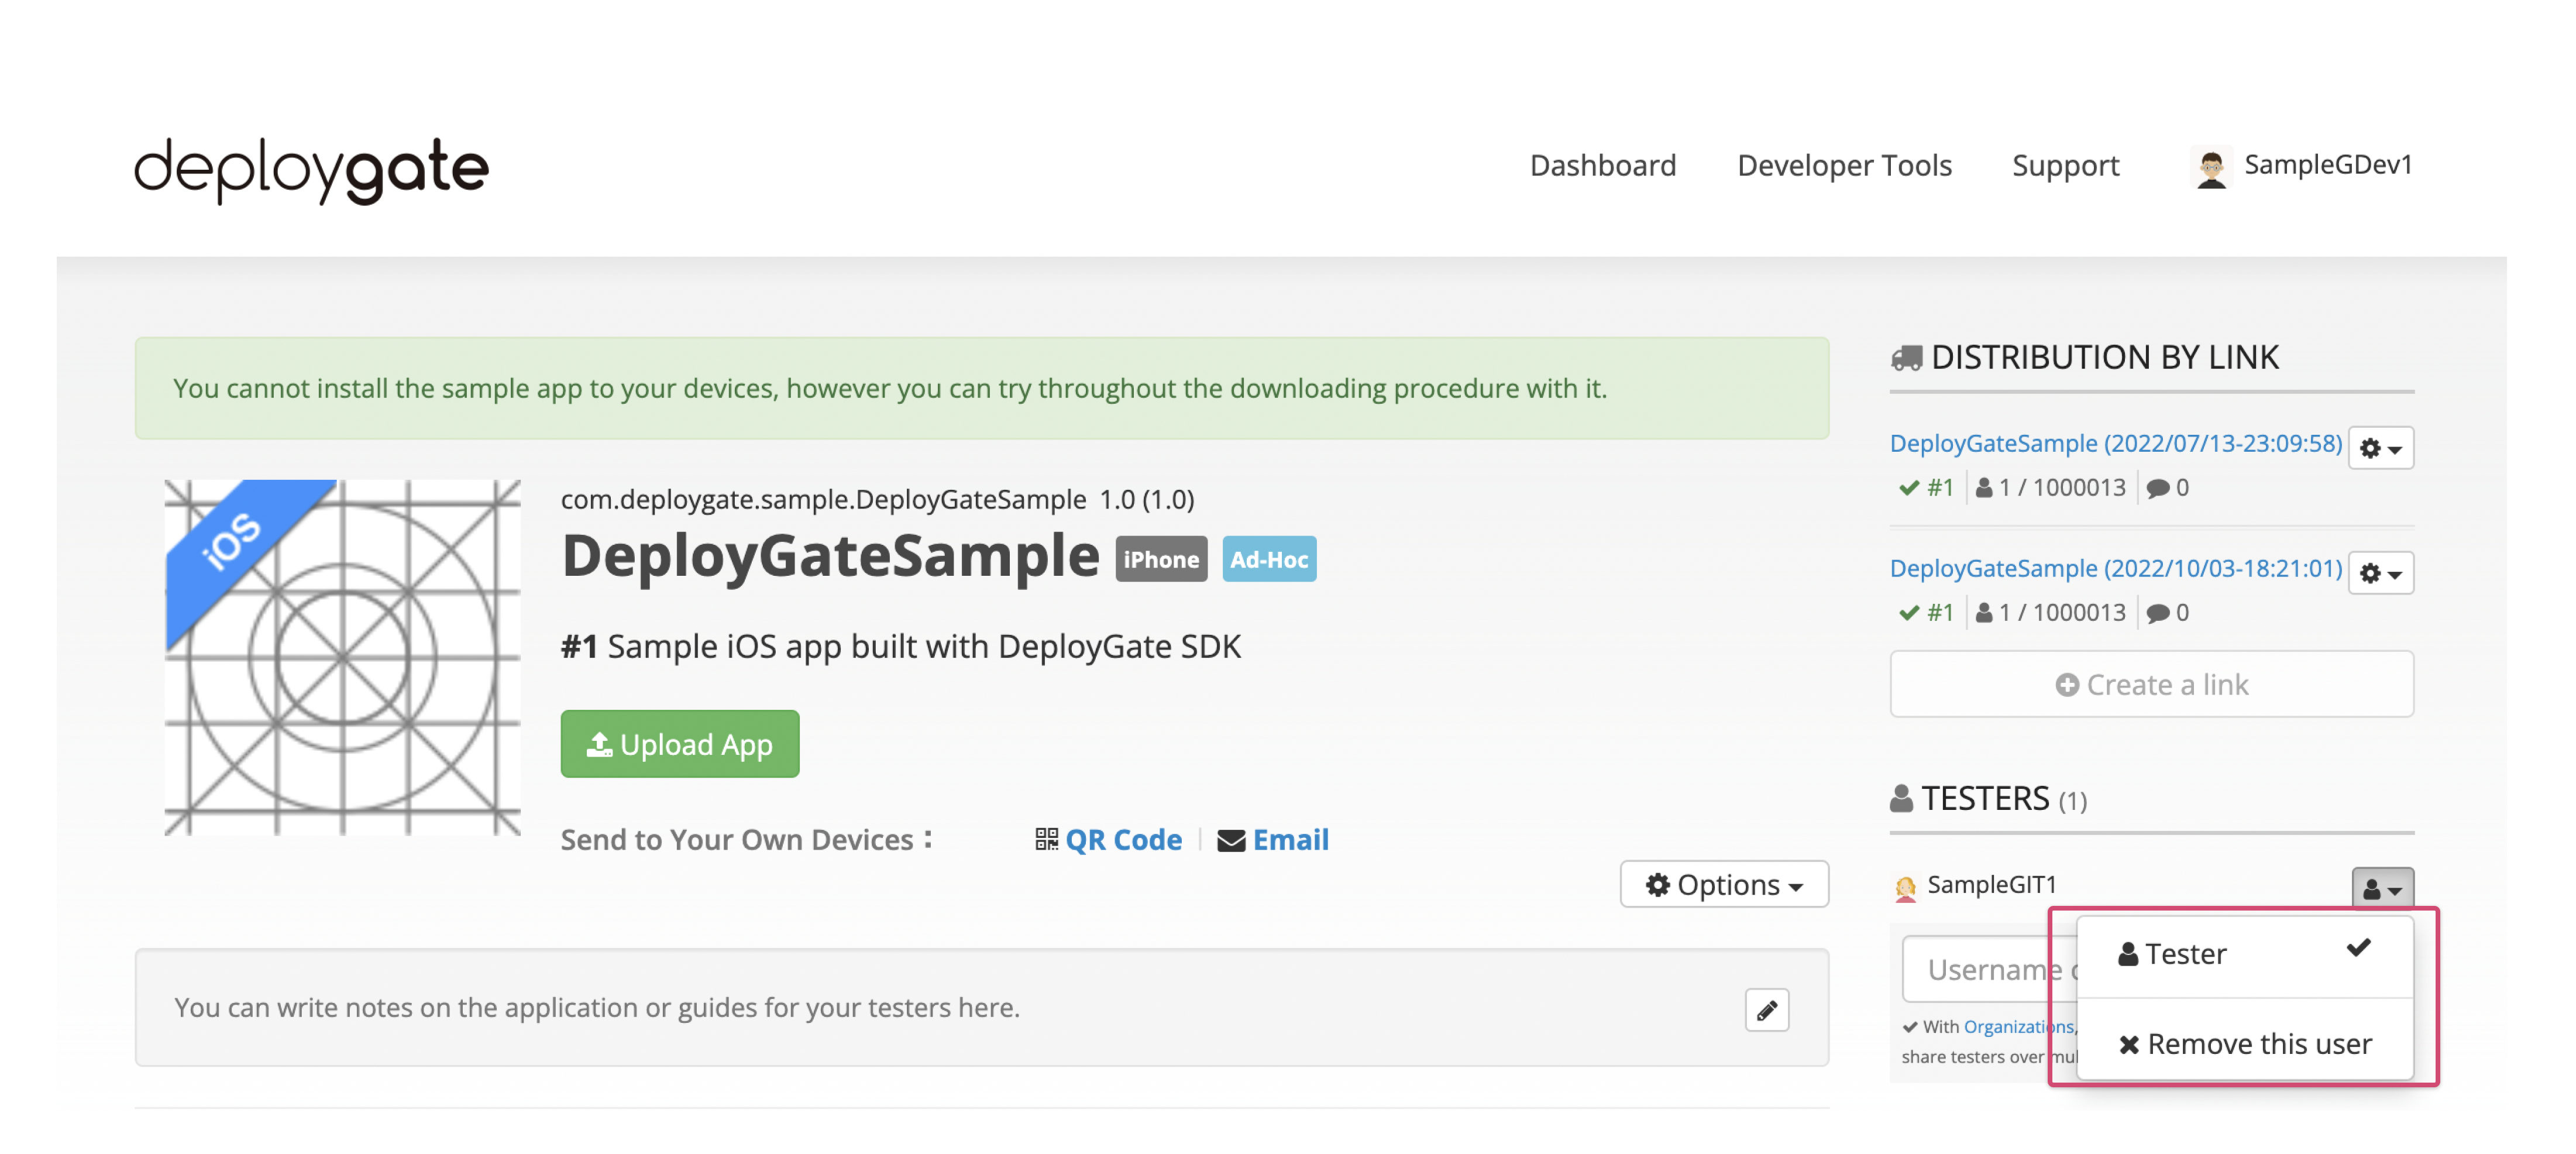
3. Deleting a UDID of a device linked to a test user
Go to the right side of the app details screen to the “Testers” section. Open the menu next to the applicable user and select “Remove this user.”
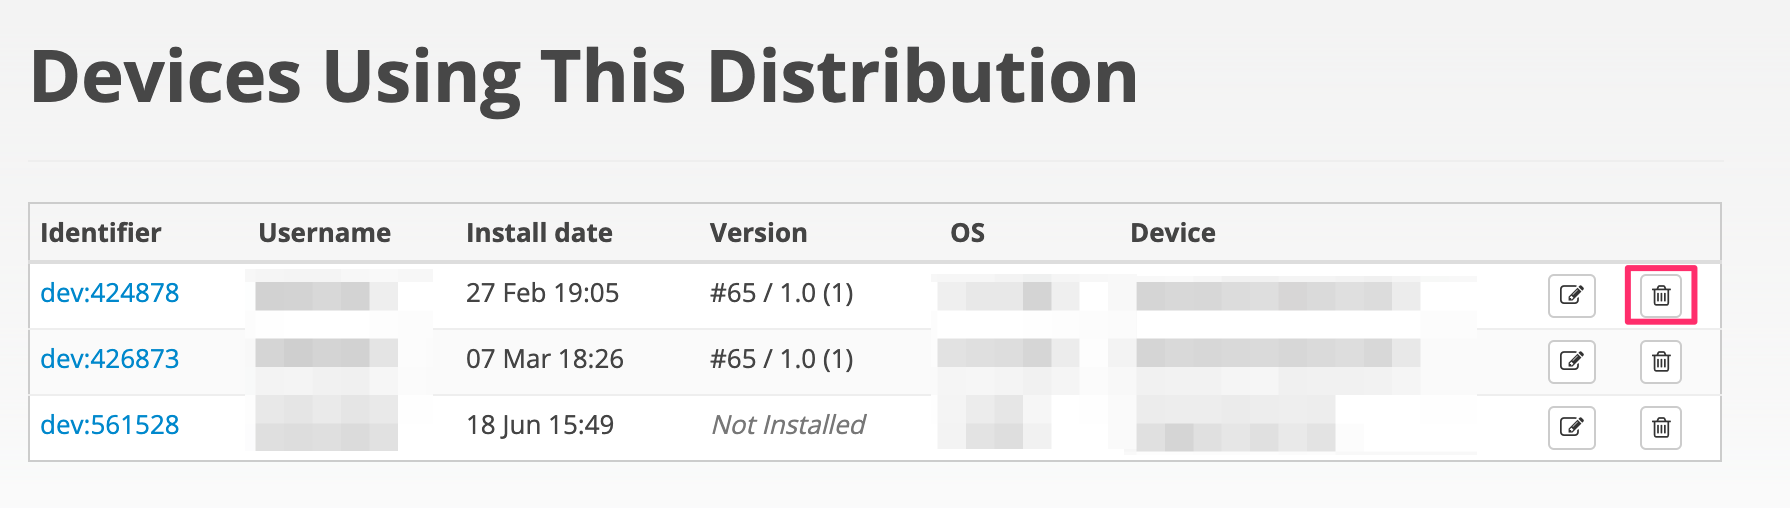
4. Deleting a UDID of a device using the distribution page
Go to the distribution page management screen’s “Devices Using This Distribution.” Locate the applicable device and select the trash icon to delete.