Saving and Sharing Captures (Screenshots)
This guide explains how to use the Capture (Screenshot) feature on Android devices.
For instructions on how to create an account, please refer to this page.
Update the DeployGate Client App to the Latest Version
Please update the DeployGate client app to the latest version from the Google Play Store.
For instructions on how to install the client app, please refer to this page.
Using the Screenshot Feature in the DeployGate Client App
1. Check Whether the Feature Is Available for the App
If the caption saying "Capture feature is available on this device" is displayed on the app details screen, you can use the Capture (Screenshot) feature. Follow the steps below to check availability.
-
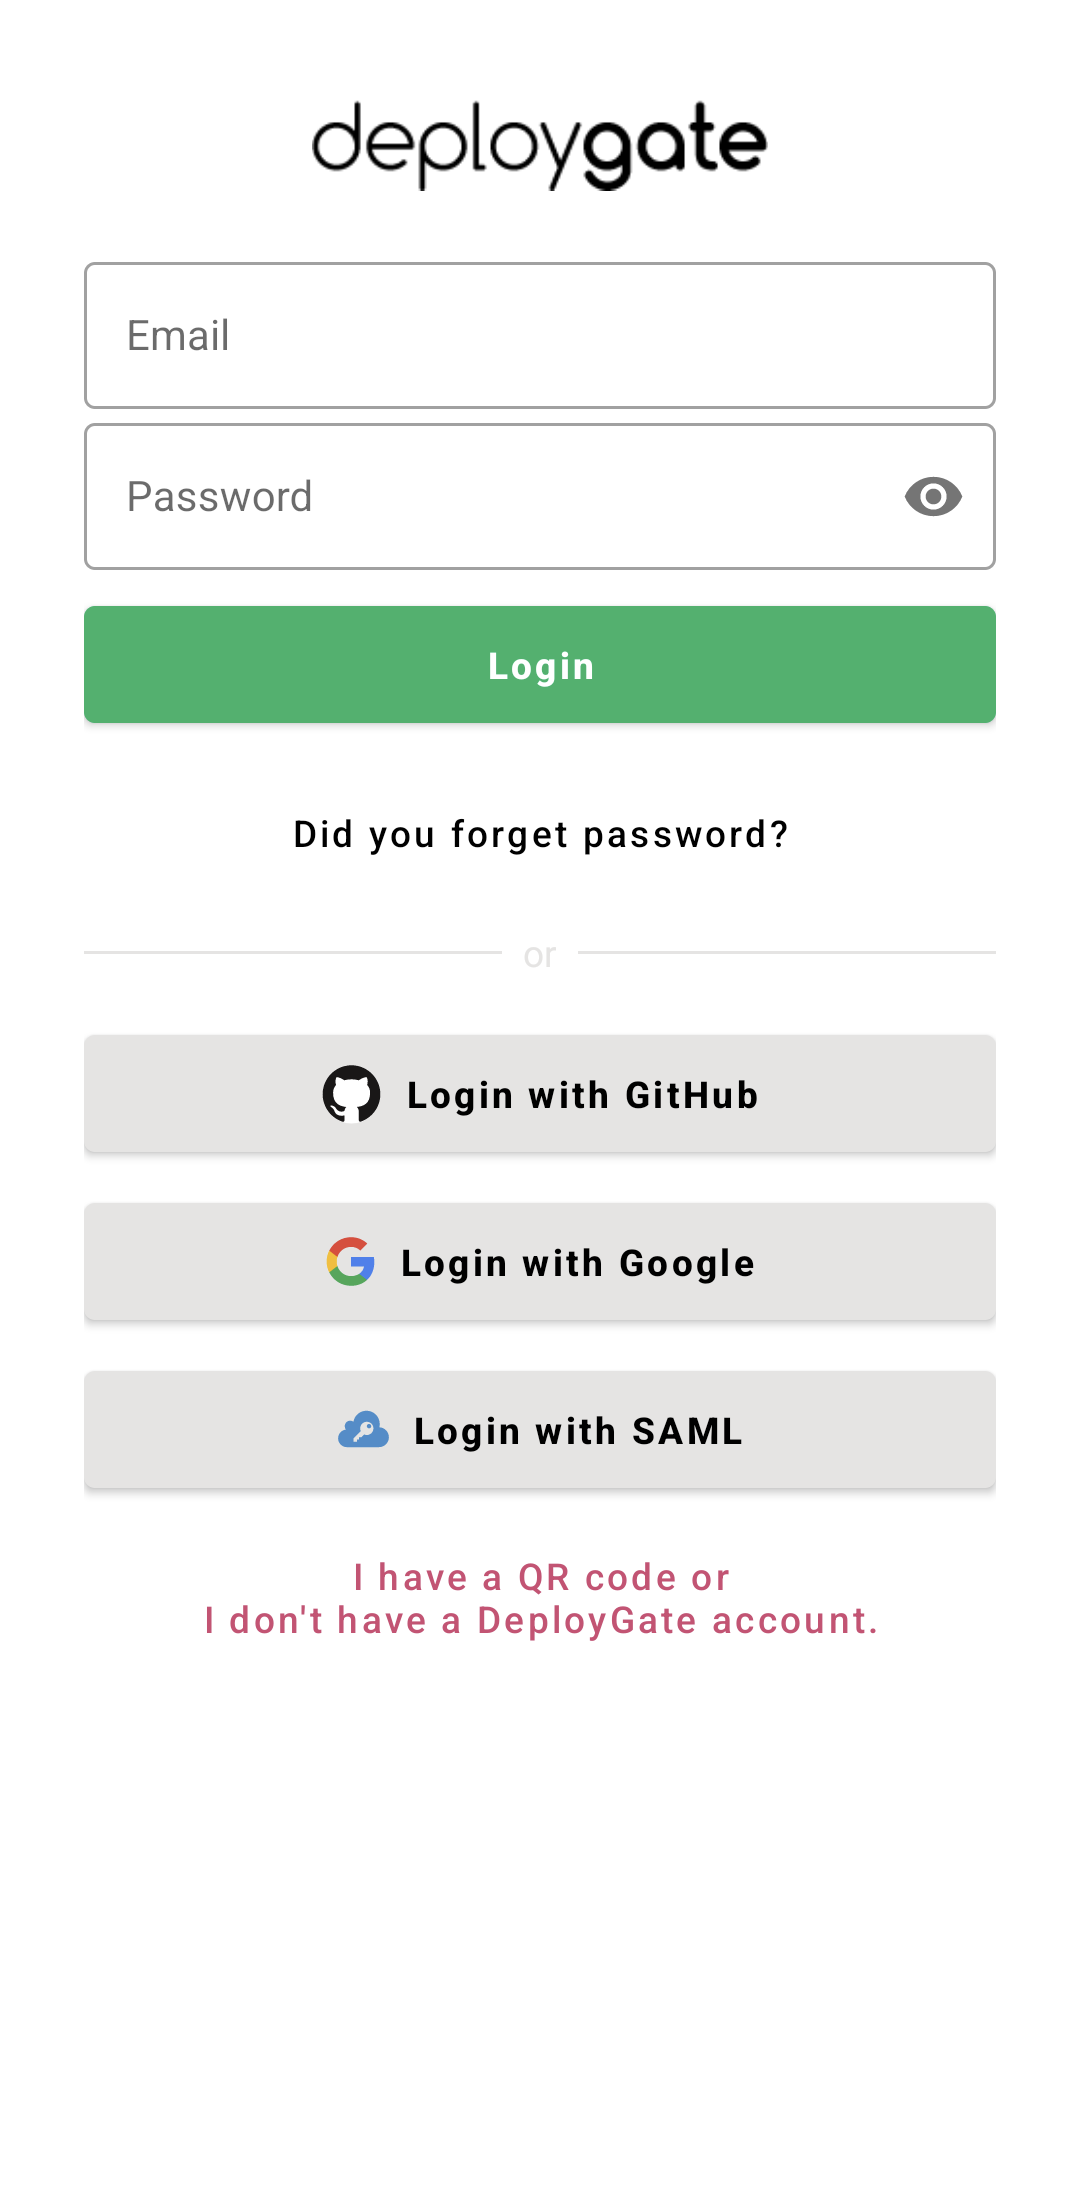
Open the DeployGate client app and log in with your DeployGate user account.
-
Open the details screen of the app specified by the developer and confirm that
Capture feature is available on this revisionis displayed.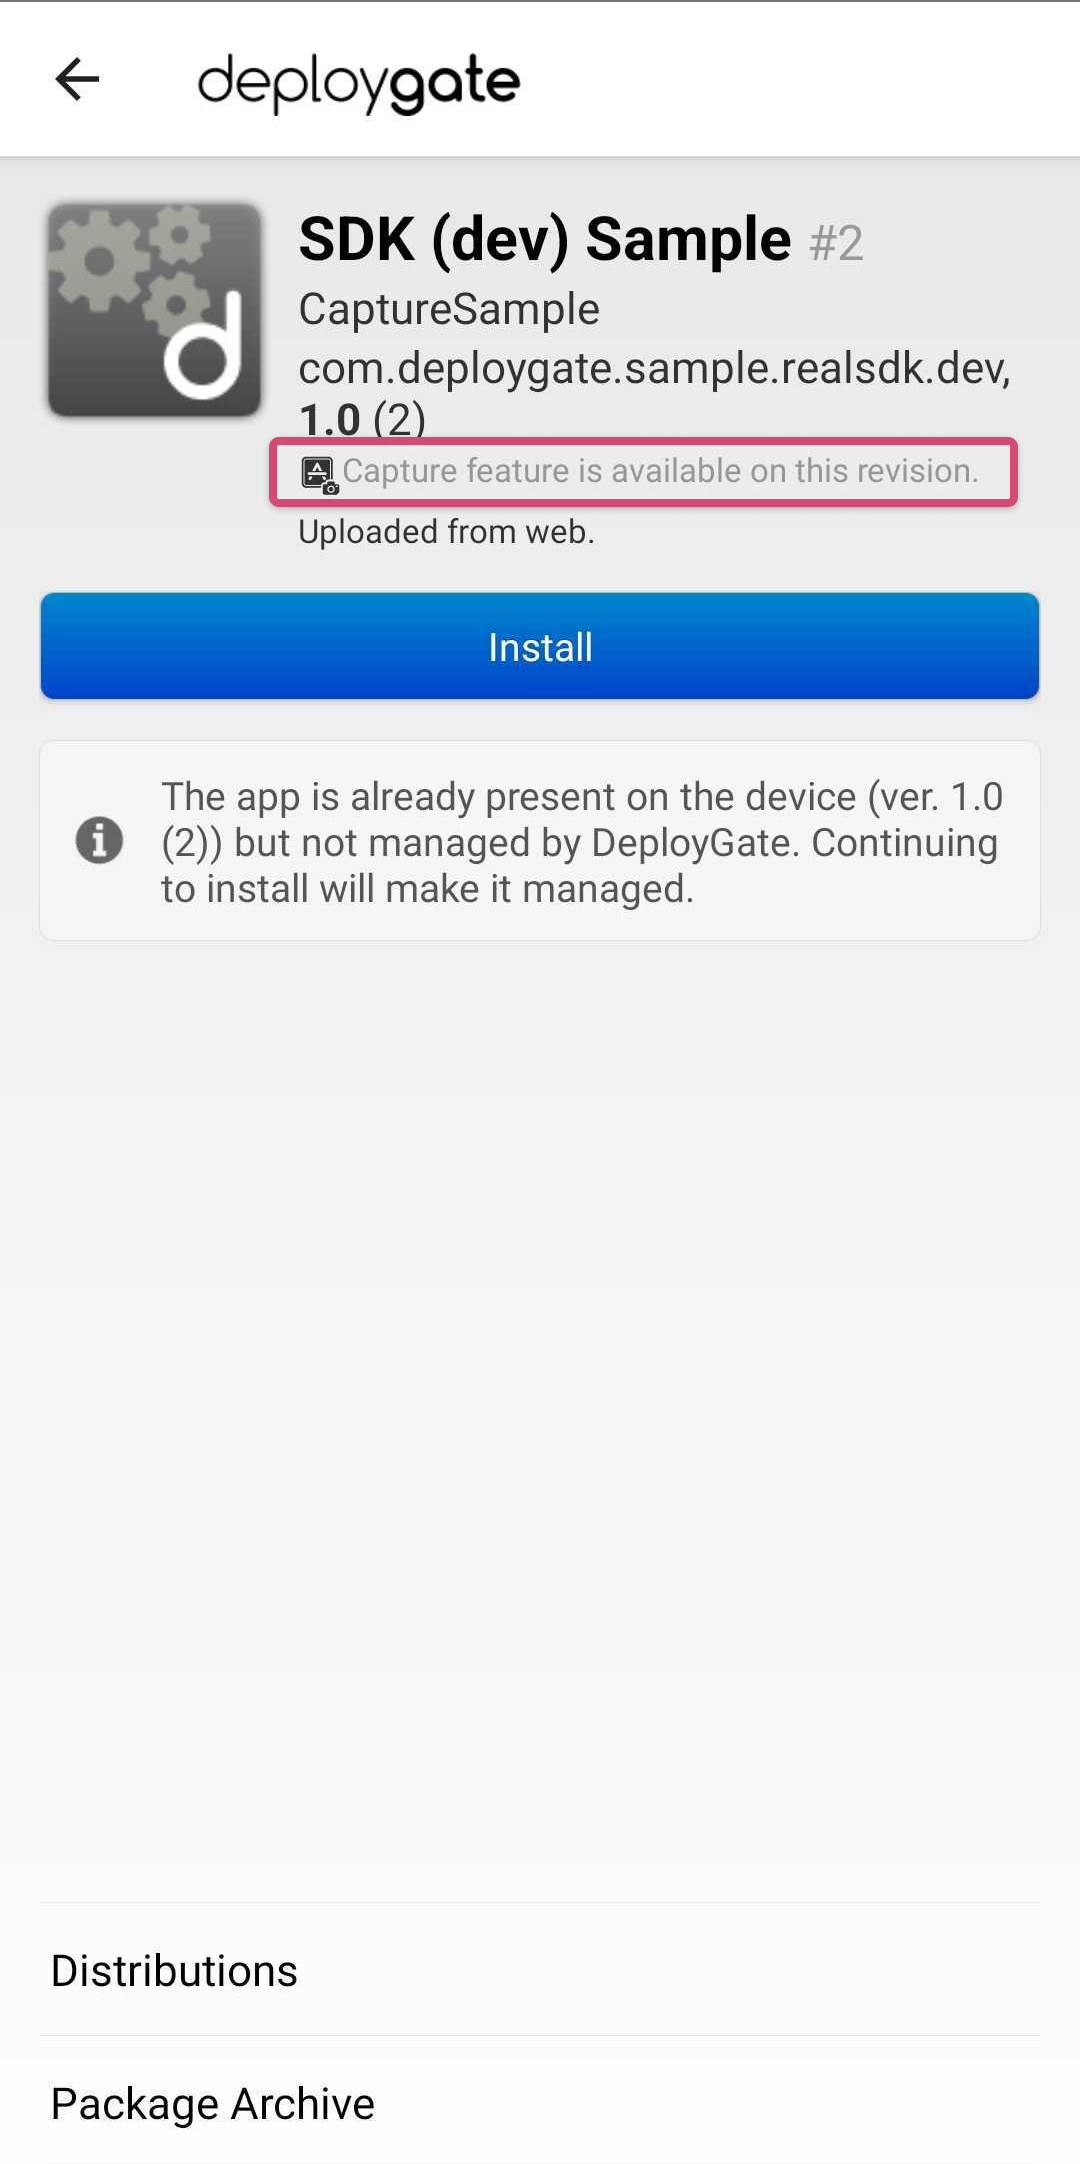
- Make sure you are logged in with your DeployGate user account (please check the invitation email from DeployGate).
- Make sure the DeployGate client app is updated to the latest version.
- Make sure the version of the app you are trying to install matches the version specified by the developer.
If you have confirmed all of the above but the feature is still unavailable, the developer will need to check the settings on their end.
Please contact the developer or the organization that distributed the app.
2. Configure Permissions by Following the Guide
-
Install the target app.
For instructions on how to install the app, please refer to this page. -
Once installation is complete, a dialog explaining the Capture feature will appear. Tap
VIEW DETAILSand follow the guide to configure the necessary permissions and settings.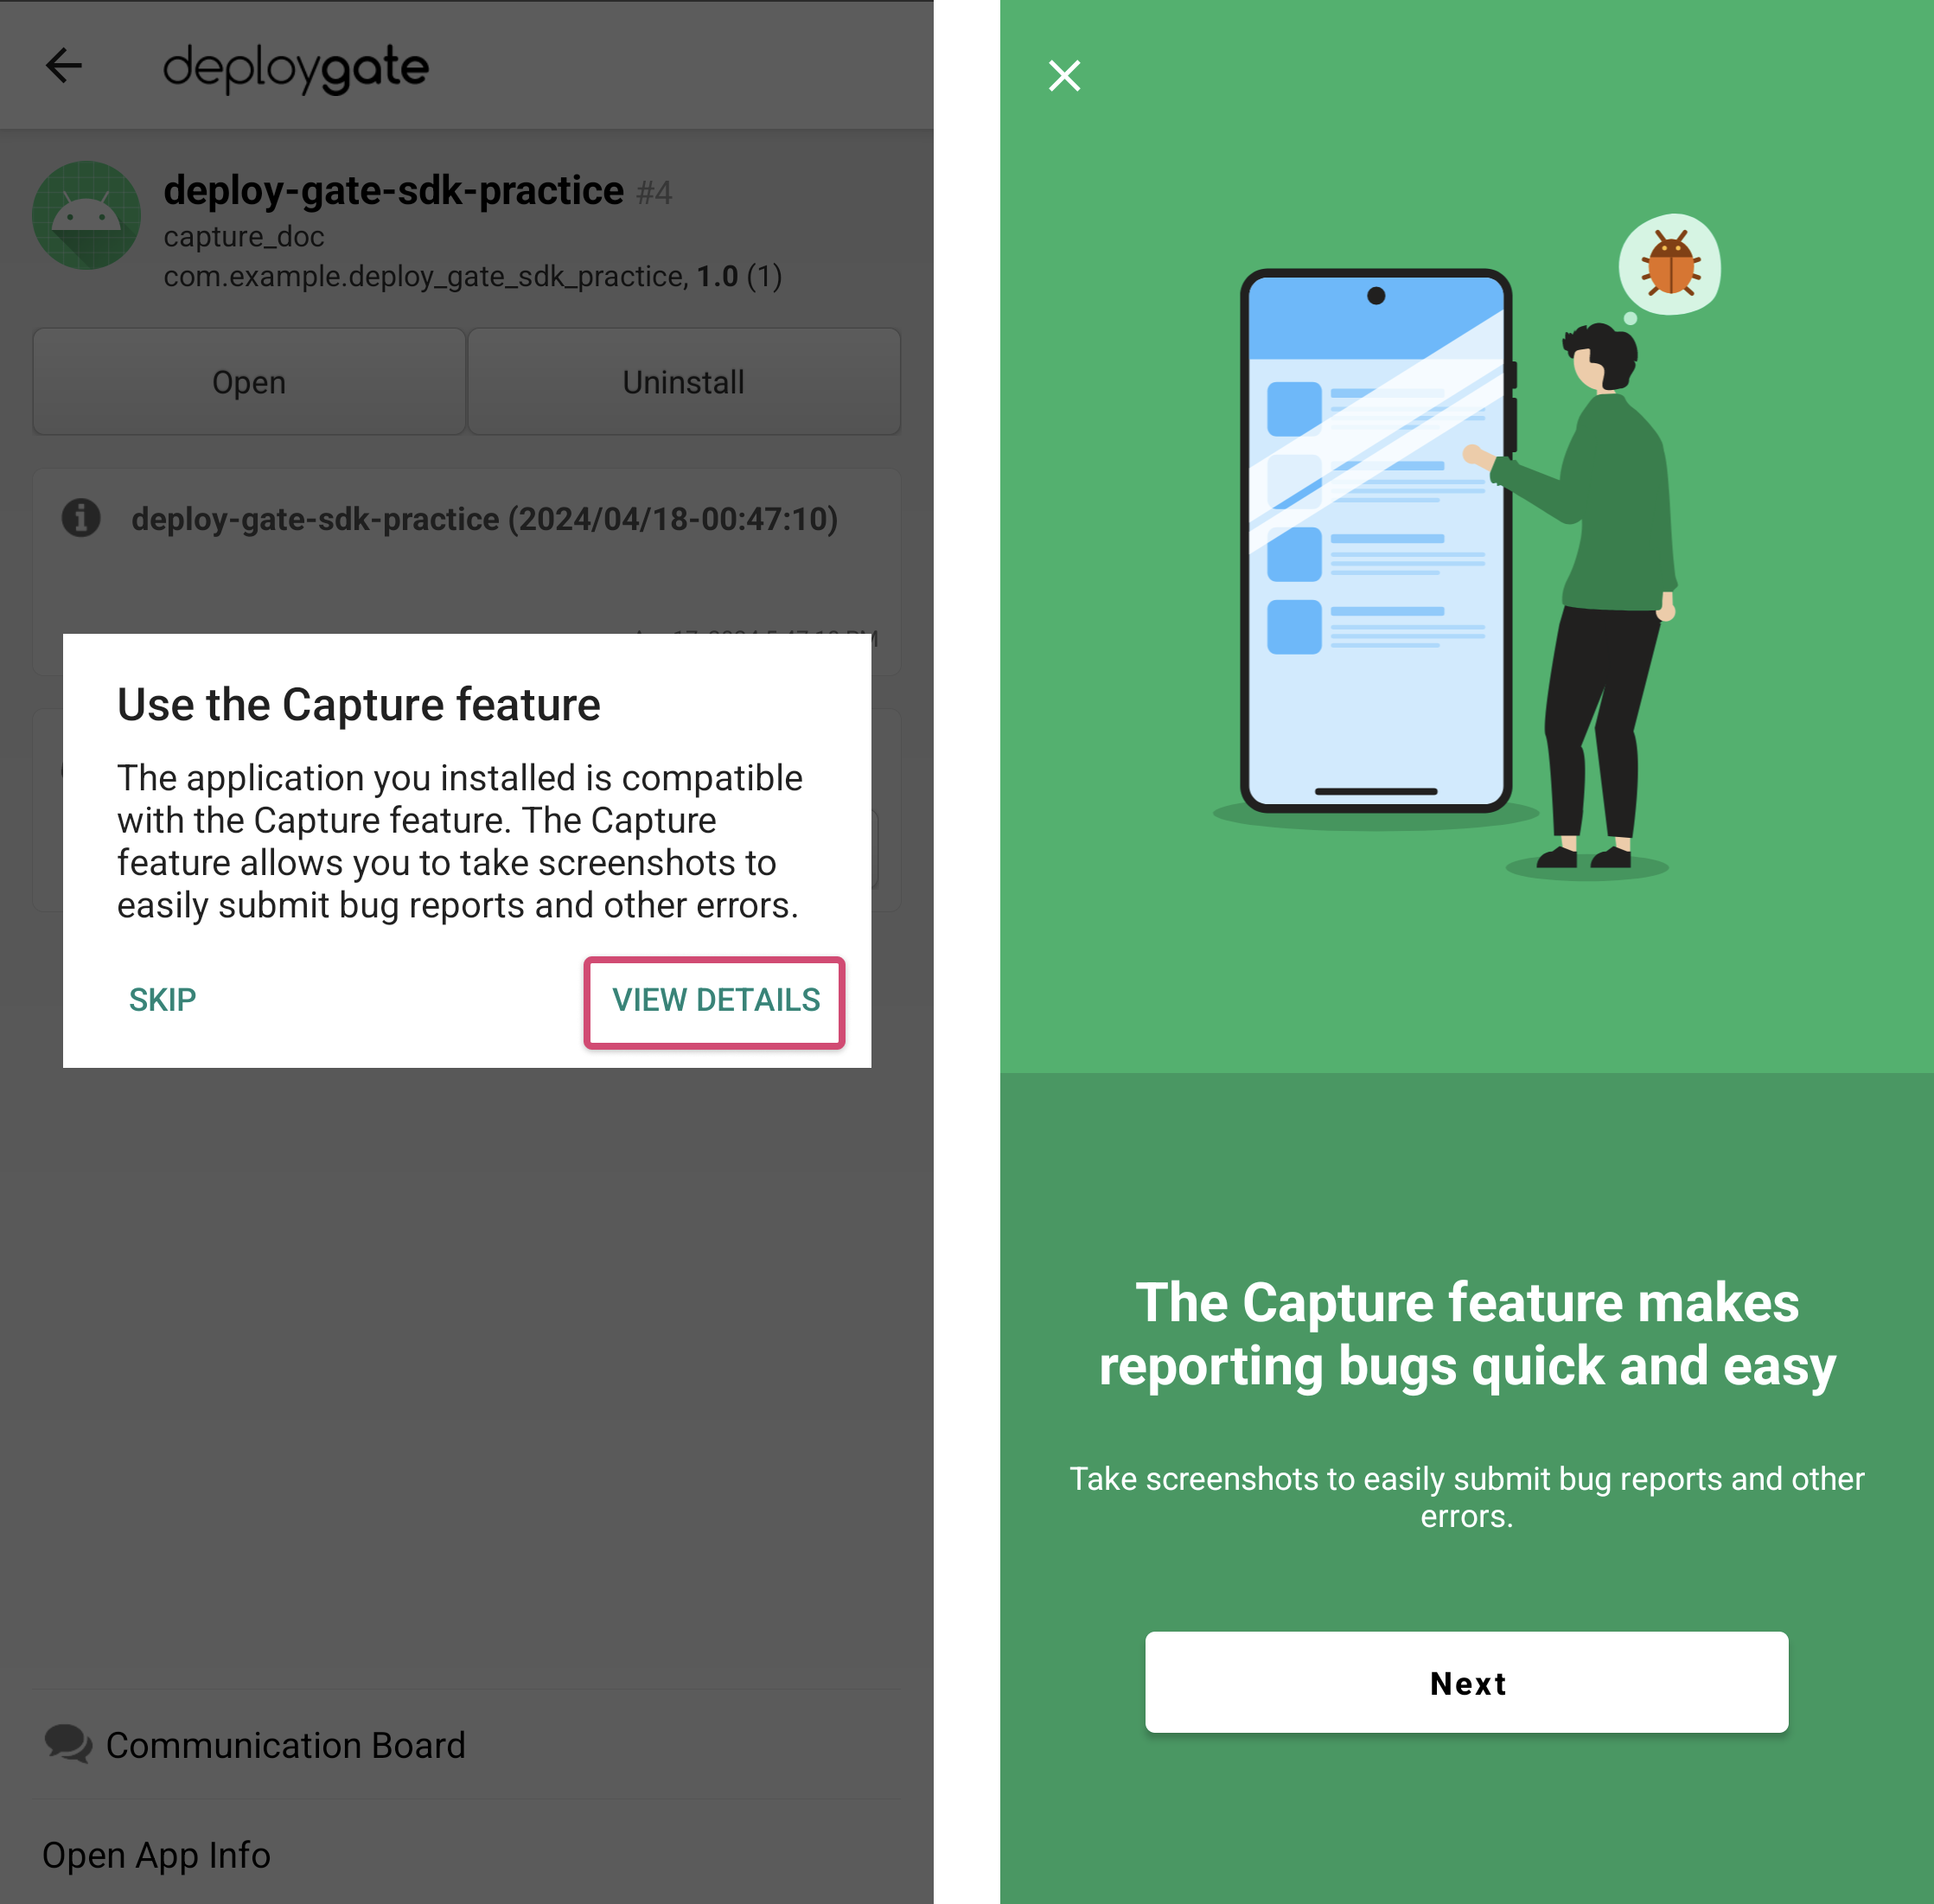
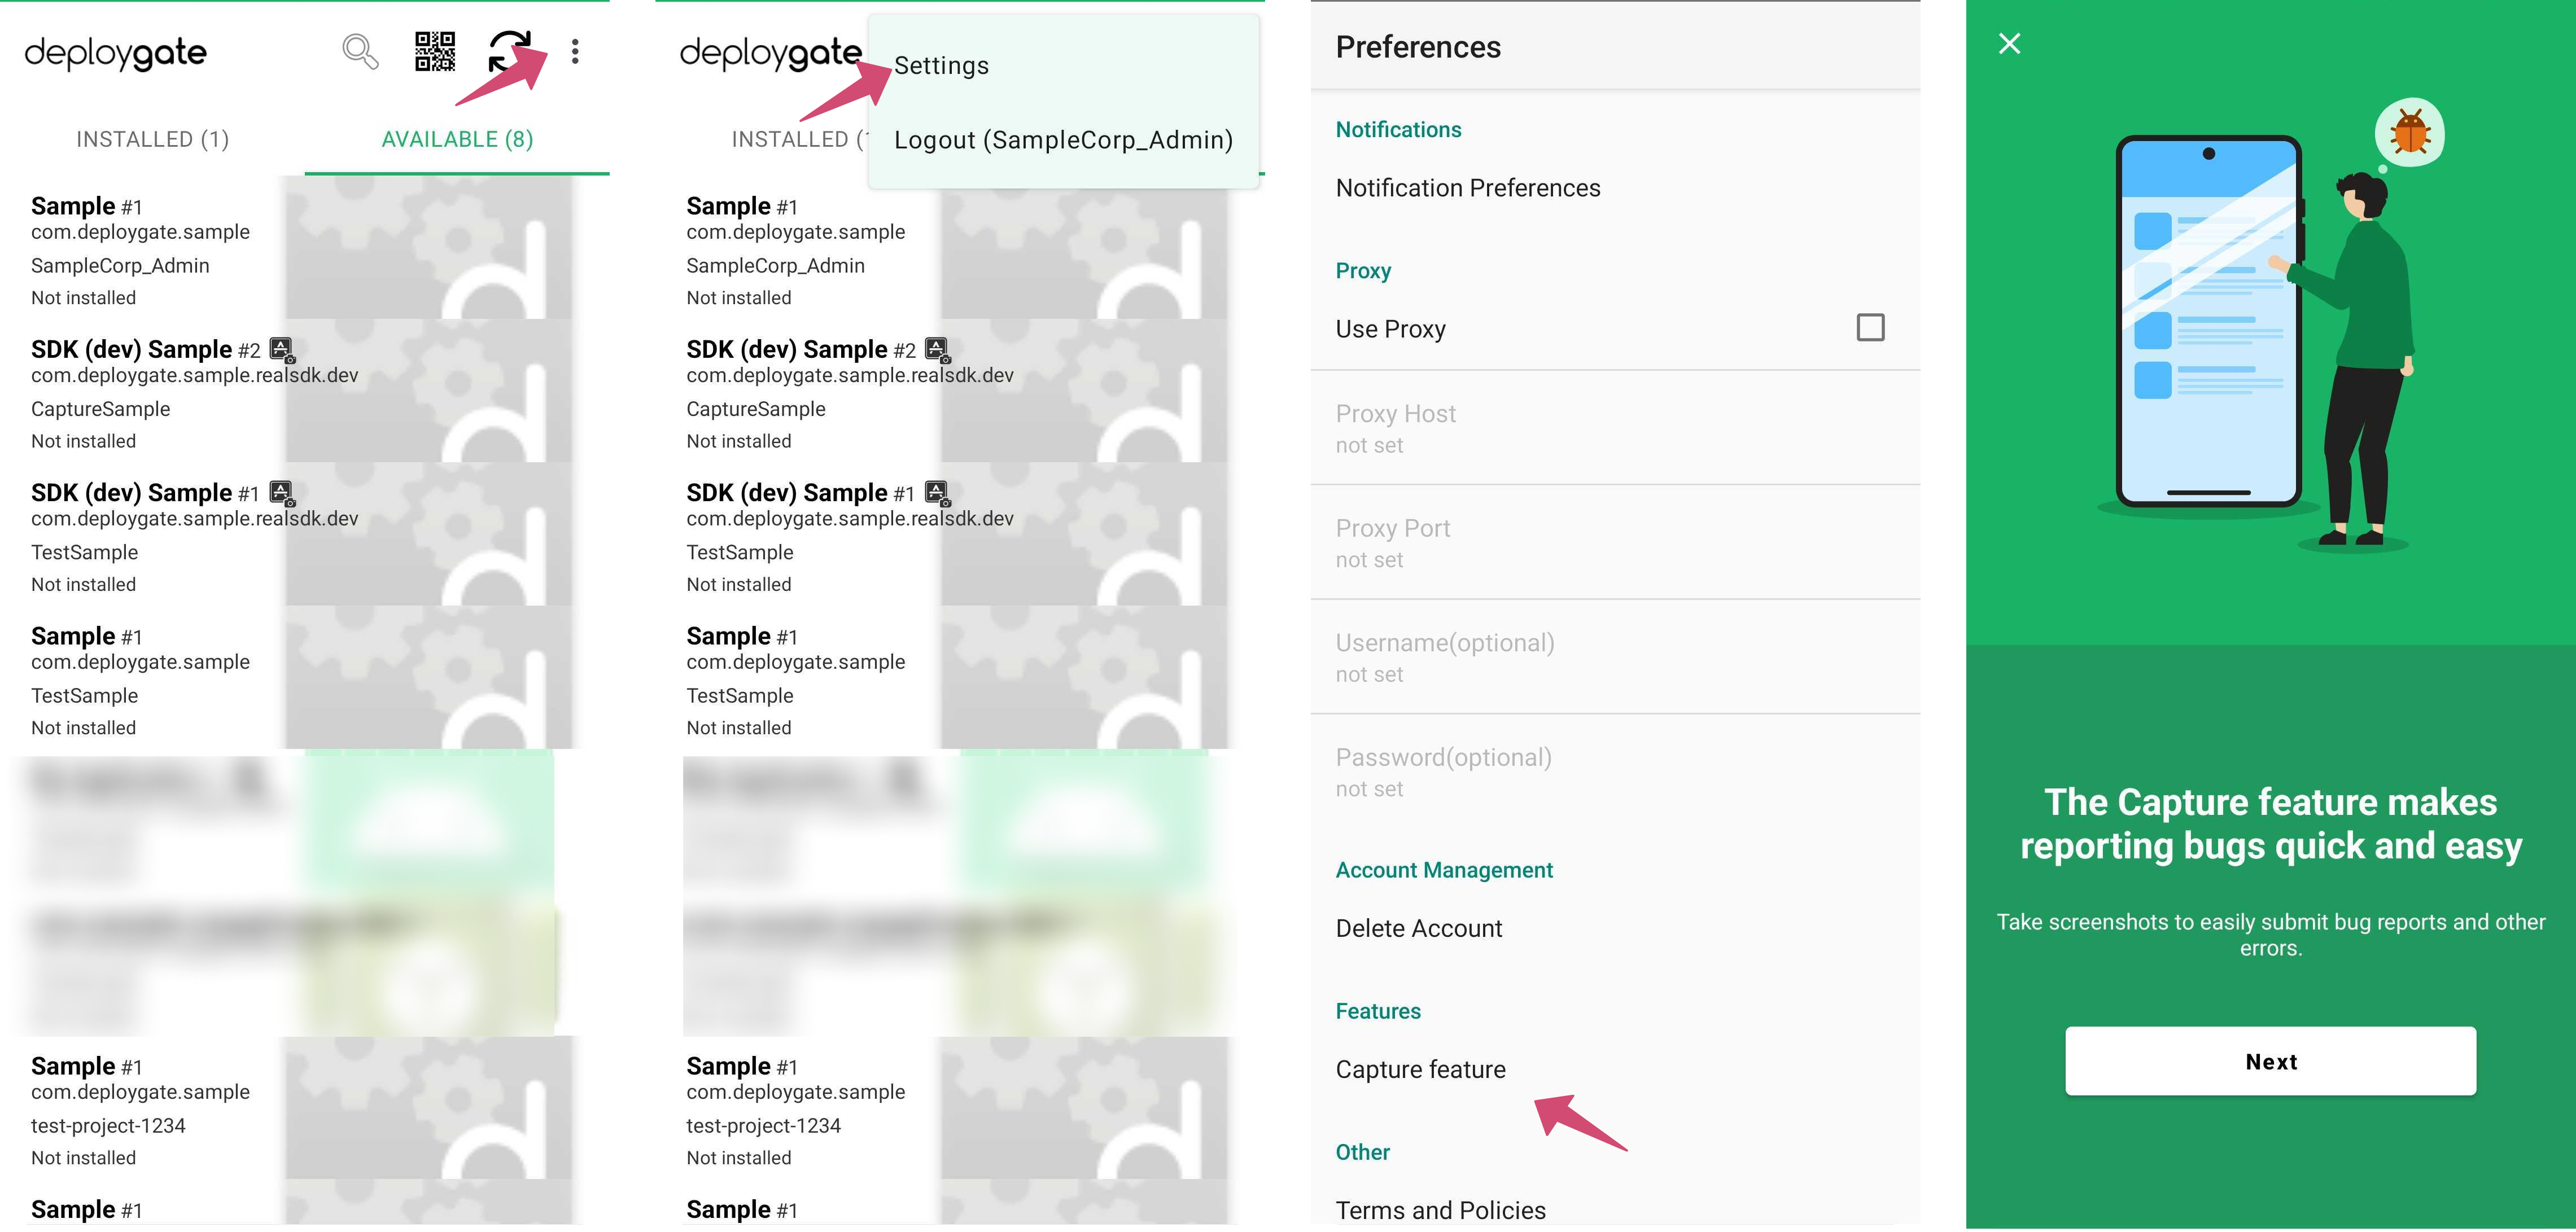
If you tapped SKIP and did not proceed to the guide, you can configure the settings using the vertical three-dot menu (︙) in the upper-right corner of the app list screen.
Select Settings, then tap Capture Feature to open the permission settings screen. Follow the guide to complete the setup.
3. Save Screenshots
-
Launch the target app and take a screenshot of the app screen.
-
A notification saying
Tap to Save Capturewill appear. Tap the notification.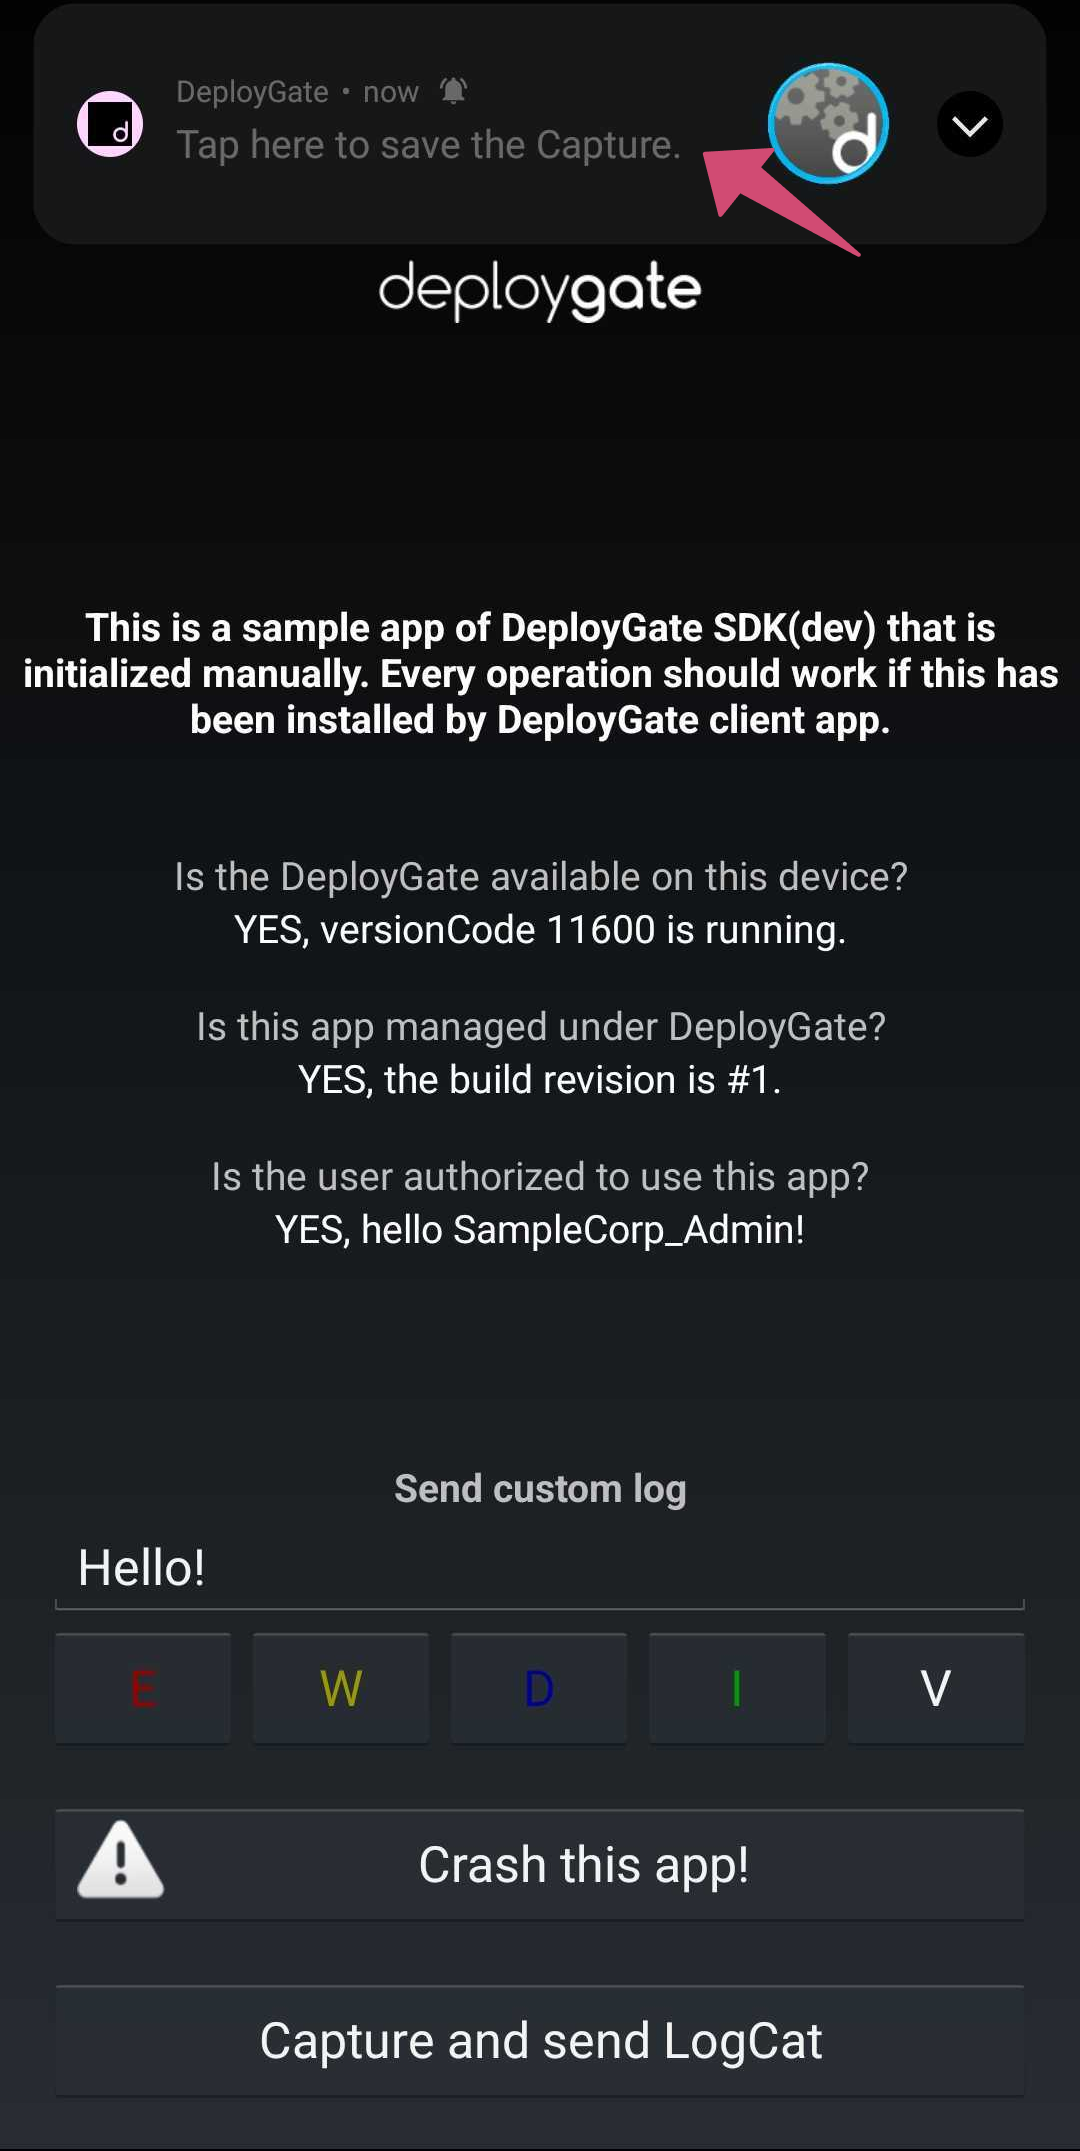
-
On the next screen, you can review the captured screenshot and its information before saving it. Enter a comment in the memo field if needed.
- Tap the icon displayed to the right of the screenshot to replace it with another image saved on your device.
- You can use your device's built-in image editing tools to annotate or mark up the screenshot.
- You can add comments in the memo field.
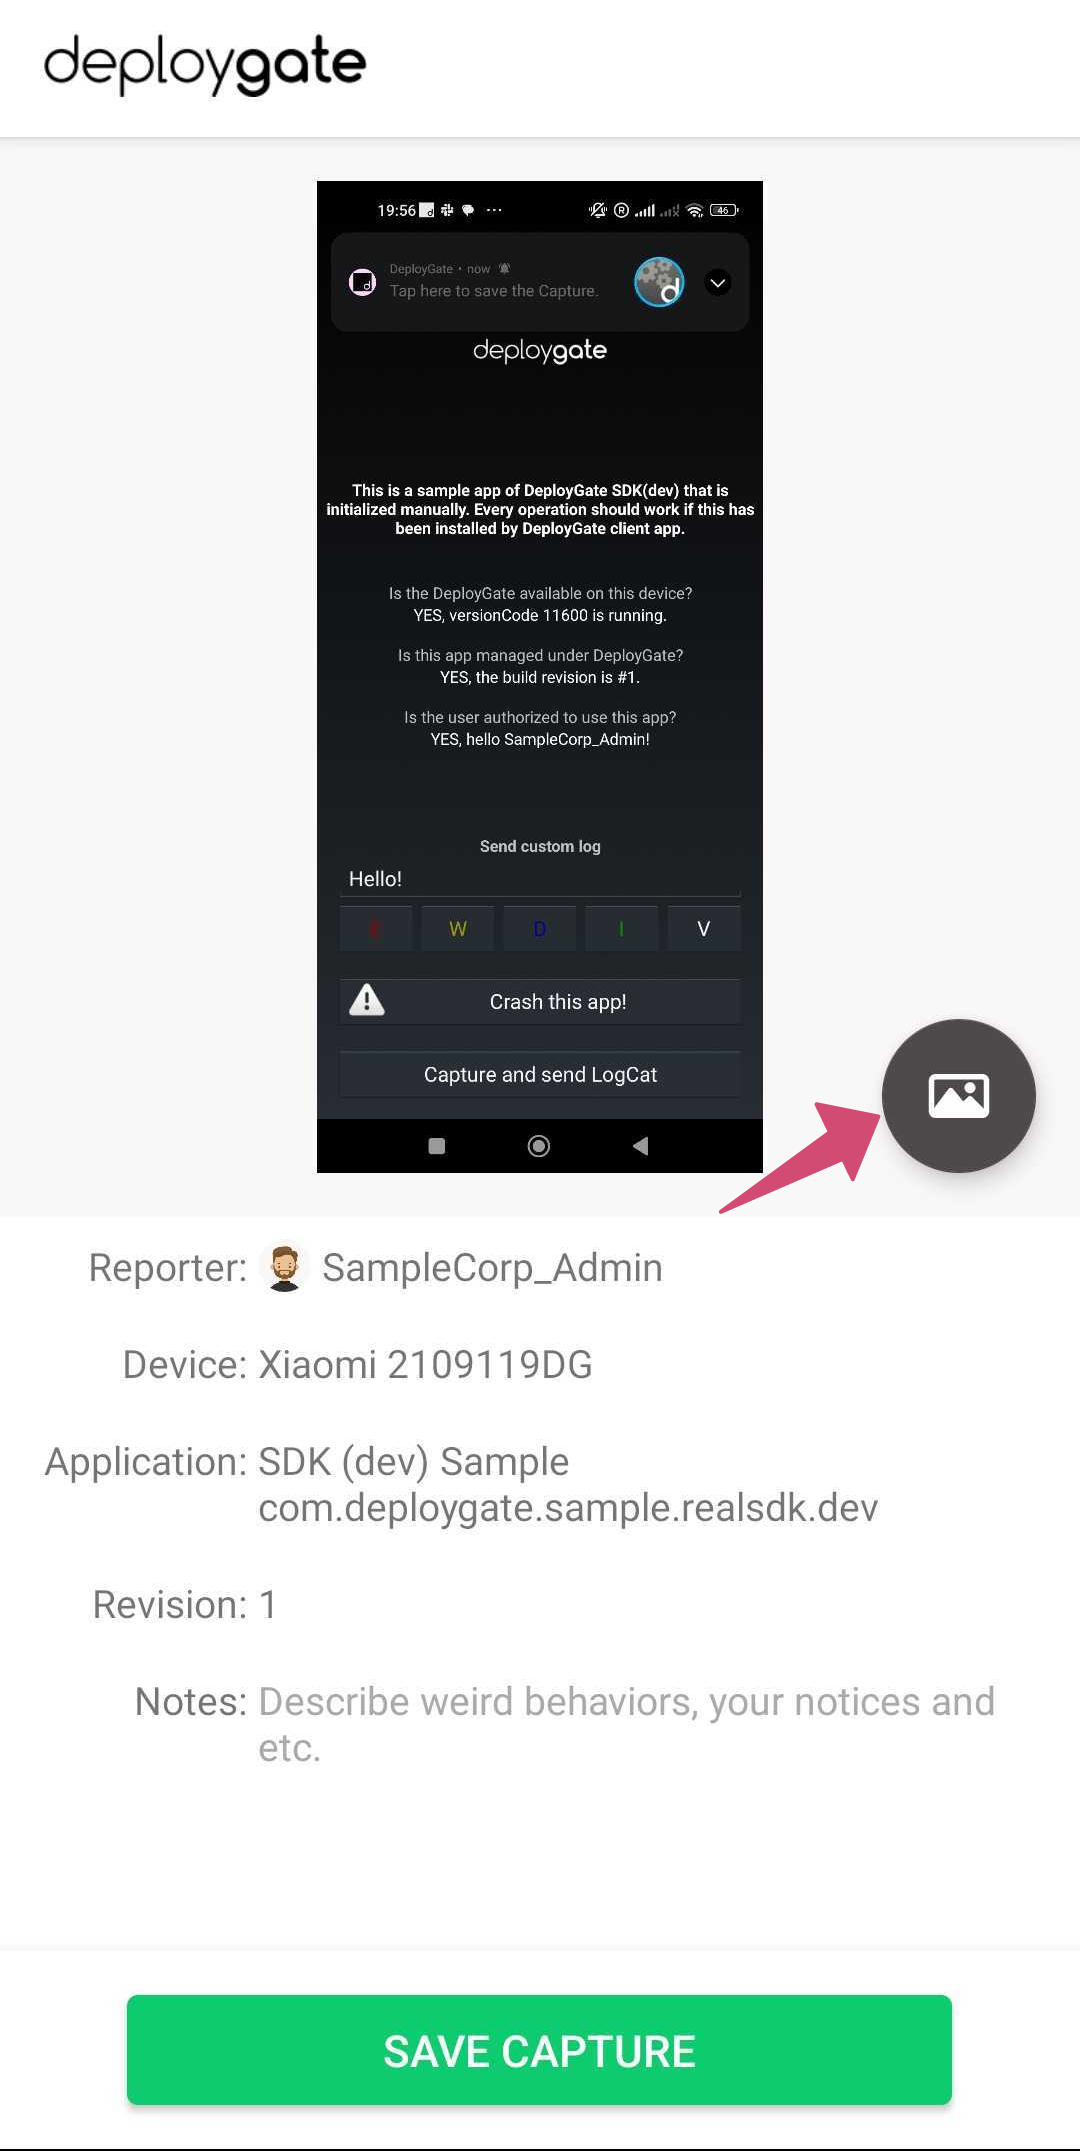
- Once you have finished editing, tap the
SAVE CAPTUREbutton.
4. Share a Screenshot from Your Device
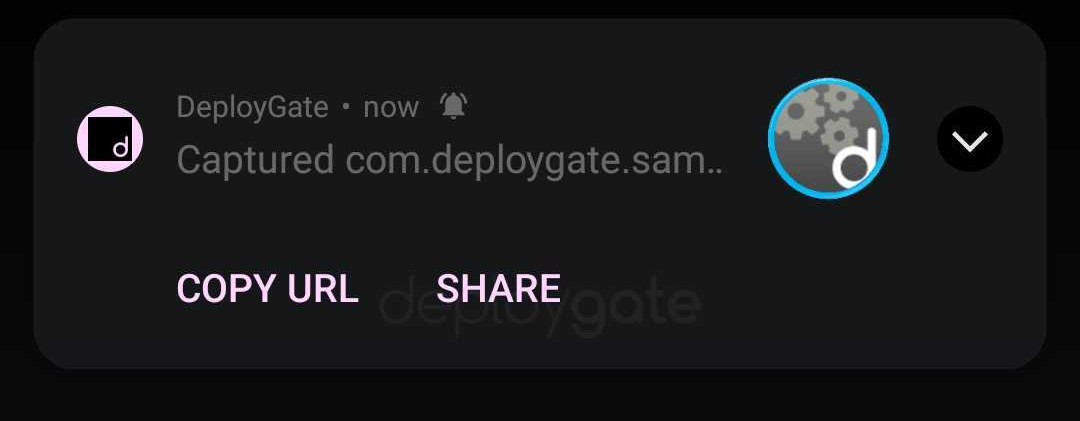
After you tap SAVE CAPTURE, a push notification will be sent.
You can provide feedback to the developer by selecting COPY URL or SHARE and sharing the capture through internal communication tools such as Slack.
This completes the instructions for using the Screenshot feature on an Android device.
Checking Saved Screenshots
For instructions on how to view saved screenshots, please refer to this page.